Table of Contents
You can change the language of a supported iPhone app without changing the iPhone's main language. Add the language to the device, then select it in that app's Settings page. The Language option appears only when the app provides more than one localization.
Add the language to your iPhone
- Open Settings > General > Language & Region.
- Select Add Language.
- Choose the language you want the app to use.
- When iOS asks which language should be primary, keep the current primary language if you do not want the rest of the iPhone interface to change.
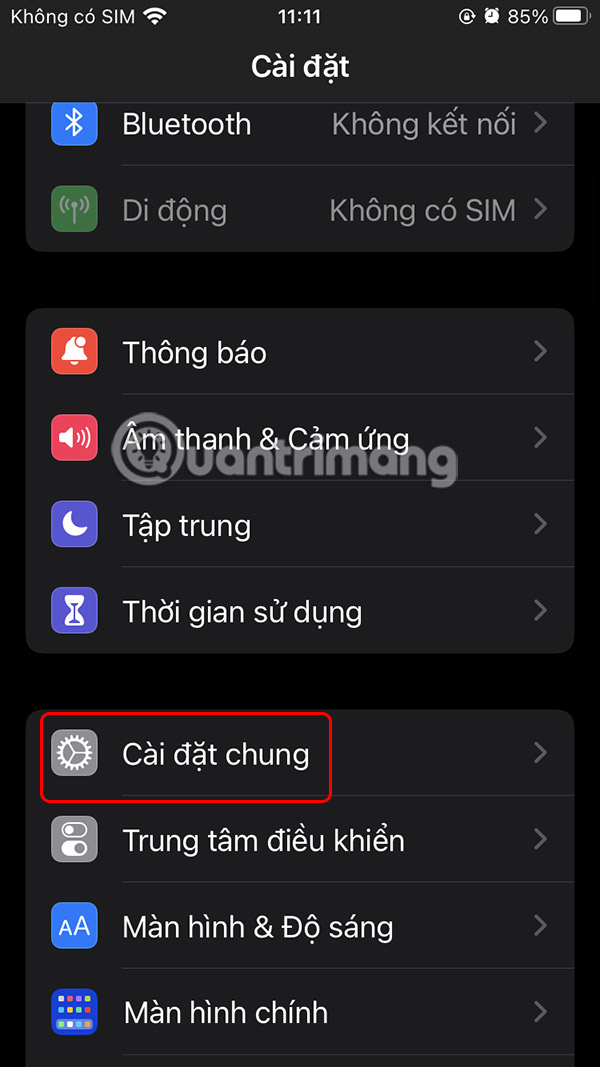
Open General in the Settings app.
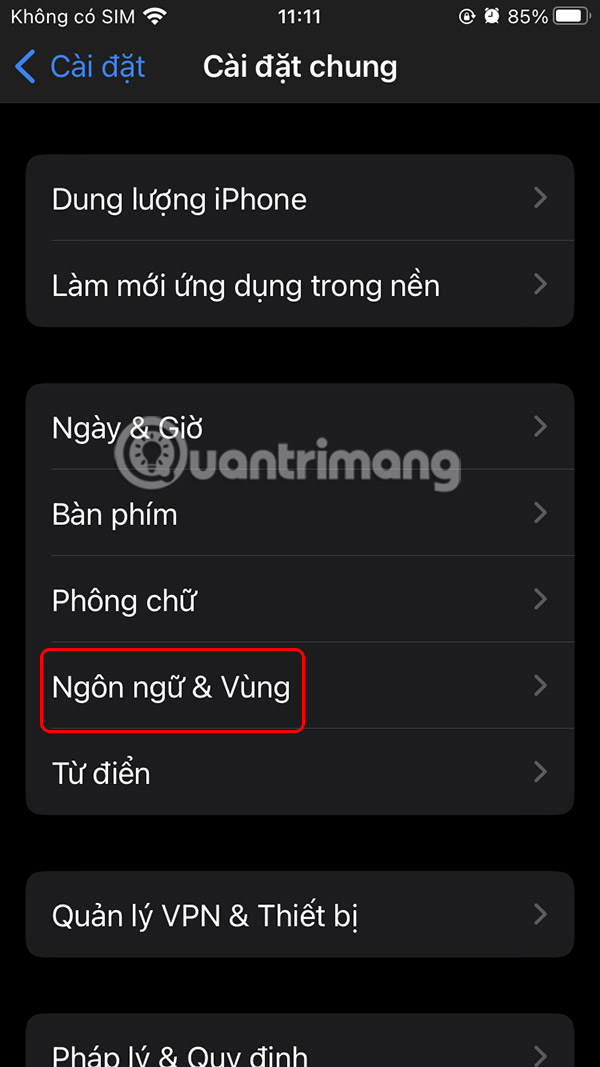
Select Language & Region.
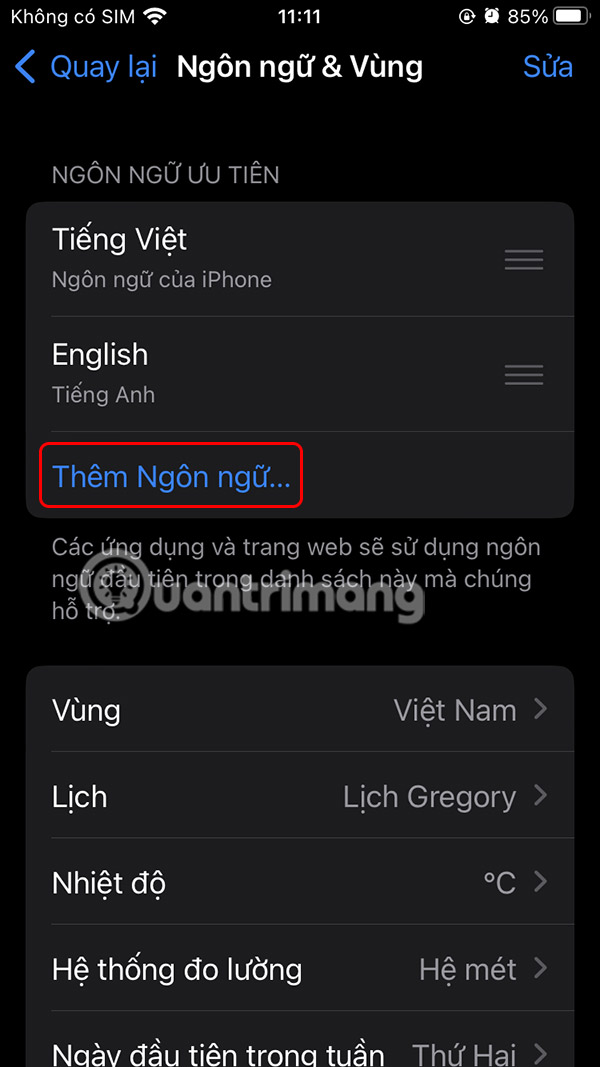
Add the language you want to make available to supported apps.
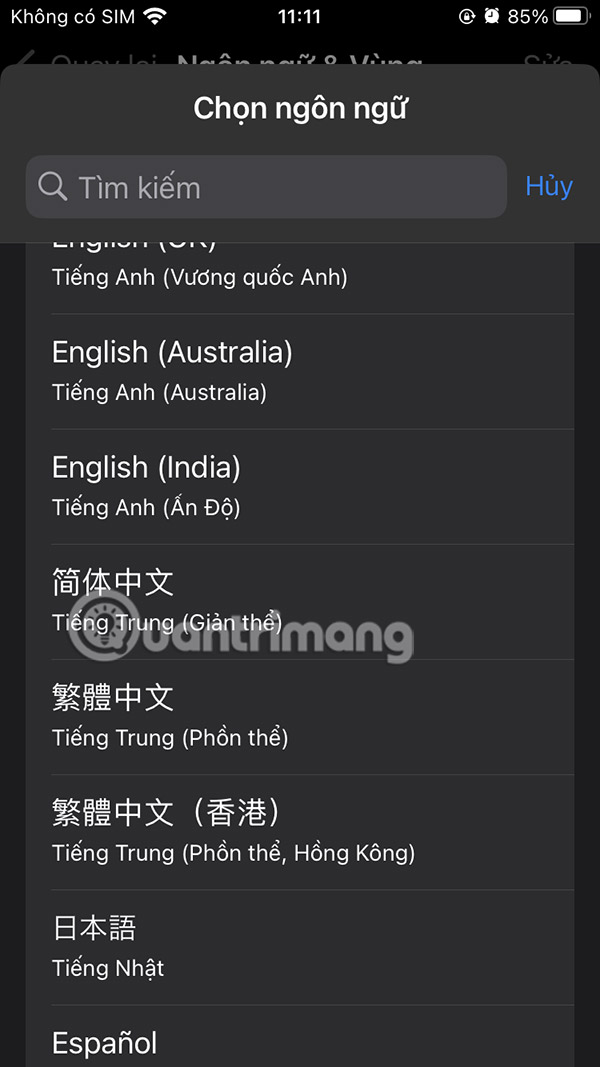
Choose a language from the list.
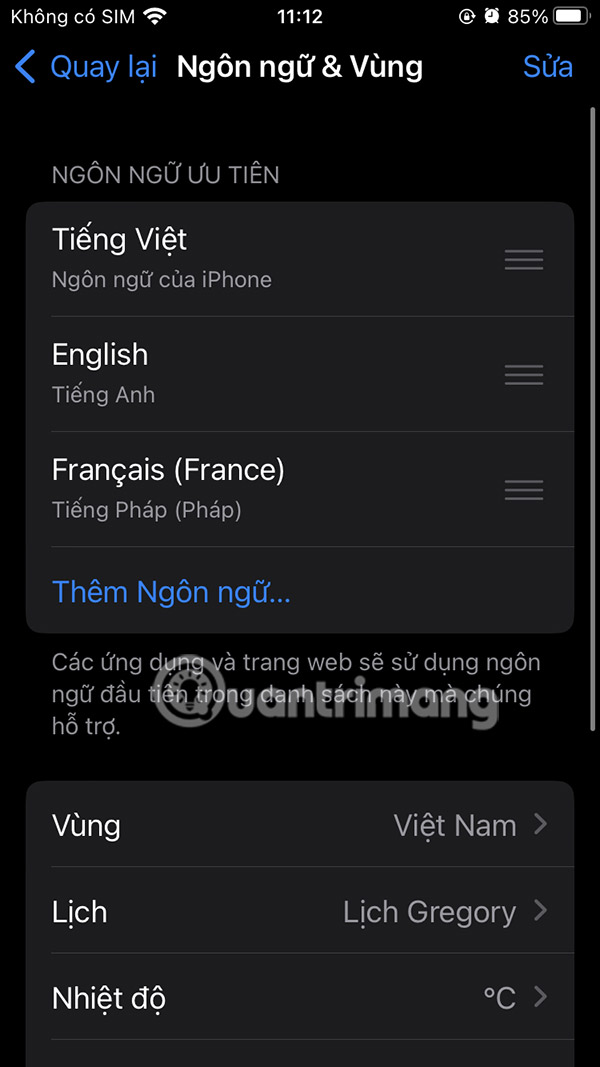
Keep the existing primary iPhone language unless you intend to change the whole device.
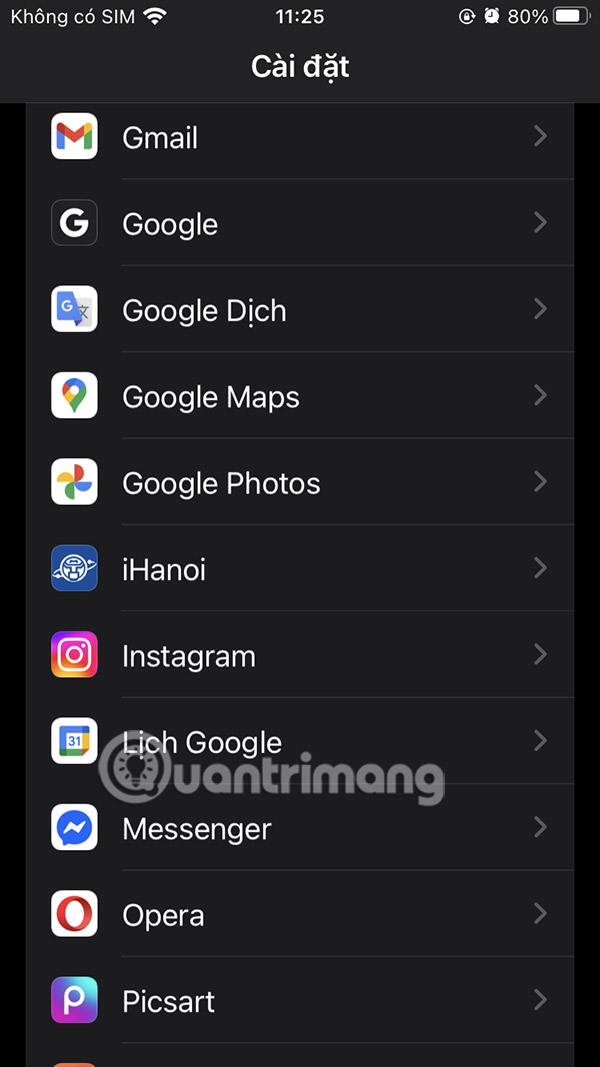
Additional languages remain listed under Language & Region.
Choose a different language for one app
- Return to Settings.
- On current iOS versions, open Apps and select the app. On older versions, scroll down the main Settings page and select the app directly.
- Select Language or Preferred Language.
- Choose one of the languages supported by the app, then reopen the app.
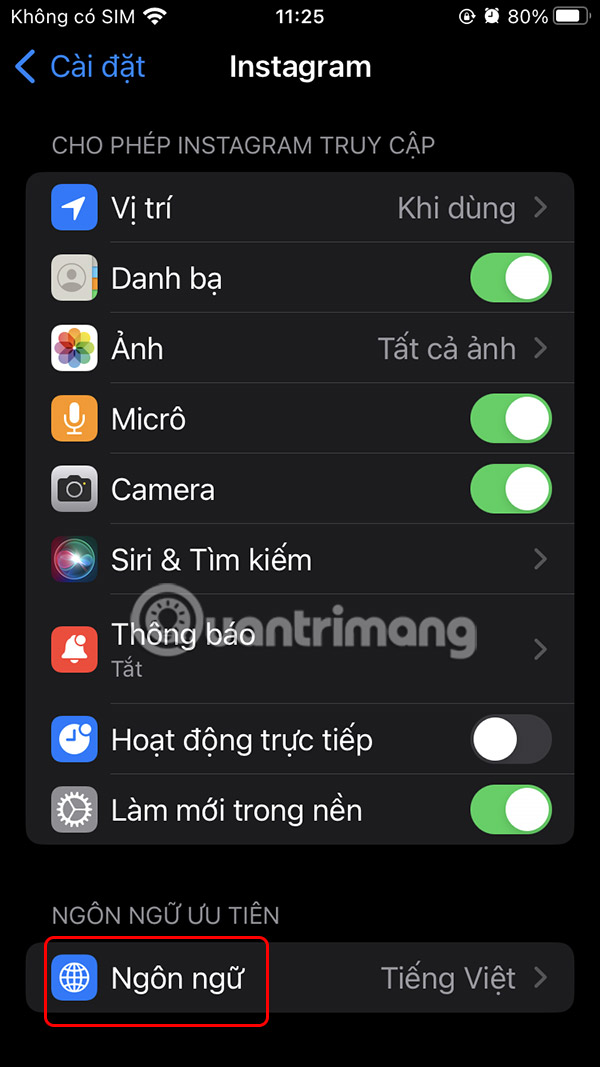
Open the app's page in Settings.
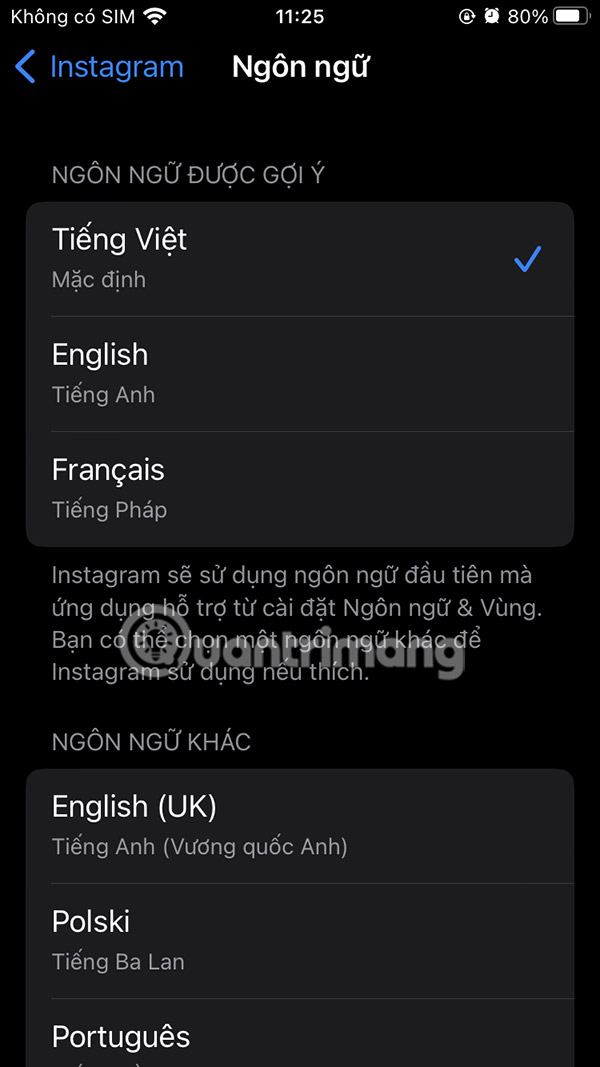
Select the app-specific Language setting when it is available.
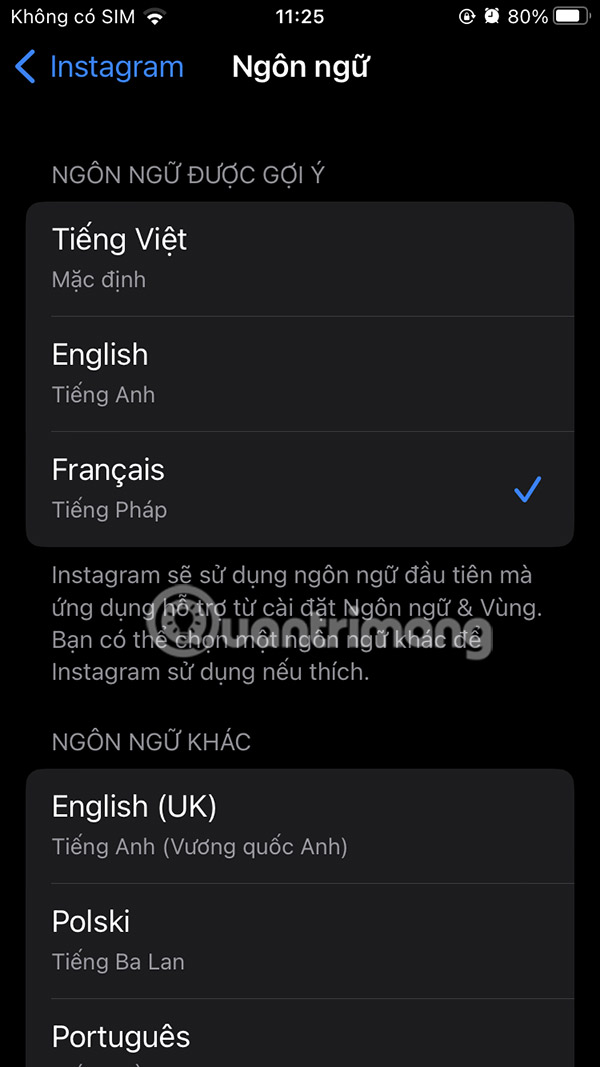
Choose a supported language for that app.
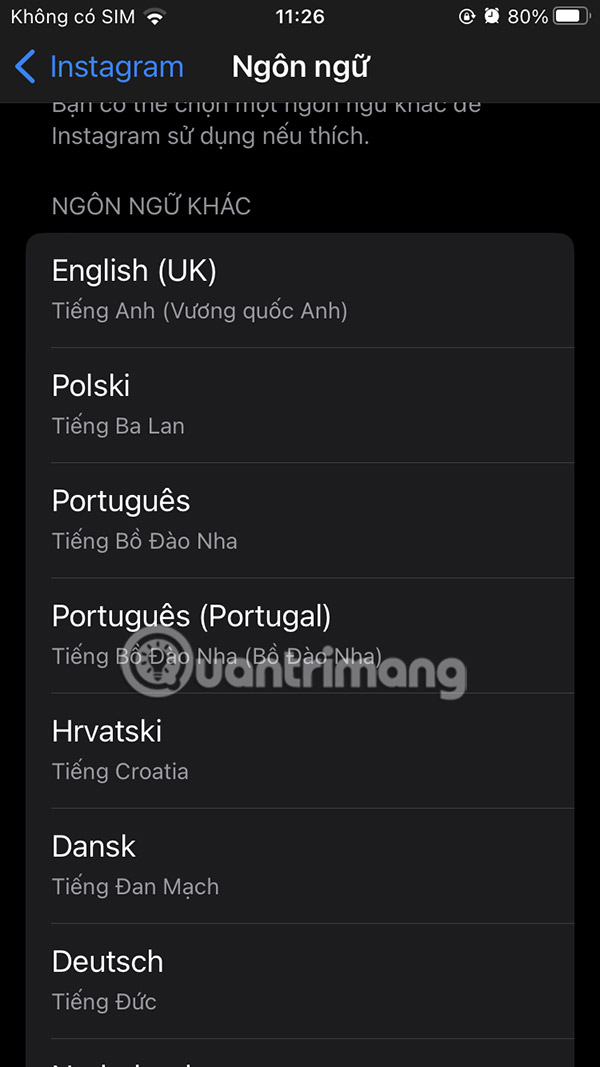
The list may include system languages and other localizations supplied by the developer.
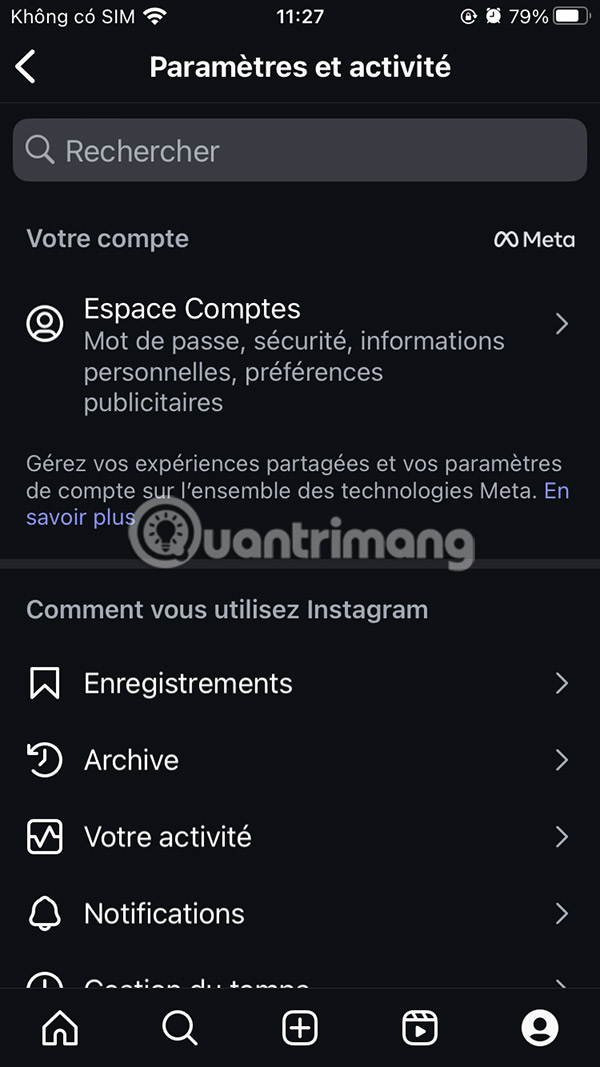
Reopen the app to confirm that its interface changed.
If the Language option is missing
- The app supports only one language: iOS cannot add a localization the developer has not provided.
- The app controls language internally: check the app's own Settings, Account, or Language menu.
- The desired language is not on the iPhone: add it under Language & Region first.
- The app has not refreshed: close and reopen it, then check for an App Store update.
- The app follows the primary system language: some apps do not expose an independent choice.
App language, keyboard language, and App Store region are different
Changing an app's interface language does not automatically add a typing keyboard and does not change the country of the App Store account. A keyboard is added separately under Settings > General > Keyboard > Keyboards. App Store country or region affects availability, billing, and subscriptions, so do not change it just to translate an app; see the separate guide to changing an App Store country or region.
If the goal is to translate text rather than the app's menus, use iPhone translation features instead. TipsMake also explains how to translate languages with an iPhone and how to scan and translate text with Google Translate.
Return the app to the iPhone's default language
Open the same app page in Settings and choose the primary device language, or choose the option that follows the system default if the app offers one. Reopen the app afterward. This changes only the selected app and does not remove the additional language from Language & Region.
Related Articles
 Compare iPhone 13 and iPhone 126 minutes read
 iPhone 12 Marks 13 Years of Change for Apple9 minutes read
 Compare iPhone 13 Pro and iPhone 12 Pro8 minutes read
 How Has the iPhone Evolved, from 2007 to 2017?24 minutes read
 Should I Upgrade My iPhone X to iPhone 13?4 minutes read
 Should iPhone 7, Update iOS 14?3 minutes read
Reader Comments 0
Sign in with email or Google to join the discussion.