Managing computers with Windows Intune - Part 3: Managing computers and upgrading
TipsMake.com - In this section, I will show you how to manage different computers using workspace Computers and Updates in the Windows Intune administration interface .
Windows Intune is a Microsoft cloud service that allows you to manage and secure corporate computers from anywhere through the web interface. In the first two sections, we introduced you to Windows Intune and the process of setting up the environment to use Windows Intune. In the next parts of the series, we will go over the Windows Intune web administration interface and look at the computer management tasks that can be performed from this administration interface. We will start this article by explaining the concept of workspace and reviewing the main workspace System Overview in the Windows Intune administration interface. Next is how to perform some computer management tasks using workspace Computers and Updates.
Note:
This series is written based on the pre-release version ( prerelease ) of Windows Intune, so there will probably be some features added in the final release version.
Learn about Windows Intune Workspace
The panel on the left side of the admin console of Windows Intune displays a series of workspaces. Each workspace allows you to manage each aspect separately in the computer environment. For example, Figure 1 below is displaying the System Overview workspace, which is a workspace that gives you an overview of the current state of the environment through warnings that need attention, upgrading the software you need. standard, direct malware to research, .

Figure 1: System Overview Workspace
The 10 workspaces shown in these images can be used to perform the following tasks:
- System Overview - Displays a brief summary of the health status of computers in the network. This is the first workspace you need to consider when you want to manage computers using Windows Intune.
- Computers - Used to group computers with the purpose of easily managing and displaying statistics on each machine's hardware and software, approving updates for a computer, running a malware scanner on the computer, . You will certainly need a lot of time in this workspace when managing computers with Windows Intune.
- Updates - List necessary software upgrades for computers and allow you to take action to approve unprocessed upgrades.
- Endpoint Protection - Lists the malware infection (past or present) and allows you to take action if needed.
- Alerts - List unprocessed warnings that need you to take action. Allows you to configure notification and alert settings.
- Software - List the software installed on the computer. Allows you to upload software to the cloud to be able to publish and deploy to computers on the network.
- Licenses - Allows you to manage software subscriptions by uploading them to Microsoft Volume License Services (MVLS). You can also manage third party software registrations.
- Policy - Allows creating policies to manage settings of Updates, Endpoint Protection, Windows Firewall and Windows Intune Center on computers on the network.
- Reports - Allows you to create detailed reports of upgrades, hardware statistics, software statistics and registration for computers.
- Administration - Enables to perform various administrative tasks such as: configuring automatic validation rules for upgrades, creating new alert types, configuring recipients and notifications for alerts, configuring administrator accounts Treat new Intune Windows, download Windows Intune client software to deploy to computers, .
In this section, we will exploit the workspace Computers and Updates; In the following sections we will introduce you to other workspaces.
Exploiting Workspace Computers
If you select workspace Computers, the navigation pane will appear and display an overview window of the computers that have installed Windows Intune client software:
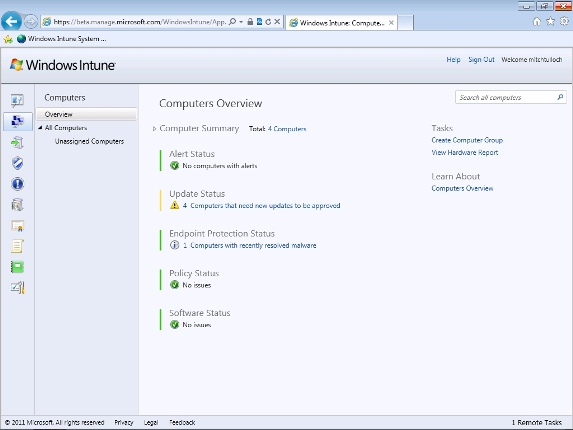
Figure 2: Overview panel of workspace Computers
Select the All Computers button in the navigation pane to list all managed computers:
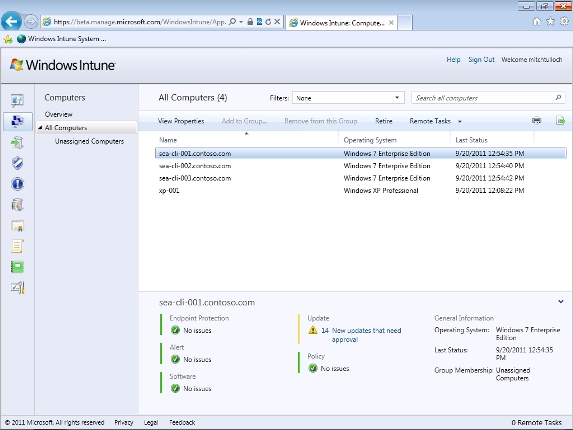
Figure 3: List of managed computers
Note that the panel below will have more information about the computer currently selected in the upper panel.
Double-click the computer in the upper panel (or right-click on it and select View Properties ), you will see the details as shown below. Here, the General tab will provide some general information about the selected computer:
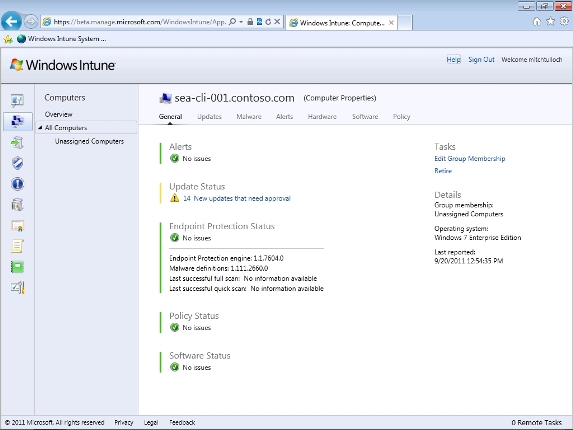
Figure 4: General tab
Select the Hardware tab and you'll see the hardware summary page for your computer:
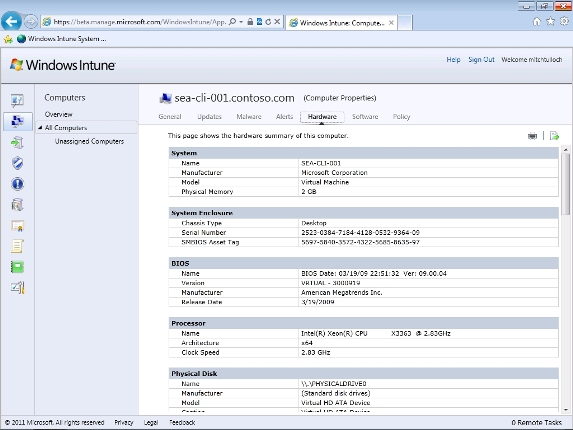
Figure 5: Hardware Tab
Selecting the Software tab will list the software installed on your computer:
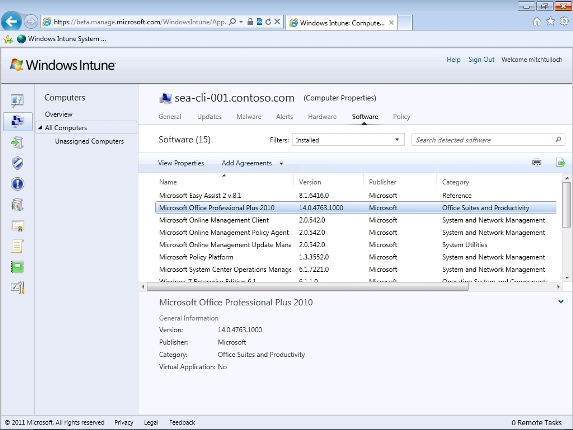
Figure 6: Tab Software
Choose Unassigned Computers under All Computers in the navigation pane. Unassigned Computers are a group of computers that have not been assigned to any user groups:

Figure 7: General tab of the Unassigned Computers group
Select the Computers tab and list the names of these unassigned computers:
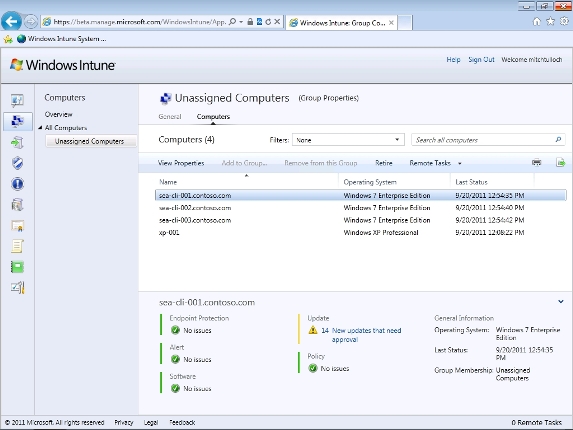
Figure 8: Computers tab of the Unassigned Computers group
At this point, we will create some groups to make it easier to manage. First, let's see what we can do from workspace Computers.
If you right click on the computer, you will see a number of different menu options, which allow you to perform administrative tasks on the computer. Eg:
- View Properties - Displays detailed information about the computer as shown in Figure 4.
- Retire - Remove a computer from the administration interface. Note that the Windows Intune client software will remain on that computer, which means that it will continue to receive malware updates and protection but you cannot manage it from the interface.
- Remote Tasks - Allows you to restart the computer, run a malware scanner or upgrade the malware identifier.
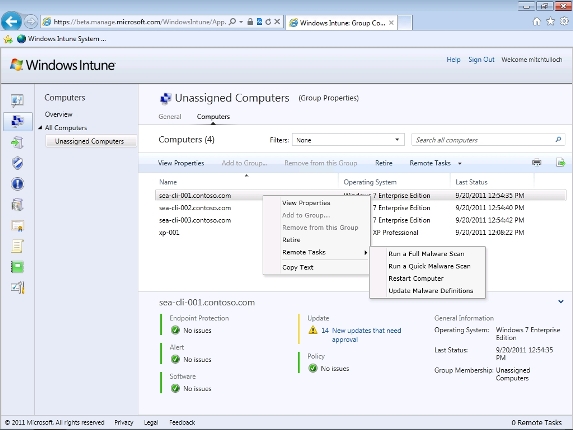
Figure 9: Perform administrative tasks on the selected computer
Note that the above administrative tasks can also be performed by clicking the appropriate button on the toolbar on the list of computers.
Let's go create some computer groups. First, because the company has three computers joined to the domain at the main Vancouver office, we created a new group called Vancouver:
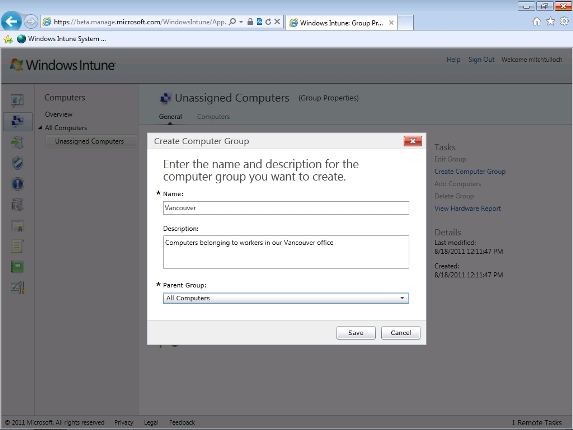
Figure 10: Create a new computer group called Vancouver
The next image shows the newly created Vancouver group. This group does not currently have members:
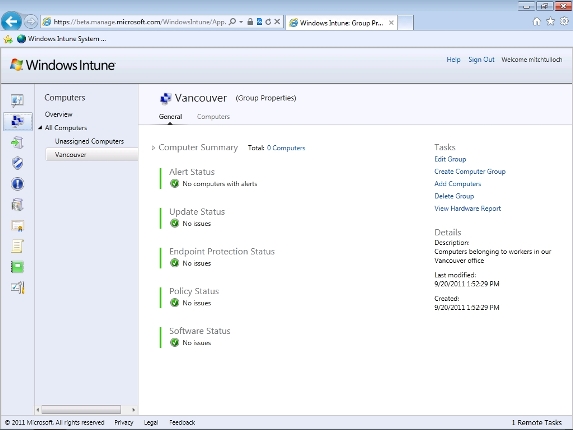
Figure 11: Vancouver team has no members yet
Click Add Computers under Tasks , then hold down CTRL and select three Windows 7 computers in Vancouver:
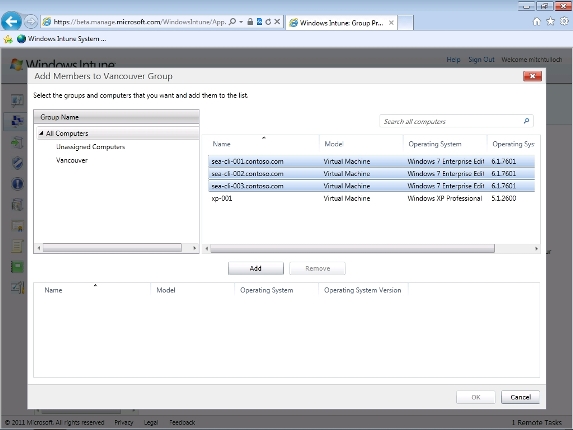
Figure 12: Add three Windows 7 computers to Vancouver team
Click the Add button to add the selected computers to the group:
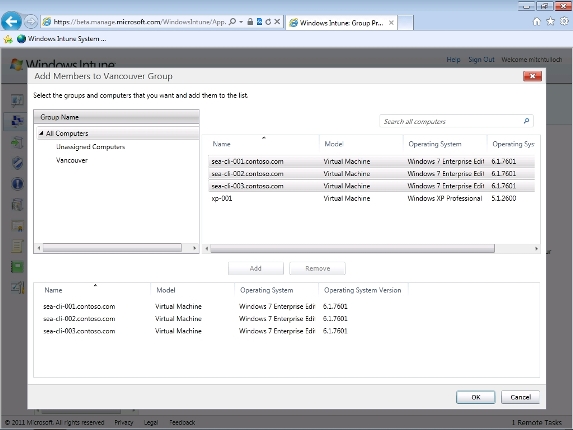
Figure 13: Three computers have been added to the group
Click OK , you will see the Vancouver team now has three computers in it. Note that one of these computers is having problems like malware infection or lack of upgrades - we will have to solve these problems:
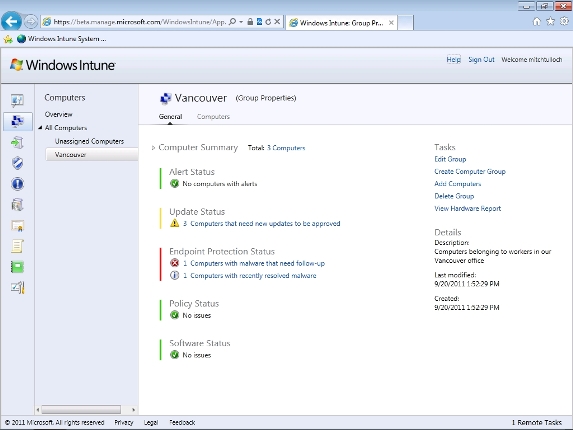
Figure 14: Computers in Vancouver
You can select the Computers tab of the Vancouver team to display more information about a specific computer in this group:
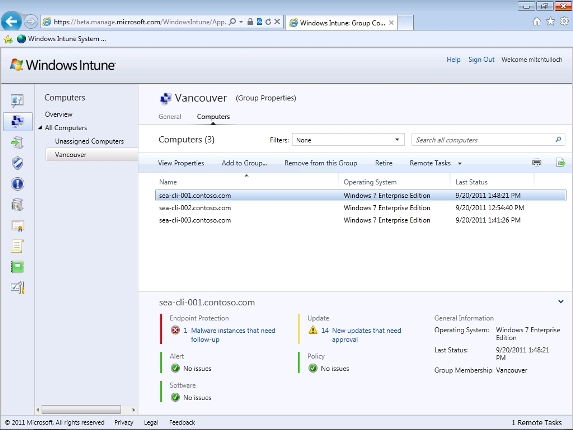
Figure 15: See more information about computers in Vancouver
Create a second group called Workgroup. This is the group that will be used to group standalone computers (not standalone) yet to join the domain:
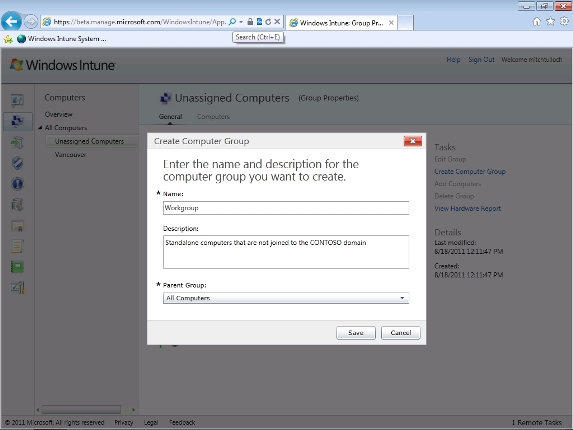
Figure 16: Creating a Workgroup group
The company has only one computer of this type and it is running on Windows XP, so let's group it into the Workgroup group:
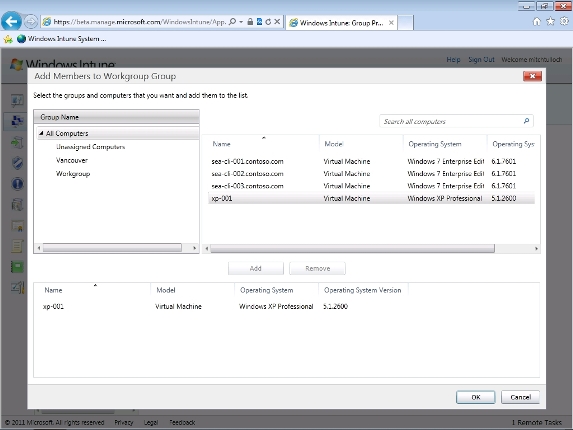
Figure 17: Adding a standalone computer to the Workgroup group
If you select the Unassigned Computers option in the navigation pane, we will see all the computers that are assigned to one of the user groups:
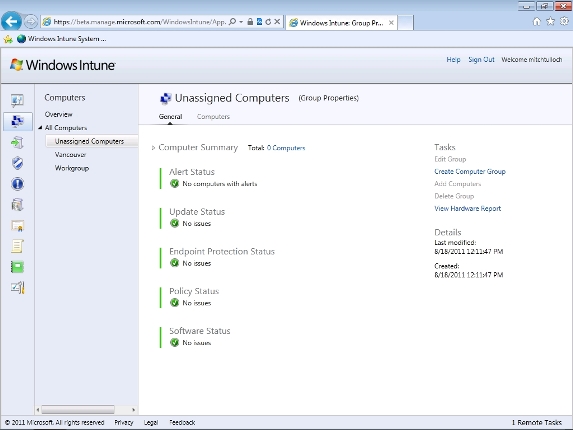
Figure 18: No computer has not been assigned
As mentioned earlier, Windows Intune can manage both joined computers to the domain and standalone computers, Windows 7, Windows Vista and Windows XP computers. This is very useful for small businesses when they cannot replace all older computers that still use Windows XP or Windows Vista operating systems.
Exploiting workspace Updates
Let's see what we can do from the workspace Updates. Select the workspace and you will see a navigation panel display with the Overview item selected, which provides a high-level overview of the status of updates of managed computers:

Figure 19: Panel Overview of workspace Updates
Select All Updates will display a list of all updates for computers, whether installed or not. This is a pretty big list:
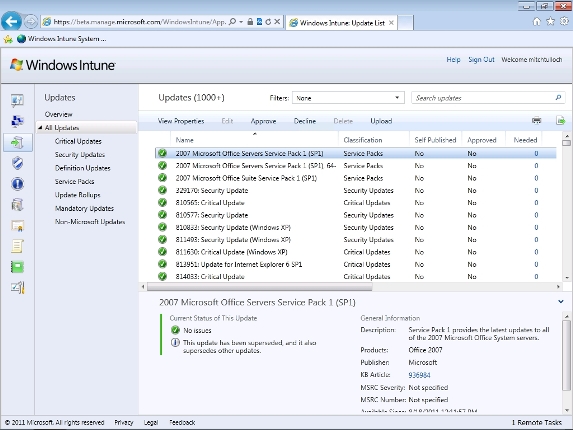
Figure 20: All updates are related to your computers
To see which upgrades are really needed, select an item and find the upgrade with the number '1' in the Needed column as follows:
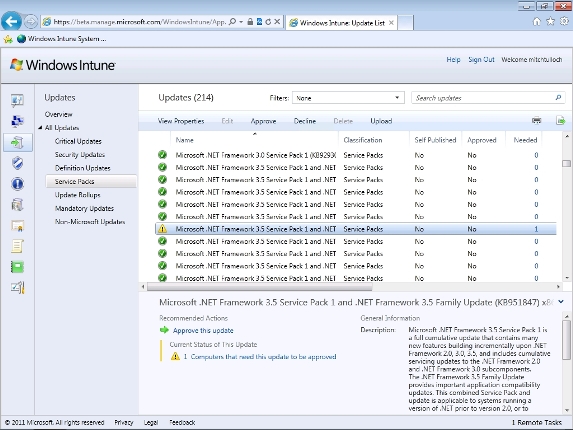
Figure 21: This upgrade is needed for one of our computers
To see which computer needs this upgrade, click the " Computers that need this update to be approved " link in the image above. You will then see a list of computers that need this upgrade, Windows XP computers are also among them:
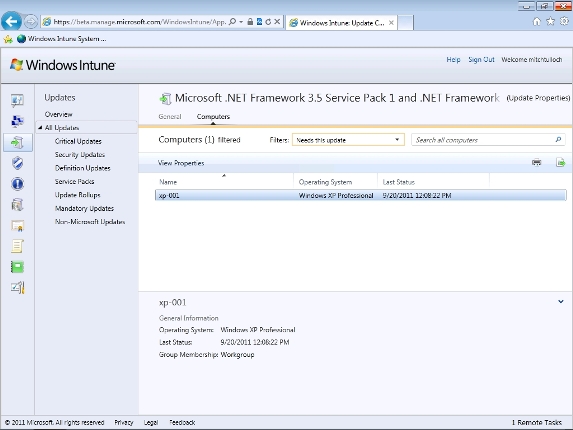
Figure 22: List of computers to upgrade
To see what can be done with an upgrade, right-click on it. The right-click menu appears and displays a series of tasks that you can perform for this upgrade. These tasks include:
- View Properties - See more information about upgrades
- Approve | Decline - Approve or refuse to install updates on affected computers.
- View Computers That etc. - Find out which computer needs this upgrade, is currently scheduled to receive it or try to install but failed.
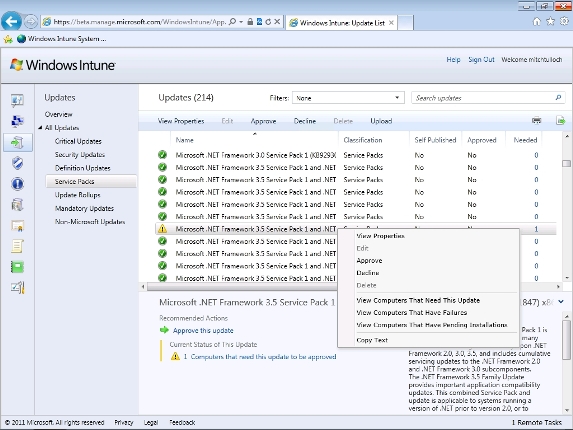
Figure 23: Performing tasks related to upgrades
Instead of right-clicking, you can click the toolbar button to perform these tasks when you've selected one or more updates from the list.
Let's go back to the standalone computer that is using Windows XP operating system, this computer is in need of the .NET Framework service pack. The easiest way to do this is to return to the workspace Computers and select the Workgroup group:
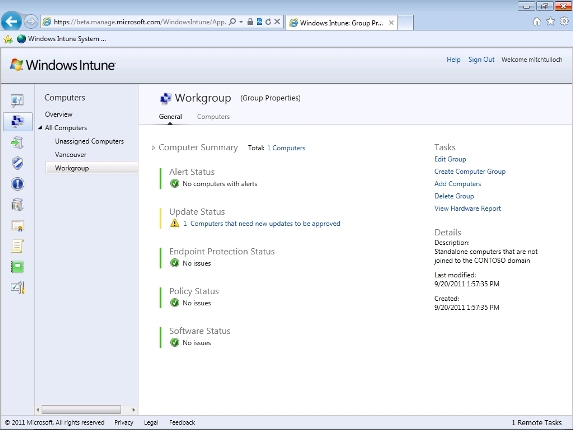
Figure 24: Standalone computers in the company
Under the Update Status heading, click the " Computers that need new updates to be approved " link to open the Computers tab of the Workgroup group. Note that this Windows XP computer has 106 upgrades that need approval!
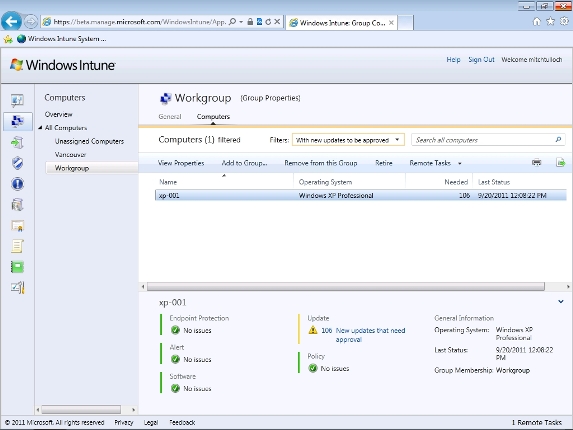
Figure 25: This computer lacks 106 upgrades!
Click the " New updates that need approval " link to display the list of all 106 upgrades needed:
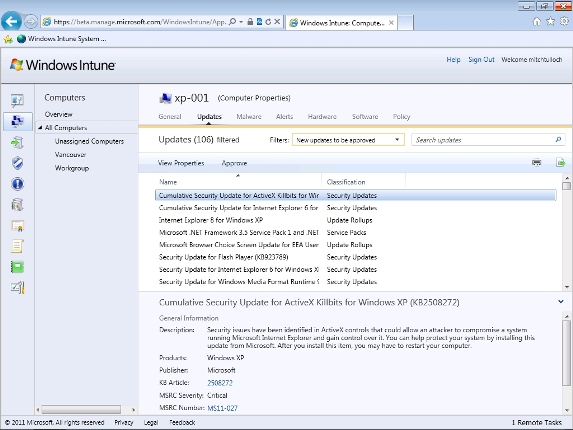
Figure 26: List of updates required for this computer
Press CTRL + A to select all updates in the list:
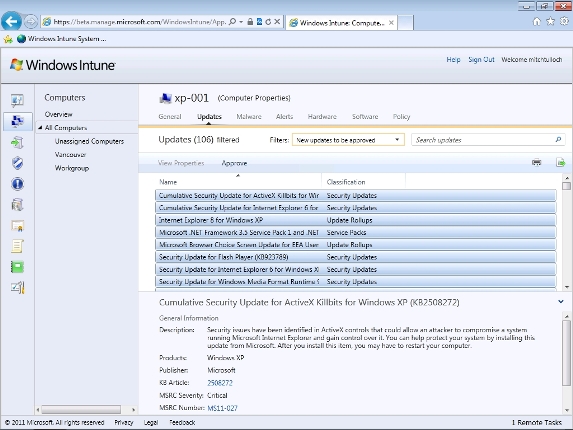
Figure 27: Select all updates
Right-click the selected updates and select Approve :
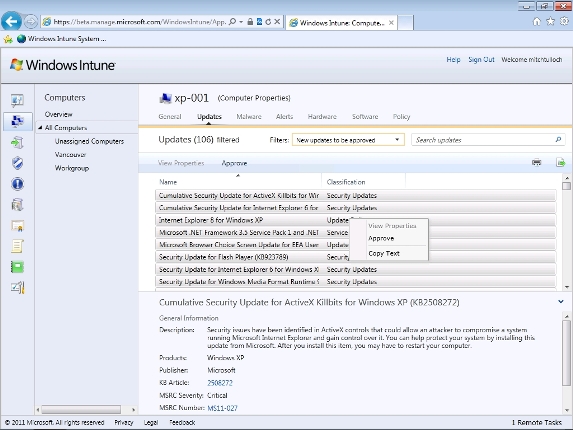
Figure 28: Approving all 106 upgrades
Here you will have the option to configure approval settings and deadlines:
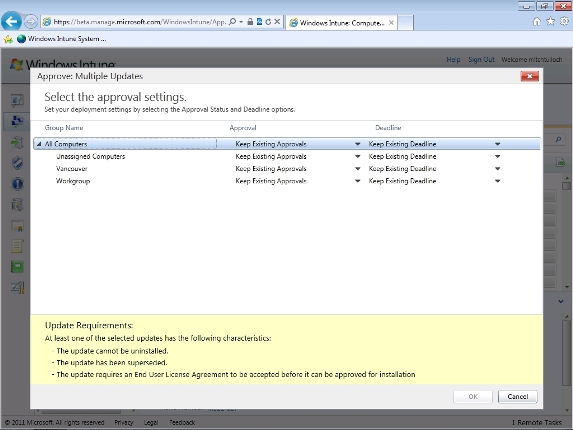
Figure 29: Configure approval settings and deadlines
Note that you should carefully read the information in the yellow section at the bottom of the window.
Since we are only interested in the health state of standalone computers, we have configured the approval settings for Workgroup only. Click Keep Existing Approvals as shown below, then change to Install :
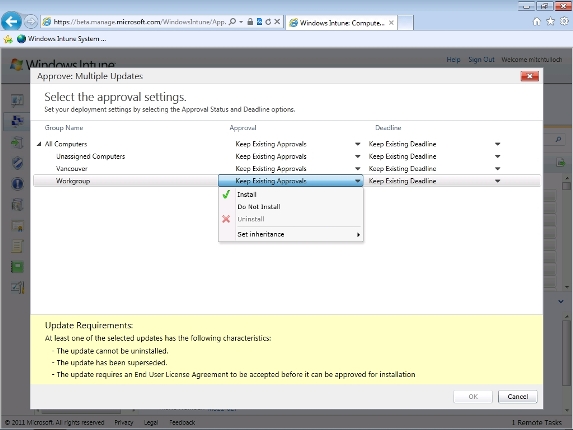
Figure 30: Configure approval settings for Workgroup group
Click Keep Existing Deadline as shown below and change it to As Soon As Possible :
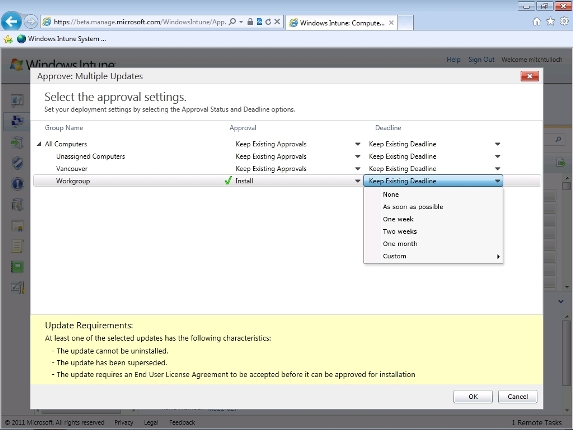
Figure 31: Configure approval limits for Workgroup groups
Deadline As Soon As Possible will install approved updates at midnight:
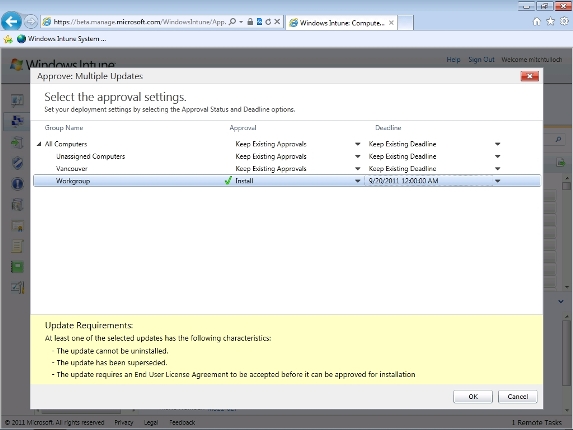
Figure 32: Approved updates will be installed at midnight.
If you want to install updates immediately, select the Custom option and set a time limit (eg 5 minutes).
Click OK in the image above to display EULA if upgrading requires you to accept EULA before installing:
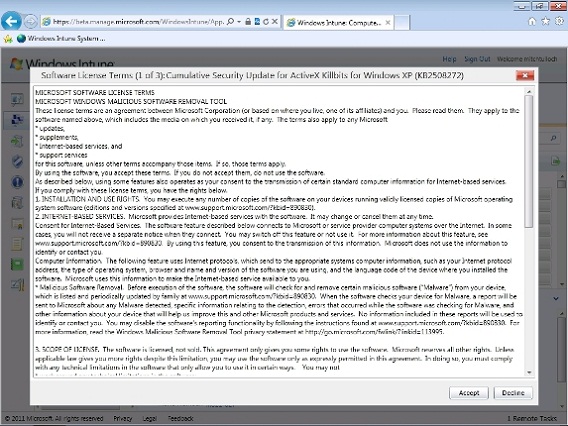
Figure 33: Some upgrades require you to accept EULA to install the upgrade
After accepting all EULA , the administration interface starts processing your approval request:
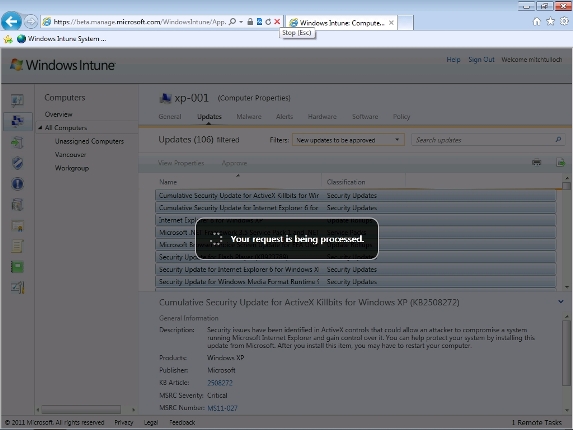
Figure 34: Approval request is being processed.
After finishing, you will be taken back to the Workgroup group of workspace Computers. Note that the Update Status message has changed the word " 1 Computers that need new updates to be approved " (see Figure 24 above) to " 1 Computers that have pending updates " as shown here:
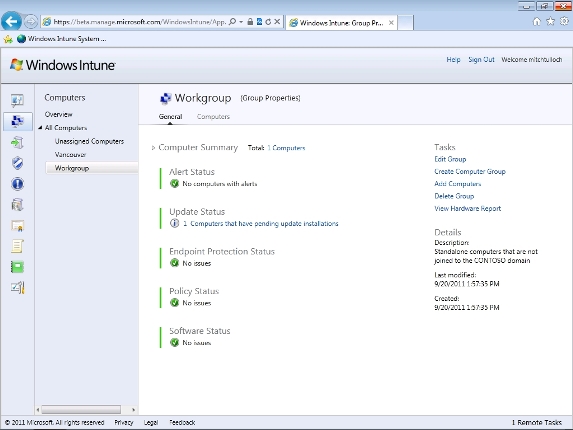
Figure 35: Approved updates are currently processing
Selecting the Computers tab will display the Windows XP computer that currently has 106 approved upgrades in progress:
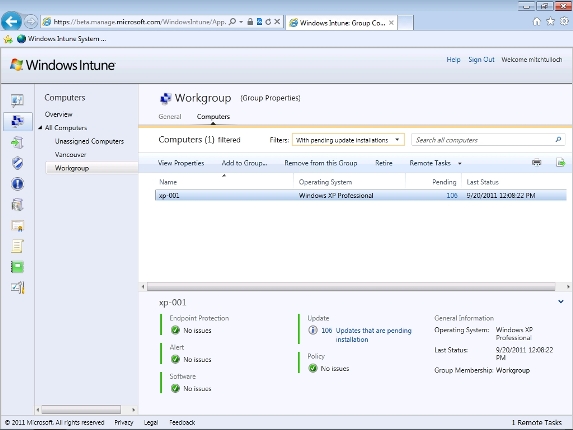
Figure 36: 106 upgrade is currently in progress
When the installation process is finished, a message will appear on the affected computer:
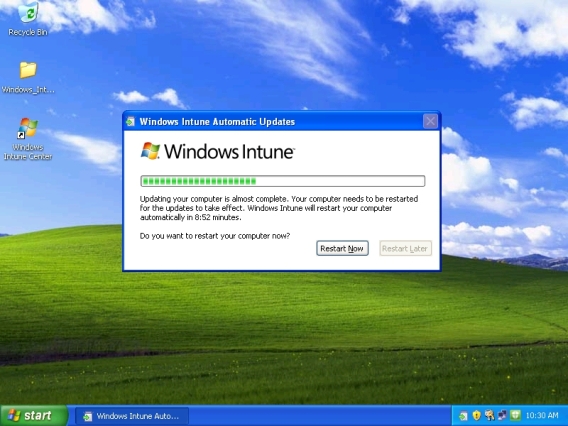
Figure 37: Approved updates are being installed
When using Windows Intune to patch all computers in your managed area, workspace System Overview will display " No issues " under Updates section - compare the image below with Figure 1 at the beginning of the article and so on. Compare the list of alerts below each image:
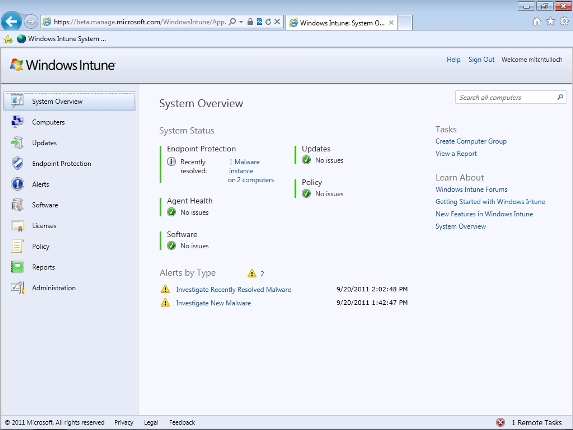
Figure 38: All computers have been fully upgraded
Conclude
In this article, I have shown you how to perform computer management tasks using workspace Computers and Updates. In the next part of the series, we will introduce you to the workspace Endpoint Protection and Alerts.
You should read it
- ★ Remote system management with the new Microsoft Intune application for Android
- ★ Configure Always On VPN in Windows 10 with Microsoft Intune
- ★ Remote management on Windows Server 2012 with Remote Management Service
- ★ Cloud computing can develop in a relatively different direction in the next few years
- ★ The NSA identifies 4 'critical' security vulnerabilities of cloud systems