Table of Contents
Bootstrap 5 flex utilities expose common CSS Flexbox behavior through classes. Add d-flex or d-inline-flex to a container, then use direction, alignment, sizing, spacing, wrapping, and order utilities on the container or its direct children.
These utilities are useful for navigation, button rows, cards, toolbars, and small component layouts. For complex page structure, Bootstrap's grid or custom CSS may communicate intent more clearly.
Create a flex container
d-flex creates a block-level flex container. Its direct children become flex items:
<div class="d-flex gap-2 p-3 border rounded">
  <div class="p-2 bg-primary text-white">Item 1</div>
  <div class="p-2 bg-primary text-white">Item 2</div>
  <div class="p-2 bg-primary text-white">Item 3</div>
</div>
d-inline-flex creates an inline-level flex container that occupies only the space its contents need:
<div class="d-inline-flex gap-2 p-2 border rounded">
  <span class="badge text-bg-secondary">HTML</span>
  <span class="badge text-bg-secondary">CSS</span>
  <span class="badge text-bg-secondary">JavaScript</span>
</div>
The Bootstrap flex utility reference lists every responsive variant.
Set row or column direction
A flex container uses a horizontal row by default. Use flex-row when you need to state that behavior explicitly, or flex-row-reverse to reverse the main-axis direction:
<div class="d-flex flex-row gap-2">...</div>
<div class="d-flex flex-row-reverse gap-2">...</div>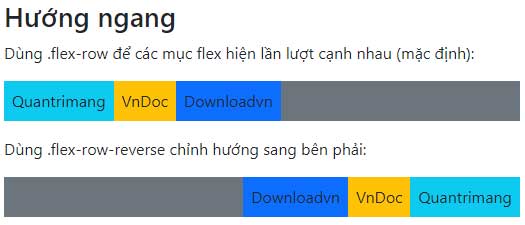
Use flex-column for a vertical main axis and flex-column-reverse for its reverse:
<nav class="d-flex flex-column gap-2">
  <a href="/overview">Overview</a>
  <a href="/reports">Reports</a>
  <a href="/settings">Settings</a>
</nav>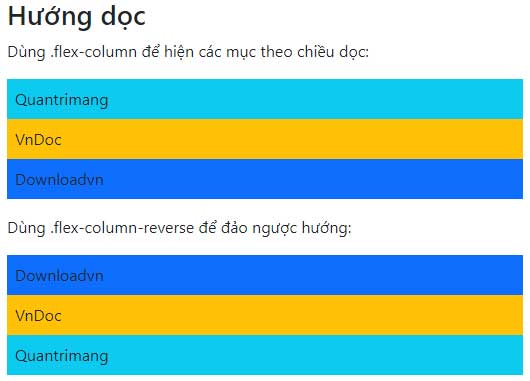
Reverse utilities change visual order without changing document order. Avoid using them when the difference would make keyboard focus or spoken content confusing.
Align items on the main axis
justify-content-* distributes items along the main axis. That axis is horizontal for flex-row and vertical for flex-column.
| Class | Effect |
|---|---|
justify-content-start | Pack items at the start |
justify-content-end | Pack items at the end |
justify-content-center | Center the group |
justify-content-between | Place remaining space between items |
justify-content-around | Place space around each item |
justify-content-evenly | Use equal space between and around items |
<div class="d-flex justify-content-between align-items-center">
  <h2 class="h5 mb-0">Recent files</h2>
  <a class="btn btn-sm btn-outline-primary" href="/files">View all</a>
</div>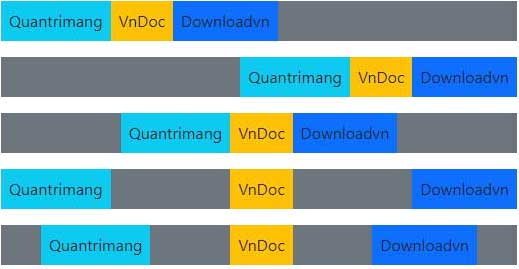
Fill, grow, and shrink flex items
Add flex-fill to siblings when they should share the available row. Content can still affect their final widths, so use the grid or custom flex-basis when exact equal columns are required.
<div class="d-flex">
  <a class="flex-fill p-2 text-center border" href="/one">One</a>
  <a class="flex-fill p-2 text-center border" href="/two">Two</a>
  <a class="flex-fill p-2 text-center border" href="/three">Three</a>
</div>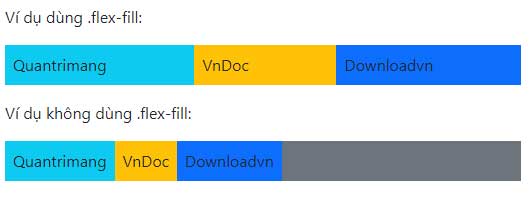
flex-grow-1 allows one item to consume remaining space. flex-grow-0 prevents growth. The matching flex-shrink-0 and flex-shrink-1 utilities control whether an item may become smaller when the row is crowded.
<div class="d-flex gap-2">
  <input class="form-control flex-grow-1" type="search"
    aria-label="Search" placeholder="Search">
  <button class="btn btn-primary flex-shrink-0" type="button">
    Search
  </button>
</div>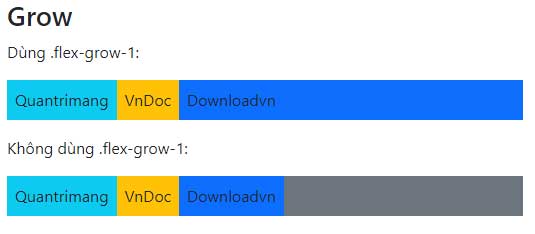
Change visual order carefully
Bootstrap supplies order-0 through order-5, plus order-first and order-last. Lower order values appear first visually:
<div class="d-flex">
  <div class="order-3 p-2">First in the HTML</div>
  <div class="order-2 p-2">Second in the HTML</div>
  <div class="order-1 p-2">Third in the HTML</div>
</div>
Order utilities do not change the DOM or keyboard focus order. Keep the source order logical, especially for interactive controls and meaningful reading sequences.
Push an item with auto margins
In left-to-right layouts, ms-auto adds automatic margin at the inline start and pushes that item toward the end. me-auto does the opposite. The logical start/end names also adapt to right-to-left layouts.
<nav class="d-flex align-items-center gap-3">
  <a href="/">Home</a>
  <a href="/articles">Articles</a>
  <a class="ms-auto" href="/account">Account</a>
</nav>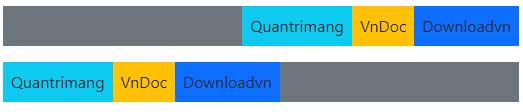
Control wrapping
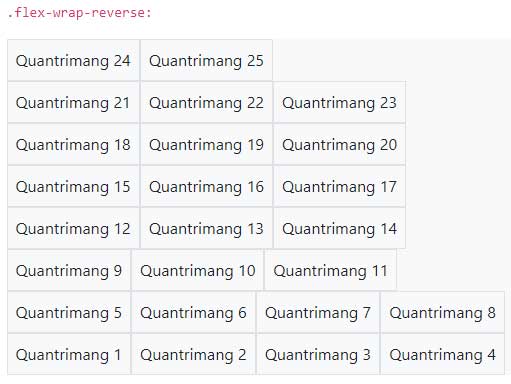
Flex items do not wrap by default. Choose one of three utilities:
flex-nowrapkeeps every item on one line and may cause overflow or shrinkage.flex-wrapmoves items onto additional lines as needed.flex-wrap-reversewraps while reversing the cross-axis line direction.
<div class="d-flex flex-wrap gap-2">
  <span class="badge text-bg-primary">Accessibility</span>
  <span class="badge text-bg-primary">Bootstrap</span>
  <span class="badge text-bg-primary">CSS</span>
  <span class="badge text-bg-primary">HTML</span>
  <span class="badge text-bg-primary">JavaScript</span>
</div>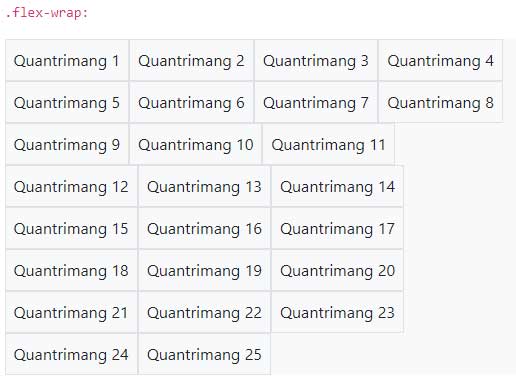
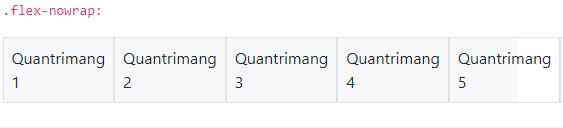
For tag lists and toolbars, flex-wrap is usually safer on narrow screens. Test long translated text and large browser zoom rather than relying on short placeholder labels.
Align multiple wrapped lines
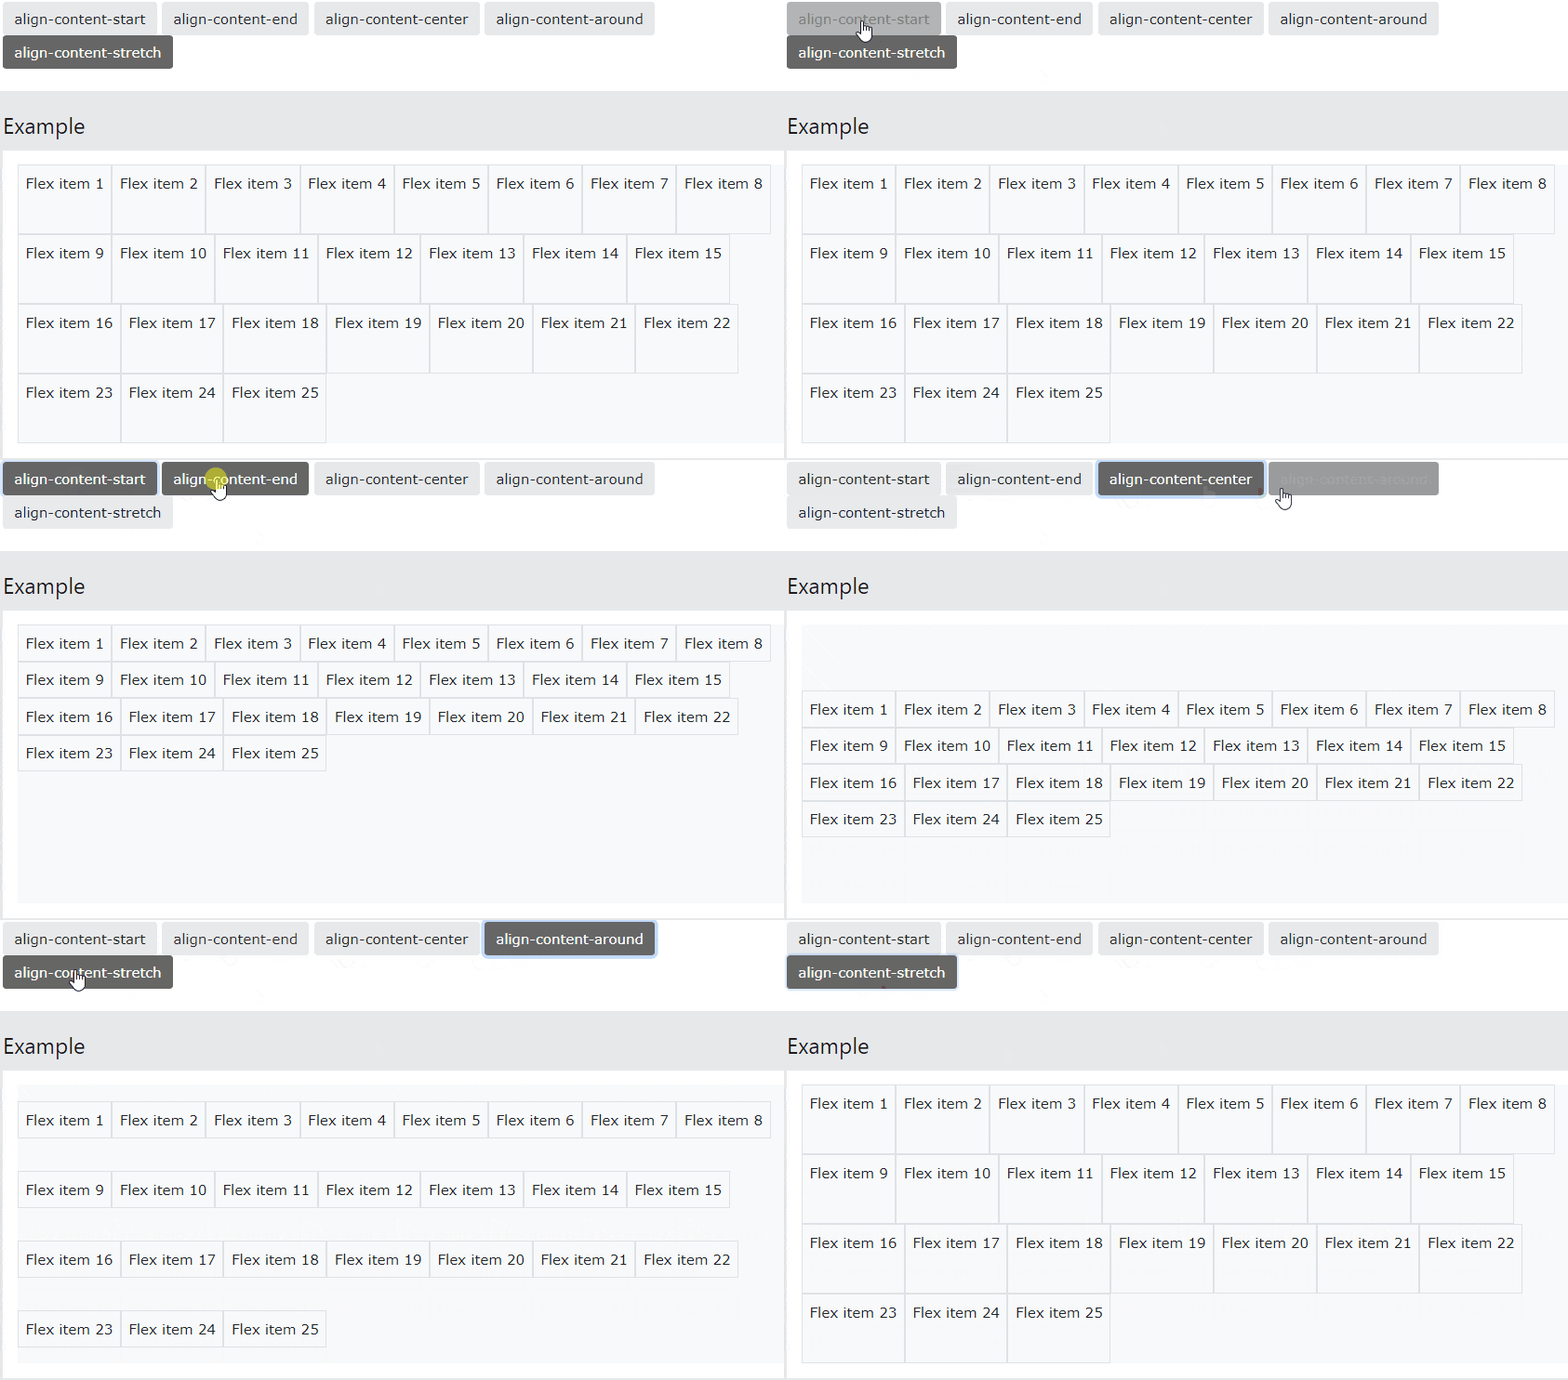
align-content-* distributes multiple flex lines on the cross axis. It has no visible effect when there is only one line, when wrapping is disabled, or when the container has no extra cross-axis space.
<div class="d-flex flex-wrap align-content-between gap-2"
  style="min-height: 12rem;">
  <div class="p-2 border">Item 1</div>
  <div class="p-2 border">Item 2</div>
  <div class="p-2 border">Item 3</div>
  <div class="p-2 border">Item 4</div>
</div>
Available values are start, end, center, between, around, and stretch.
Align all items on the cross axis
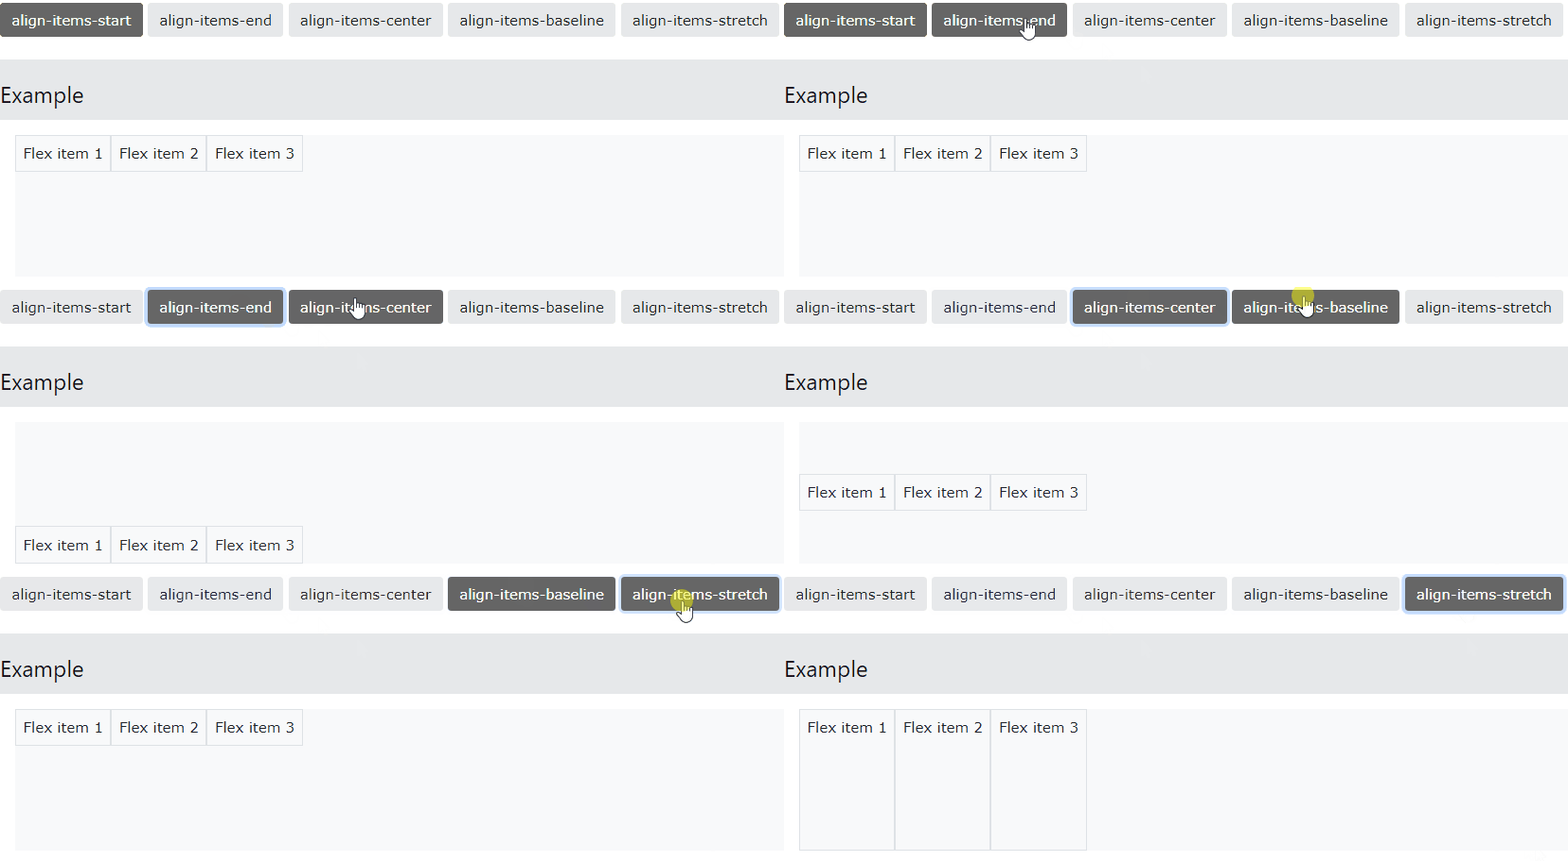
Apply align-items-* to the container to align every item on the cross axis:
<div class="d-flex align-items-center gap-3">
  <img src="avatar.jpg" alt="" width="48" height="48">
  <div>
    <strong>Account name</strong>
    <p class="mb-0 text-secondary">Supporting text</p>
  </div>
</div>
Choose align-items-start, end, center, baseline, or stretch.
Align one item differently
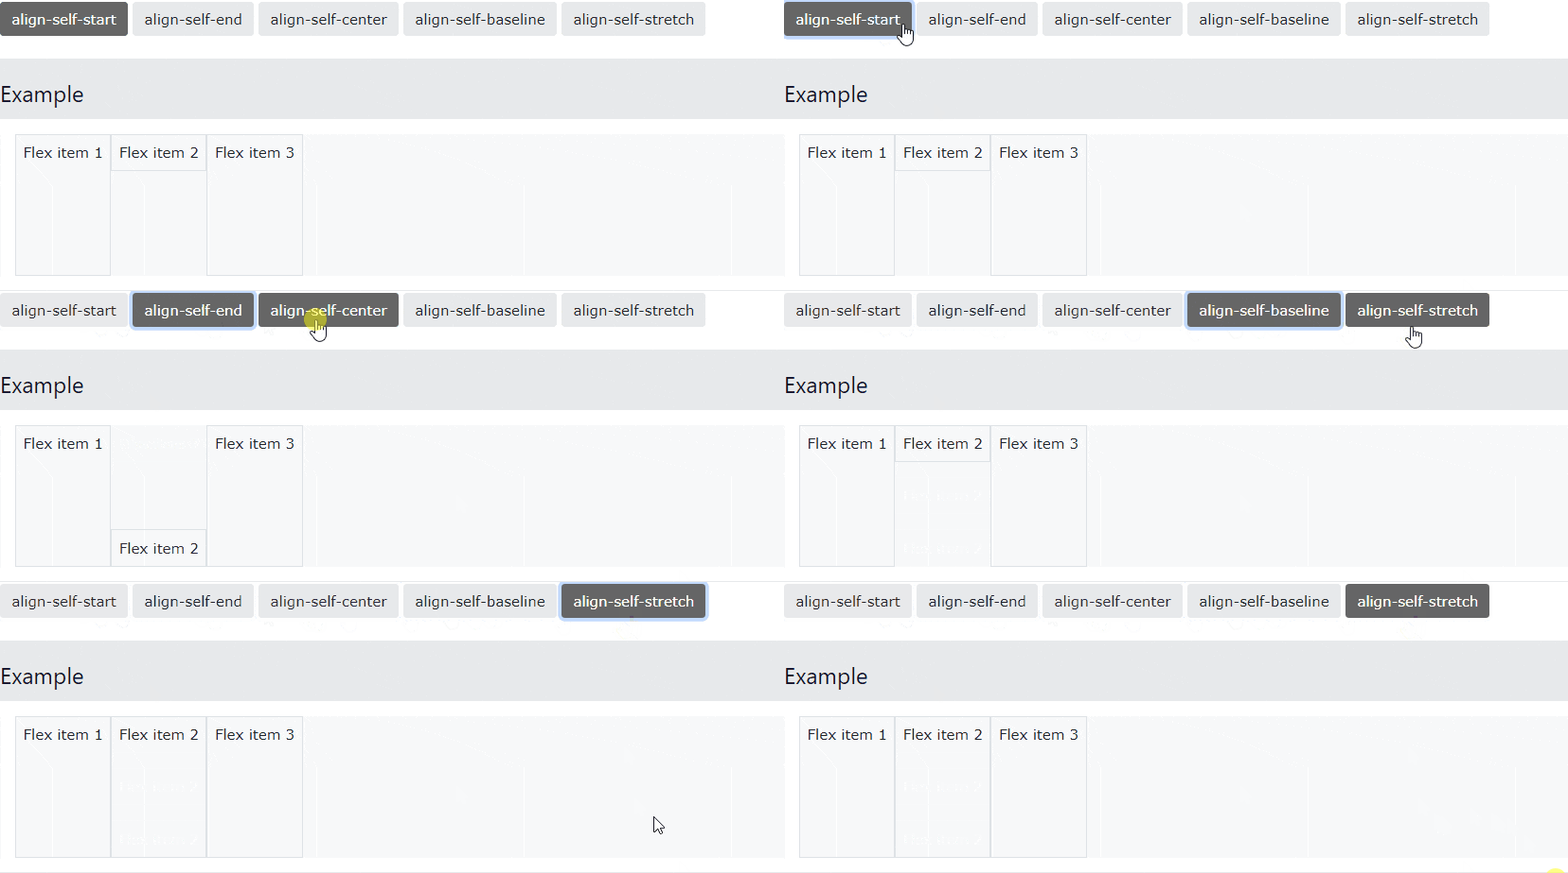
Apply align-self-* to one flex item to override the container's align-items value for that item:
<div class="d-flex align-items-start gap-2" style="min-height: 8rem;">
  <div class="p-2 border">Start</div>
  <div class="align-self-center p-2 border">Centered item</div>
  <div class="p-2 border">Start</div>
</div>
The available suffixes are the same: start, end, center, baseline, and stretch.
Use responsive flex utilities
Insert a breakpoint abbreviation into most flex utilities to apply the rule from that minimum width upward. For example, flex-column flex-md-row stacks items by default and changes to a row at 768px.
<div class="d-flex flex-column flex-md-row
  align-items-stretch align-items-md-center gap-3">
  <div class="flex-grow-1">Main content</div>
  <button class="btn btn-primary flex-shrink-0" type="button">
    Continue
  </button>
</div>| Utility pattern | Purpose |
|---|---|
d-{breakpoint}-flex | Create a block flex container from a breakpoint |
d-{breakpoint}-inline-flex | Create an inline flex container from a breakpoint |
flex-{breakpoint}-row / column | Change main-axis direction |
justify-content-{breakpoint}-* | Align items on the main axis |
align-items-{breakpoint}-* | Align every item on the cross axis |
align-self-{breakpoint}-* | Align one item on the cross axis |
flex-{breakpoint}-fill | Fill the available main-axis space |
flex-{breakpoint}-{grow|shrink}-{0|1} | Control growth or shrinkage |
flex-{breakpoint}-{wrap|nowrap|wrap-reverse} | Control line wrapping |
order-{breakpoint}-{0-5} | Change visual order |
align-content-{breakpoint}-* | Distribute multiple wrapped lines |
The valid breakpoint names are sm, md, lg, xl, and xxl. Omit the breakpoint segment for a rule that applies at every width.
Choose the right alignment tool
| Goal | Utility |
|---|---|
| Position items along the main axis | justify-content-* |
| Position all items along the cross axis | align-items-* |
| Position one item along the cross axis | align-self-* |
| Distribute several wrapped lines | align-content-* |
| Push one item away from its siblings | ms-auto, me-auto, mt-auto, or mb-auto |
The main and cross axes depend on flex-direction. When the direction changes from row to column, the meaning of horizontal and vertical alignment changes with it.
Practical safeguards
- Keep DOM order logical even when using reverse or order utilities.
- Add
gap-*for consistent spacing instead of margins on every child. - Test wrapping at narrow widths, with long translations, and at 200% zoom.
- Use the grid for page-level column systems and flex utilities for one-dimensional component layout.
- Prefer custom CSS when a long class list obscures the component's purpose.
For broader toolkit context, compare popular CSS frameworks. These HTML editors can help inspect the resulting markup, and this guide to Bootstrap 5 modals shows how flex-based utilities appear inside a larger component.
Related Articles
 Lesson 42: Large Grid in Bootstrap 54 minutes read
 Lesson 38: Grid Systems from Stacked to Horizontal in Bootstrap 54 minutes read
 Lesson 15: Pagination in Bootstrap 54 minutes read
 Lesson 4: Typography in Bootstrap 512 minutes read
 Lesson 29: Utilities in Bootstrap 59 minutes read
 Lesson 39: Ultra-Small Grid Styles in Bootstrap 54 minutes read
Reader Comments 0
Sign in with email or Google to join the discussion.