Introducing the Windows Live Mesh 2011 application
According to recent conflicting information, Microsoft is still hesitating about the fate of Live Mesh / Sync synchronization service based on the cloud technology platform ....
TipsMake.com - According to recent conflicting information, Microsoft is still hesitating about the fate of Live Mesh / Sync synchronization service based on cloud technology . After a few introductions to Live Mesh Public Beta and subsequent renaming, the service was unified as Live Mesh 2011, and here are a few basic things about this service.
Microsoft Live Mesh 2011 allows users to use 'technology clouds' to store, synchronize data, share files between PC and Mac computers. If you are using Live Mesh Beta, you will certainly receive a notification email from Microsoft about stopping providing this service on March 31, 2011:
'Bạn nhận thông báo này này vì bạn sử dụng Beta Mesh Live từ Microsoft. On March 31, 2011, the beta of Live Mesh will end, and the Live Mesh beta will stop working. Sau March 31, bạn sẽ không thể được truy cập được lưu trữ tập tin nào trong Live Desktop của bạn hay kết nối với máy phục vụ các người dùng using Live Mesh software. Bạn tập tin sẽ còn thoát khi đồng thời giữa các máy ảnh của bạn và Live Live Mesh storage. Hãy đọc dưới đây để hành động làm việc bạn đưa ra. '
In the next section, we will learn how to install and use the final version of Live Mesh.
Installation and setup:
Live Mesh is a component of the Windows Live Essentials 2011 Suite, and if you are using the Beta, you need to uninstall it. With Live Essentials installation manager, users just need to choose to install all or certain components:

Keep in mind that you must remove the beta first, then install on each computer to synchronize the necessary data:

Installation process completed:

Start the program from the Start Menu in the All Programs Windows Live section :

Or type the keyword keyword Mesh in the search box:

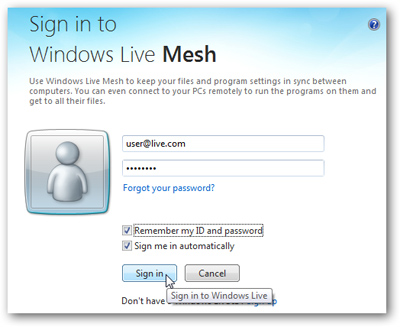
Log in to the program with a Windows Live ID account, you might consider using the Remember your ID and Password function and Sign in automatically if you want:
The main interface of Live Mesh 2011, where you can synchronize data between your computer and other supported devices:
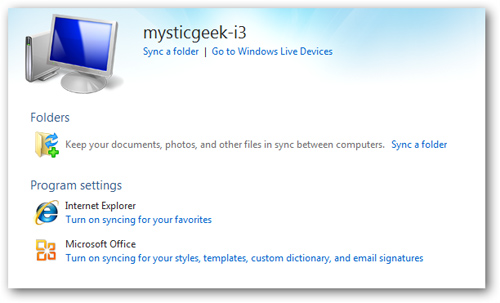
Synchronize files and folders between computers
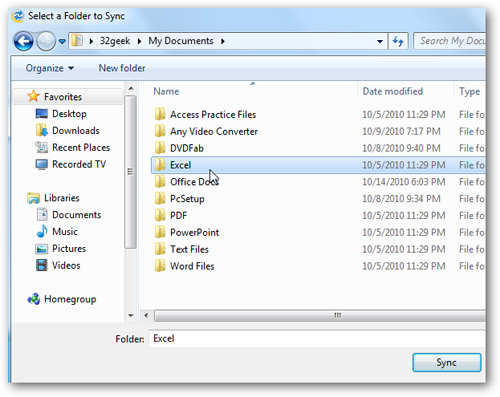
And now, we will test this function between computers using Windows operating systems (currently it supports Mac OS X, but we do not have the test conditions yet), boot Live Mesh and select Sync a folder path :

Then point to the folder to exchange data and press the Sync button:
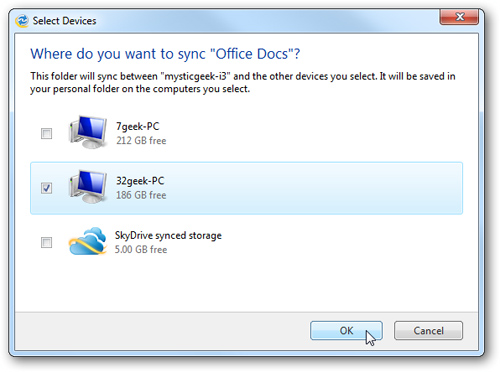
And then choose the computer to transfer data to:
The whole process of the process is displayed:
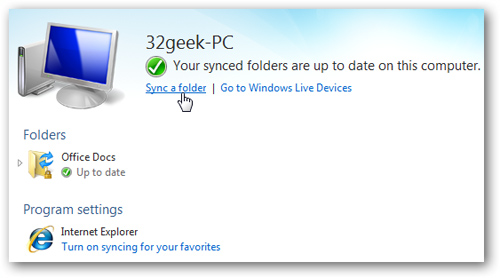
After finishing, you will see all data has been successfully synced:

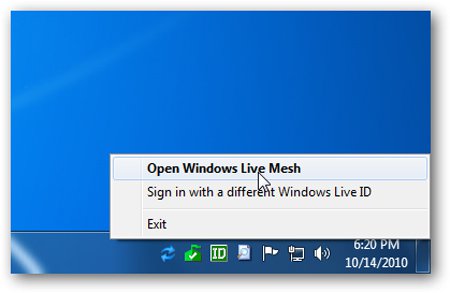
Live Mesh works in underground mode, and keeps track of all synced folders to detect changes. Whenever users add new files to that folder, they will be updated immediately between computers, you can open the program in the Notification Area tray of the Taskbar:
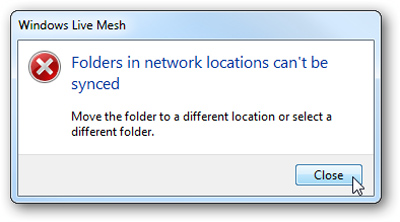
By default, shared folders on Network Locations cannot be synchronized with Live Mesh 2011, currently only compatible on Windows Server 2003, 2008, and Windows Home Server Version 1:
Sync folders with Live Mesh and SkyDrive
One of Microsoft's popular online data sharing services is SkyDrive, with a new version of Mesh, which allows users to use up to 5GB of data. Open Live Mesh and select Sync a folder :
Select the folder to backup and press the Sync button:

Unlike the previous step, this time choose SkyDrive synced storage and click OK :

The sync process is in progress:

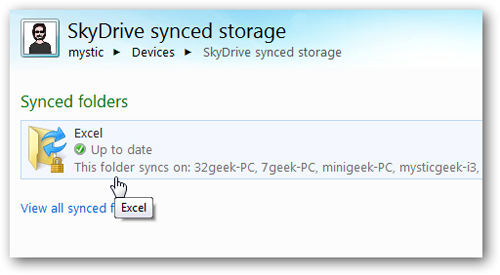
To review the list of specific folders or files successfully synchronized, press the SkyDrive synced storage button and log in with your Live account if required:

For example, here is an Excel folder that has been backed up to SkyDrive, click on the folder icon to view the entire contents:
Here we can see it directly or download it, but there is currently no way to open these files with MS Office Web Apps from Synced Storage of SkyDrive - a quite disadvantageous point.
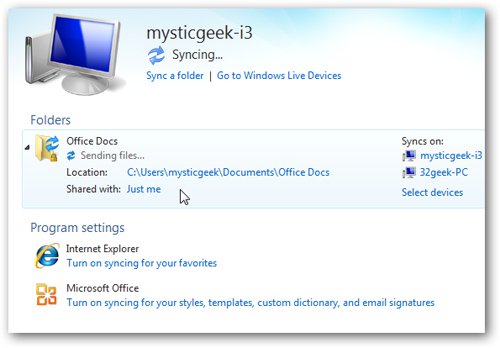
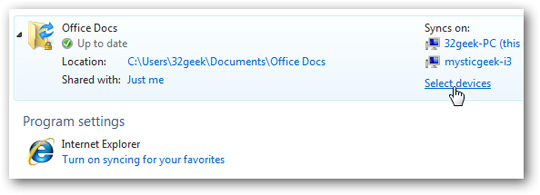
Detailed and specific information on other shared computers, current status, specific capacity:

Sync folders with other computers and SkyDrive
On the other hand, users can choose multiple computers and your SkyDrive Synced Storage item once. For example, we need to back up the Office Docs folder between multiple computers and SkyDrive Synced Storage, select Select devices :
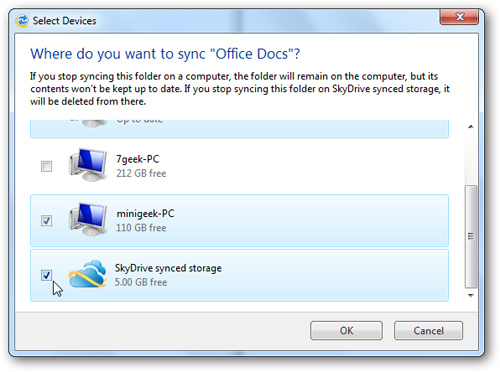
And choose where to synchronize the folder, here is the Netbook device and SkyDrive Synced Storage:
Remote connection to another computer
Another unique feature of Live Mesh 2011 is that it can connect, access and control remote component computers:

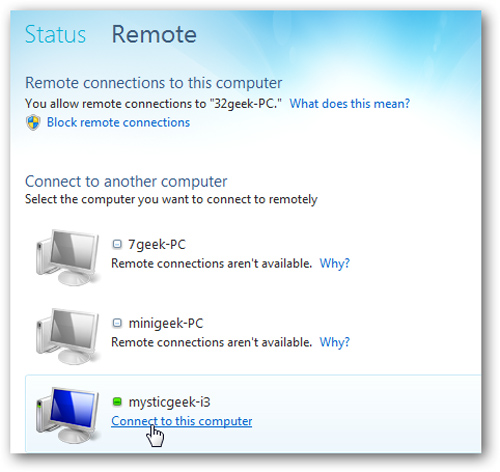
But you have to remember to enable Allow remote connections to this computer on each computer you need to access:

As in the example below, there are 2 computers that have not yet been controlled and remote access properties:
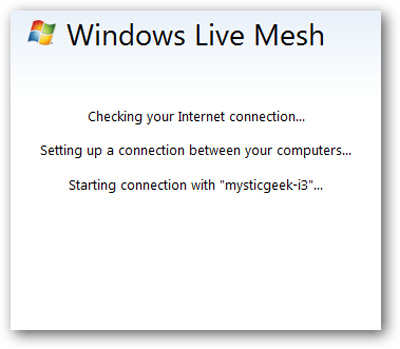
Select the link Connect to this computer and wait for the connection creation process to complete:
Below is the control screen when connecting to a Netbook using Windows 7:

In the control menu bar, users can use different functions, such as sending Ctrl + Alt + Del commands to the machine in control:
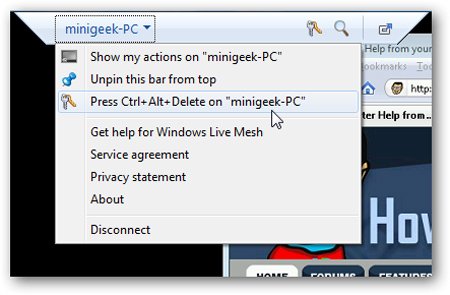
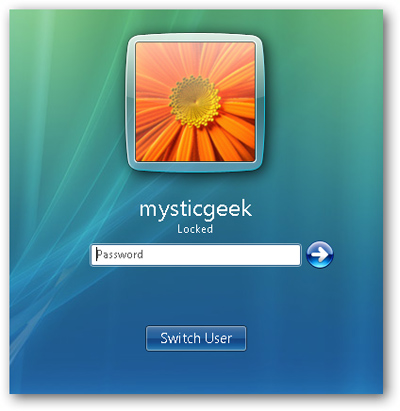
While connecting, if someone is using that computer, they will be "thrown" out:
Select Show my action on computer name to display the desktop and what you are doing:
Click on the magnifying glass icon to change the display area when connecting to another device:
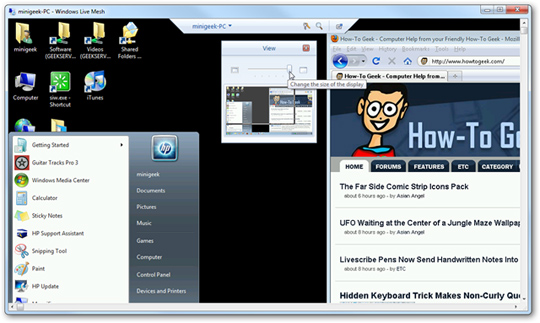
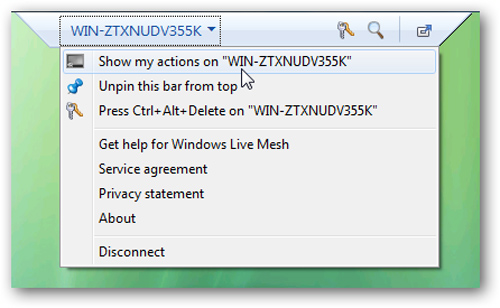
The following example is an image that connects to a Windows Vista computer:

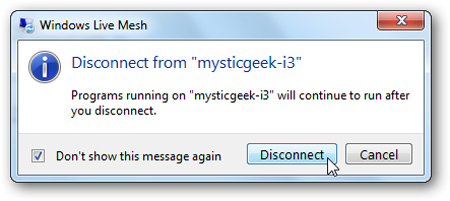
At the end of the process, you simply select Disconnect to disconnect from the computer:
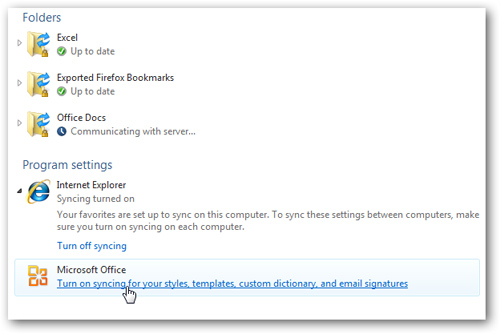
Synchronize program settings between multiple computers
Another function we will look at here is to combine the settings of Internet Explorer and MS Office among many different computers. In Live Mesh 2011, you select Program Settings and click Turn On on each program to combine, perform this operation on computers that need to synchronize together:
For example, any computer using IE9 with MSN bookmarks is available:
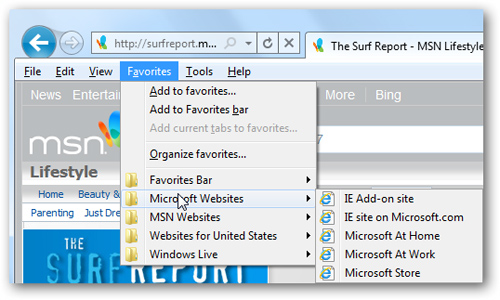
After enabling IE9's combination of settings, you can use bookmarks from other computers:

Live Mesh 2011 currently works well and stable on different platforms such as Windows Vista, Server 2003, Server 2008, Windows Home Server Version 1, Mac OS X 10.5 or higher . but does not work on Windows XP With so many new utilities, Live Mesh 2011 will become an effective tool for users. Good luck!