Table of Contents
Storage Sense is one of the useful features that helps you organize storage space on your computer more effectively. This tool will automatically delete junk files, temporary files on the system along with many options to automatically delete files. Below are instructions for using Storage sense Windows.
What is Storage Sense?
When the free storage space on your computer is insufficient, the system performance will decrease. In this case, you need to remove unnecessary things from the system.
Storage Sense is a feature that helps you manage your disk space more efficiently and free up space. With the help of Storage Sense, unnecessary temporary files, system files, apps and features, and more are removed from your computer.
Storage Sense can find and delete the following items:
- Temporary files
- Apps & Features: Uninstall unwanted or unused programs on your computer.
- System & reserved: allows you to delete unnecessary restore points.
- OneDrive: delete unused files stored in the cloud.
- Other file types
How to use Storage sense via Settings
Step 1:
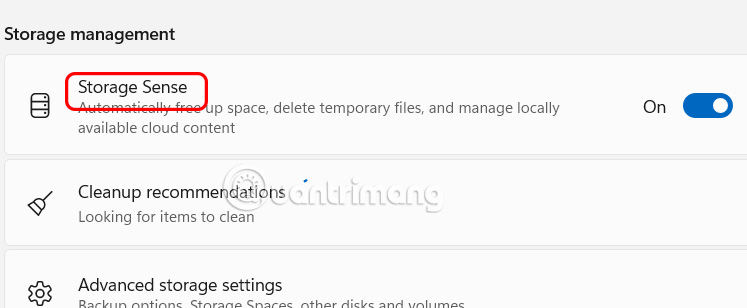
You open Settings on your computer, then select System and look to the side, select Storage Sense and activate this tool .
Step 2:
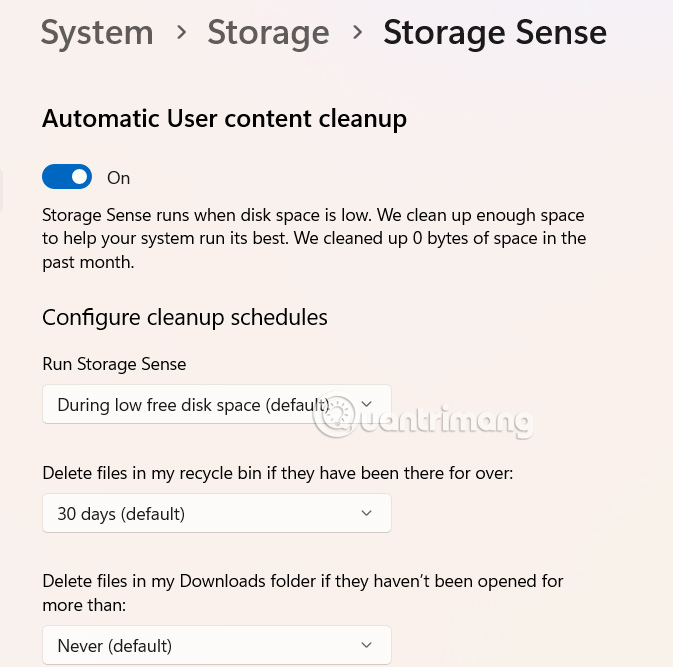
To customize Storage Sense, expand the tool and adjust how often Storage Sense runs and cleans.
In the Configure Cleanup Schedules section, adjust when Windows should run Storage Sense and when it should delete files in the Recycle Bin and Downloads folders.
Using Storage sense via Group Policy Editor
Step 1:
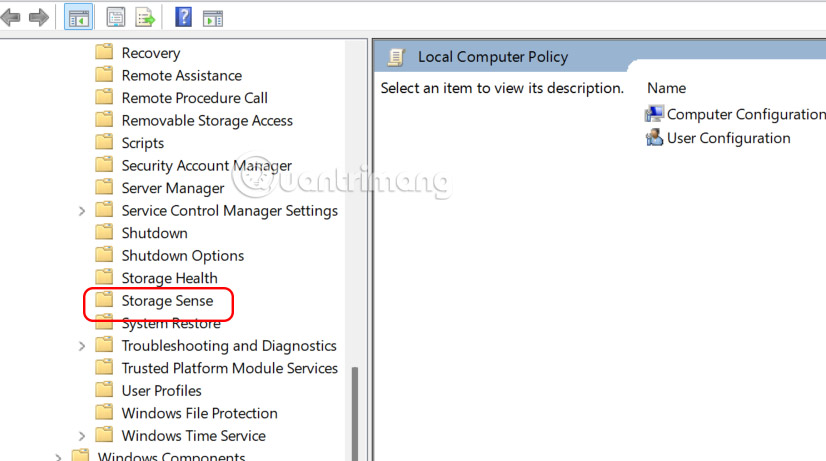
Press the Win + R key combination to open the Run dialog box and enter the keyword gpedit.msc . Switch to the new interface, access the path Computer Configuration > Administrative Templates > System > Storage Sense .
Step 2:
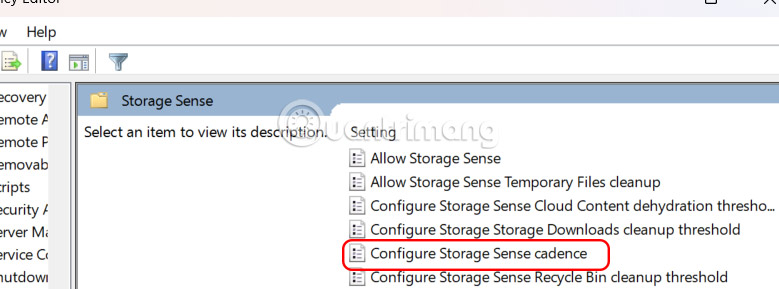
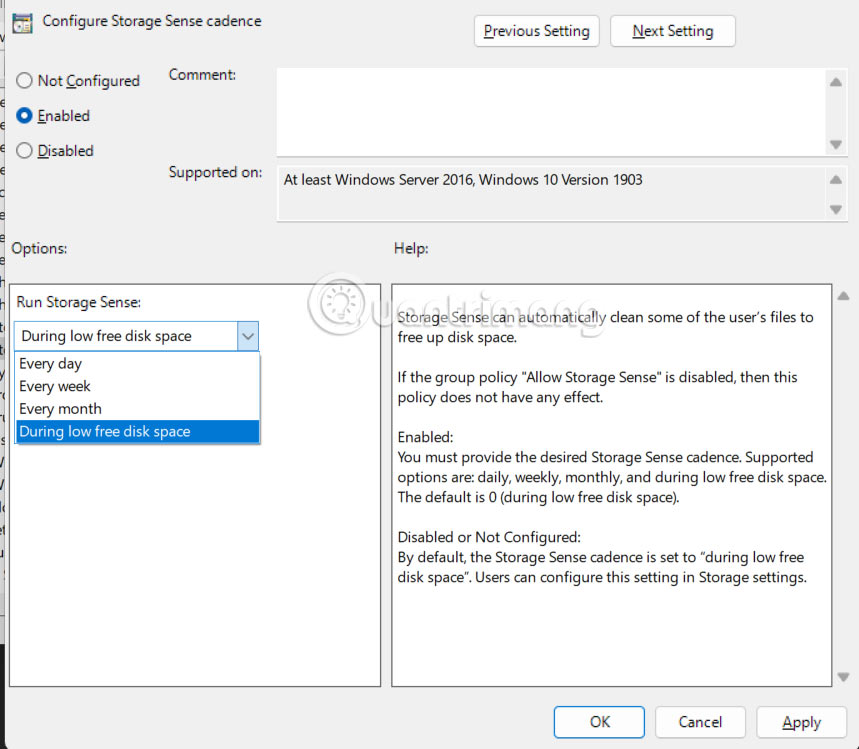
Then double select the Configure Storge Sense cadence value .
Step 3:
In the new interface that appears, click Enabled and then select the menu below to select the time to launch Storage sense at Run Storage Sense.
Final Thoughts
Following the steps in order and checking version-specific settings should make it easier to Use Storage Sense Windows to Free up Disk Space. If an option looks different, verify the device, app, or operating-system version before changing additional settings.
FAQ
What is the best way to Use Storage Sense Windows to Free up Disk Space?
Start with the requirements described in the article and follow the steps in order. Storage Sense is one of the useful features that helps you organize storage space on your computer more effectively. This tool will automatically delete junk files, temporary files on the system along with many options to automatically delete files.
What should you know about What is Storage Sense??
When the free storage space on your computer is insufficient, the system performance will decrease. In this case, you need to remove unnecessary things from the system.
What should you do if the instructions do not match your screen?
Check the device, software version, account permissions, and regional settings. Interfaces can change after updates, so use the closest matching option and consult the official support documentation when necessary.
Related Articles
 How to Use Disk Quota to Limit Windows Storage Capacity4 minutes read
 Automatically Frees Free Space on Windows 10 After 30 Days5 minutes read
 4 Best Disk Capacity Analysis Tools on Windows 108 minutes read
 Free Up Hard Drive Space Automatically on Windows 10 with Disk7 minutes read
 Methods to Expand Storage Memory for Computers Quickly7 minutes read
 Disk Quotas Configuration in Windows 20037 minutes read
Reader Comments 0
Sign in with email or Google to join the discussion.