How to create a portable PC diagnostic USB with your favorite, open-source tools
Instead of keeping track of multiple recovery drives, create a single bootable USB rescue media with password reset tools, virus scanning, disk backup software, and benchmarking utilities.
Table of Contents
Windows has some great diagnostic tools for troubleshooting your computer, but what if you could create a USB drive with all the diagnostic tools you need? Instead of keeping track of multiple recovery drives, create a single bootable USB rescue media with password reset tools, virus scanners, disk imager software, and benchmarking utilities.
Why choose Ventoy + PhoenixPE for diagnostic toolkit?
Ventoy's versatility with the PhoenixPE environment
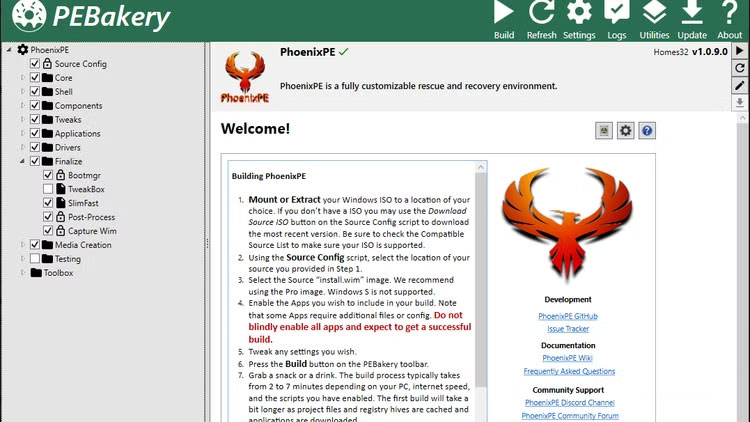
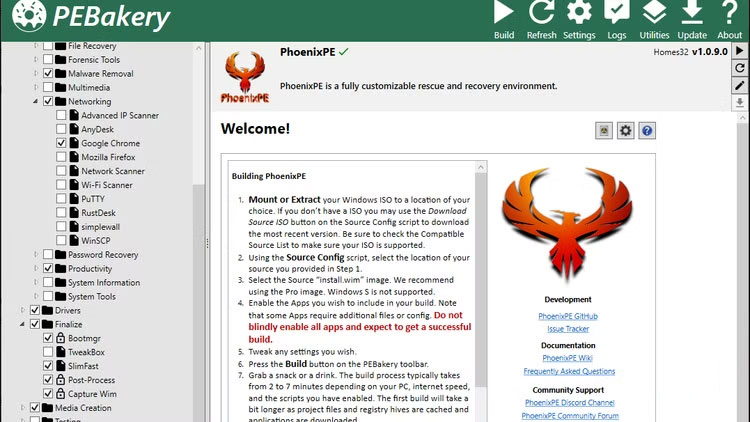
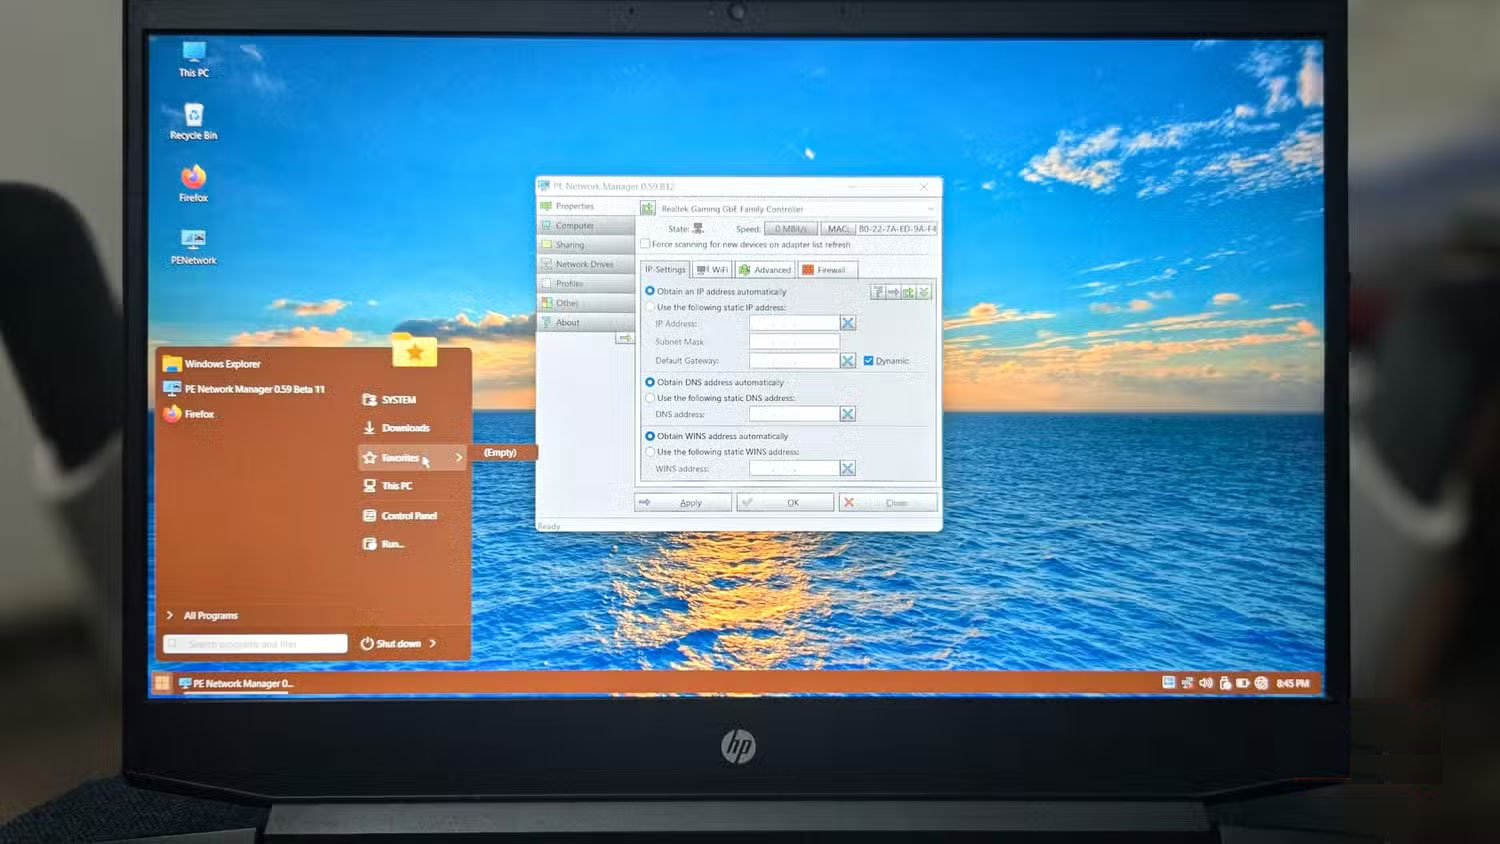
PhoenixPE is a WinPE security/recovery environment based on Windows 10 and 11. Think of it as a lightweight version of Windows that runs entirely from RAM . It includes diagnostic tools, recovery utilities, malware removal apps, and repair software that work even if your main Windows installation won't boot.
While PhoenixPE offers some great features, tools like MemTest86 or the Windows installer require their own environment. So instead of dealing with multiple USB drives or constantly overwriting your boot media, you can install PhoenixPE on a Ventoy multi-boot USB.
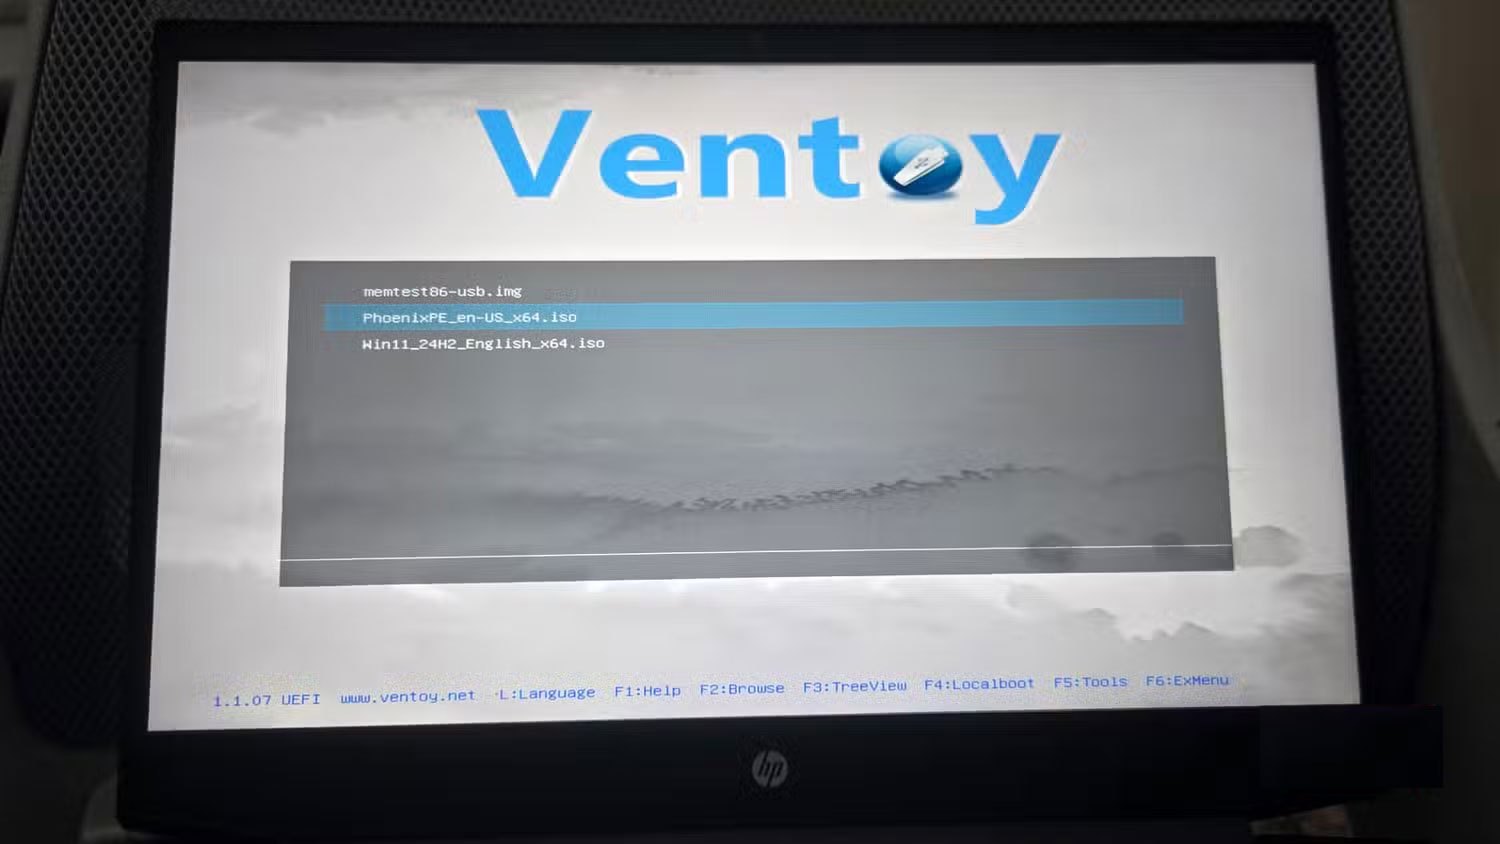
This combination allows you to boot multiple ISOs from a single drive. Ventoy acts as the bootloader, providing a clean menu for all the ISOs, while PhoenixPE provides a full Windows environment with diagnostic tools when you need them.
Prepare everything you need before you start
Download essential software and prepare your workspace
Before you take out the USB drive, you should download everything you need and prepare the PhoenixPE ISO first. This way, when the Ventoy drive is ready, you can immediately copy all the tools to it.
Start by creating a new folder called WinPE on your desktop – this will be your workspace. Next, download the following essential tools:
- PhoenixPE : Extract this ZIP file and move all the contents into the WinPE folder .
- .NET 6.0 : Required to run the PhoenixPE builder. Install this tool if you don't have it already.
- 7-Zip : Download and install this file extraction tool if you don't already have it. You'll need it to extract the Windows ISO later.
- Ventoy : Download but don't run it yet; we'll use this tool after creating PhoenixPE.
- Windows 11 ISO: Go to the Windows 11 download page . Under Download Windows 11 Disk Image (ISO) for x64 devices , select Windows 11 (multi-edition ISO for x64 devices) and click Confirm . Then, select your language and download the 64-bit version of the ISO file.
We recommend building PhoenixPE in a virtual machine to avoid conflicts with your main system. If you are building directly on your PC and encounter an error launching PEBakery, you may need to temporarily disable virus and threat protection, along with reputation-based protection in the Windows Security app.
Building a custom PhoenixPE environment
Create Windows PE using the diagnostic tools you selected
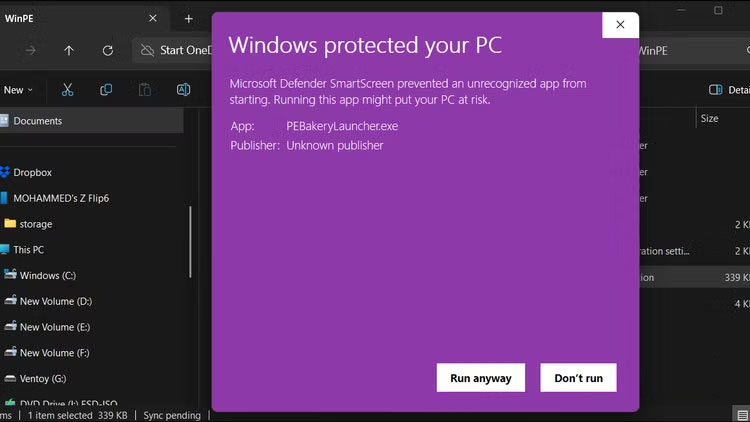
Run PEBakeryLauncher.exe from the WinPE folder . You may see a Windows protected your PC screen . This happens because Windows Defender doesn't recognize the software's digital signature, since it's an open source tool built by the community. The file is safe to run, but you can scan it with an online virus checker if you want to be sure.
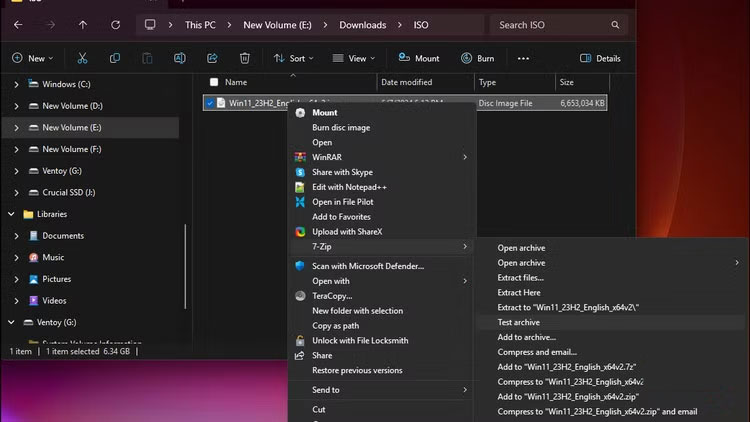
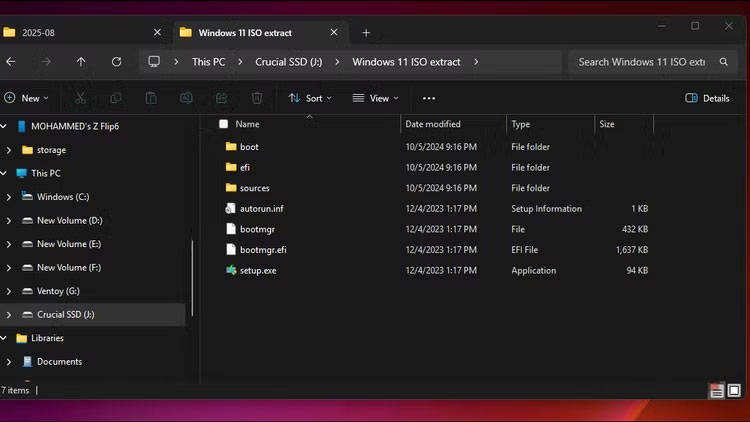
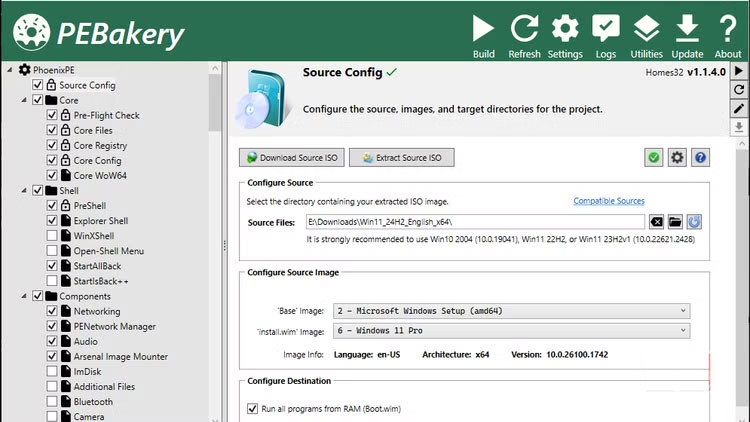
Now you need to add the source files from the Windows 11 ISO file to create WinPE. PhoenixPE includes an option to download the source ISO directly from Microsoft's servers, but this option didn't work in our testing. Instead, extract the Windows 11 ISO you downloaded earlier. To do this, right-click the ISO file, then select 7-Zip > Extract to [folder name] .
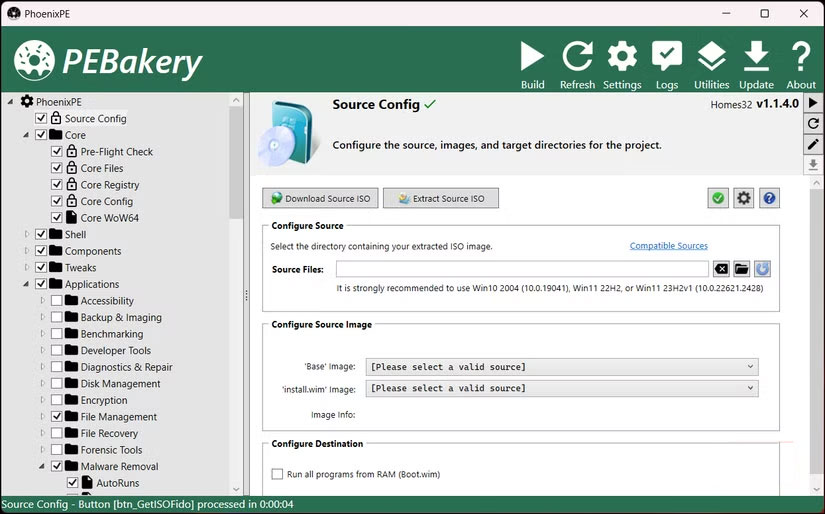
In the PhoenixPE window, click Source Config , then select the Folder icon (browse) for Source Files and select the extracted folder. In Configure Destination , select the Run all programs from RAM (Boot.wim) option for better performance.

Select application
Start with a few essential apps
Instead of downloading all the available applications at once, start with a few essential applications. This is a good way to build a stable WinPE without running into compatibility errors, which you will encounter during the build process.
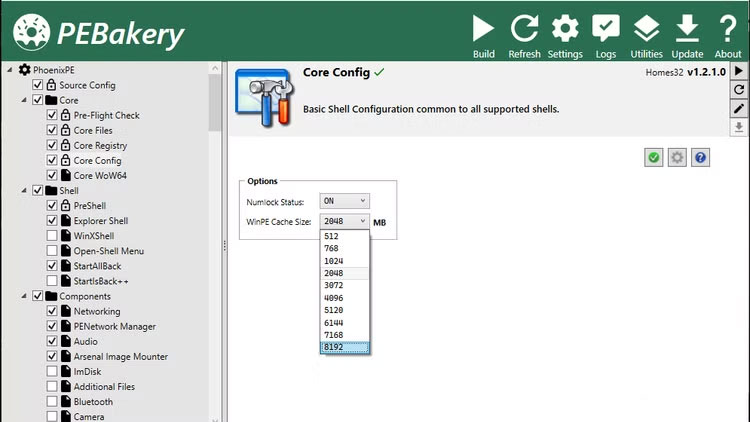
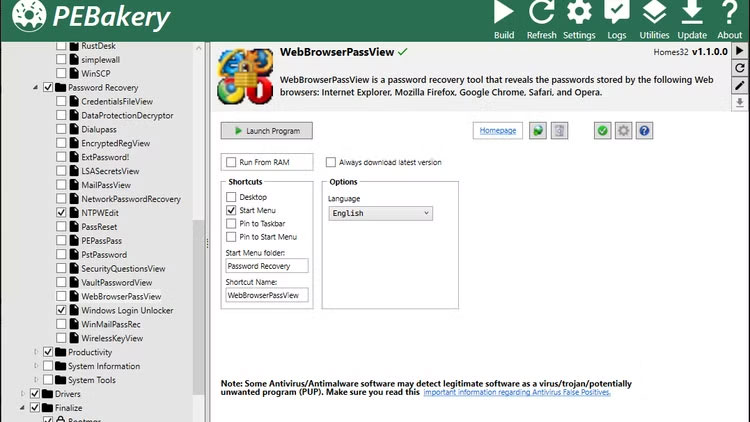
Leave the Shell , Components , and Tweaks items at their default options. Then, expand Applications > Password Recovery and select NTPWEdit and Windows Logon Unlocker . As the names suggest, these tools can help you reset or remove your local Windows account password when you're locked out of your computer.
Then, navigate to Applications > Network and select Google Chrome . Having the browser in the recovery environment allows you to download drivers or look up error codes without needing another device.
Create Ventoy USB and add tools
Prepare boot drive with all diagnostic ISOs
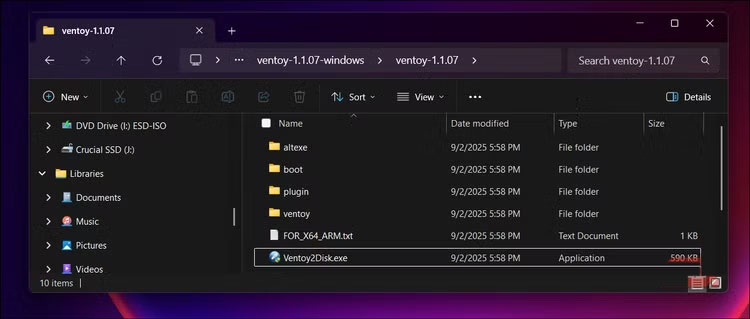
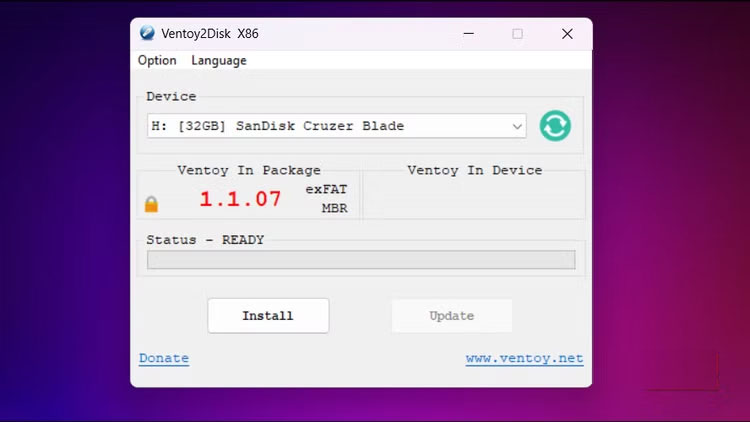
Now it's time to prepare your USB drive. To do this, run Ventoy2Disk.exe , then select your USB drive from the Device drop-down menu and click Install . Your drive will be formatted, so back up any important data on the storage drive. Click Yes to continue, and once the installation is complete, click OK .
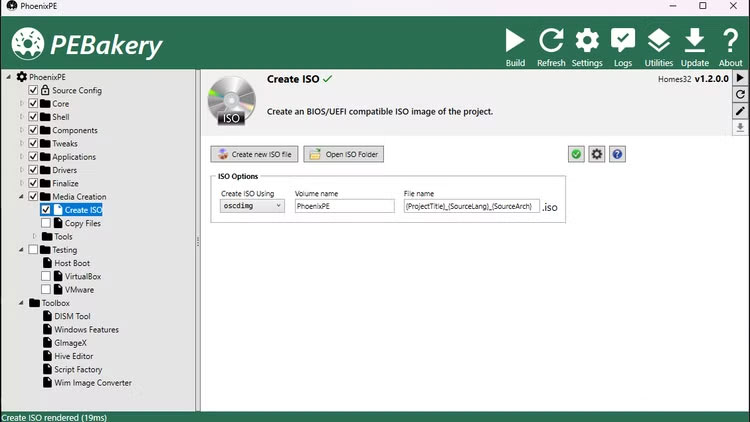
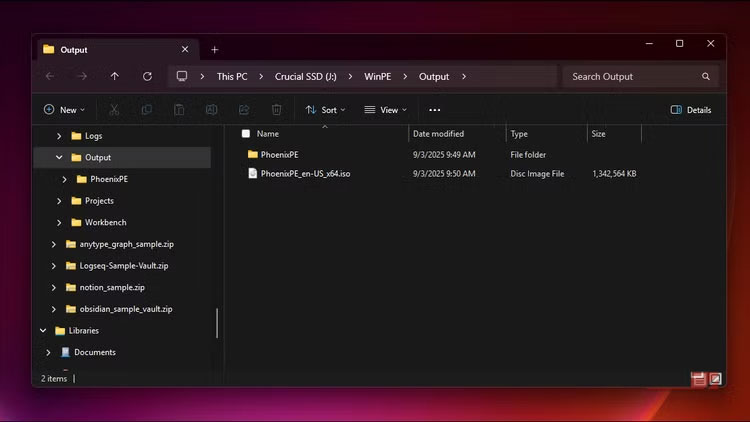
Next, copy the PhoenixPE_en-US_x64.iso file to the newly created Ventoy USB drive. Also, copy the original Windows 11 ISO, as this will allow you to do a clean install of Windows from the same boot drive if needed.
Since tools like MemTest86 and CloneZilla cannot run under Windows, keep them as separate ISOs on your Ventoy drive. MemTest86 requires direct hardware access to test memory, while Clonezilla requires a separate Linux environment for drive operations. Just download these ISOs and copy them along with PhoenixPE.
Was this article helpful?
Your feedback helps us improve.
Related Articles
 How to use Ventoy to make USB more useful5 minutes read
 10 Best Free Open Source Tools for Students6 minutes read
 Solve the real problem with the Network Diagnostic function8 minutes read
 4 Open Source AI Apps You Can Use Every Day4 minutes read
 How is AI helping open-source programmers 'do everything themselves'?5 minutes read
 5 great open source tools that keep your personal data safe8 minutes read
Reader Comments 0
Sign in with email or Google to join the discussion.