Table of Contents
This practical guide explains how to use namedrop on iphone to share contacts quickly with clear steps and useful context. It also covers common requirements, potential problems, and the details that can help you get better results.
Instructions for Using Namedrop on iPhone to Share Data
Step 1:
At the interface on the iPhone, we first need to activate AirDrop and set up the mode to receive data, or share data with others.
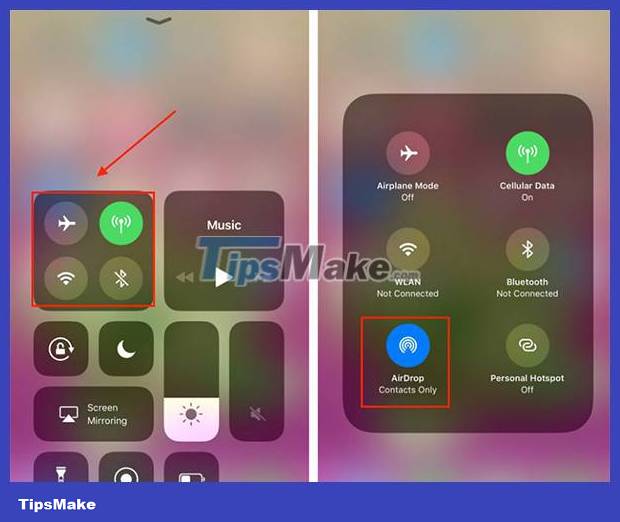
Step 2:
Next bring your iPhone near the iPhone or Apple Watch of the person you want to receive contact information. Right now the interface displays the Receive Only or Share option, depending on the needs. If you want to share your information, click Share , if you want to receive information, click Receive Only.

Step 3:
Show on screen your contact information. We can choose to share what personal information we want to share , by clicking on that information.
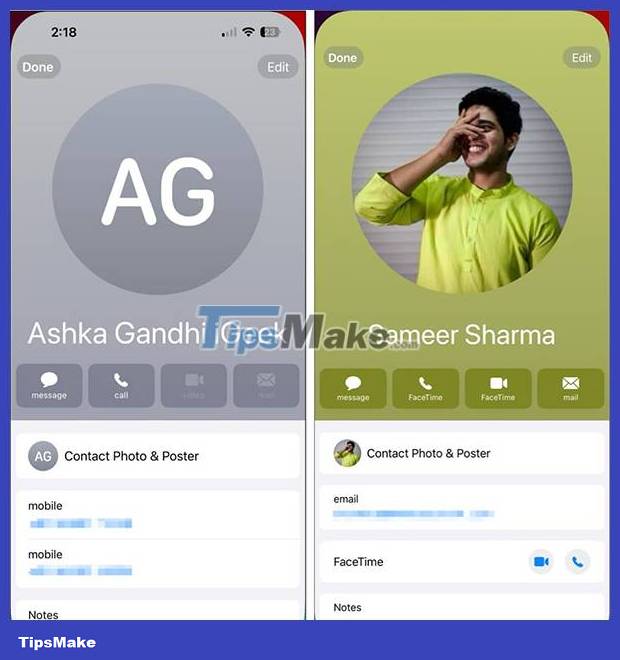
The process of sharing personal information using the NameDrop feature on iPhone is done right after. When the transfer of this personal information is completed, a notification will be displayed for the user to know.
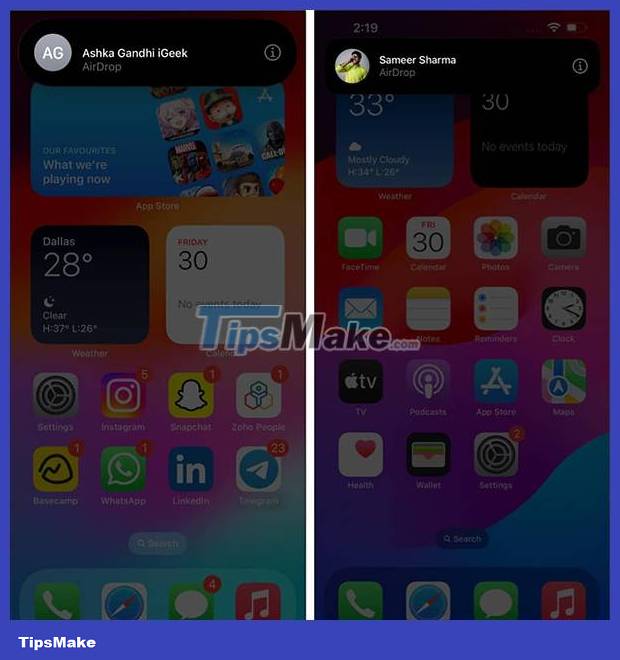
So with the NameDrop feature on this iPhone, sharing your personal information with others is much simpler and faster, instead of just transferring normal data via AirDrop like previous iOS versions.
Conclusion
Understanding Namedrop on iPhone makes it easier to compare options, avoid common mistakes, and apply the information in this guide more effectively. Review the relevant requirements before making changes or choosing a solution.
FAQ
How do you use namedrop on iphone to share contacts quickly?
Follow the steps in this guide in order, confirm the required settings or tools, and verify the result before making additional changes.
Is it safe to use namedrop on iphone to share contacts quickly?
It is generally safe when you follow the recommended instructions, use trusted tools, and avoid changing settings you do not understand.
What should you do if the process does not work?
Recheck the requirements, restart the device or application when appropriate, and review each step for missed settings or compatibility issues.
Related Articles
 Instructions to Deactivate Namedrop on iPhone2 minutes read
 Is the iPhone's NameDrop Feature Safe to Use: Complete Overview5 minutes read
 How to Share Contacts on Zalo: Share Zalo Contacts5 minutes read
 How to Insert Contacts in iPhone Messages3 minutes read
 Revealing How to Transfer Contacts from iPhone to SIM Super Quickly Explained5 minutes read
 How to Import Contacts from SIM to iPhone: Step-by-Step Guide4 minutes read
Reader Comments 0
Sign in with email or Google to join the discussion.