How to Use GarageBand to Record a Podcast
You can use Apple's free GarageBand app for Mac to record and edit basic podcasts.
Table of Contents
You can use Apple's free GarageBand app for Mac to record and edit basic podcasts. We can take advantage of the basic built-in features of GarageBand to record podcasts with supporting tools such as microphones and headphones. Here is a guide to using GarageBand to record podcasts.
How to use GarageBand to record a podcast
Step 1:
You open the GarageBand application then click to select new project on the application.
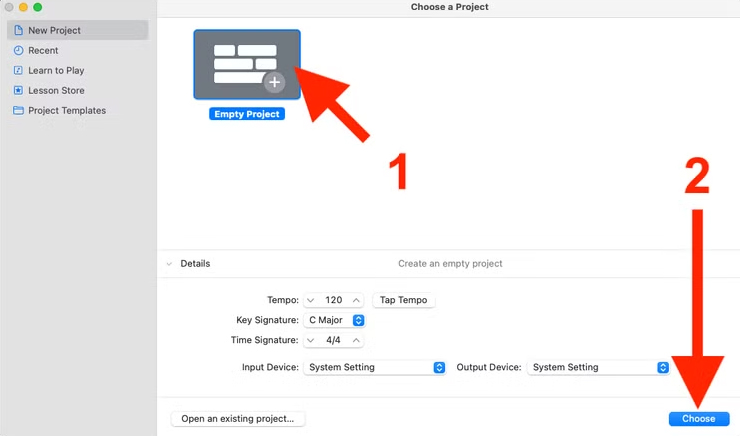
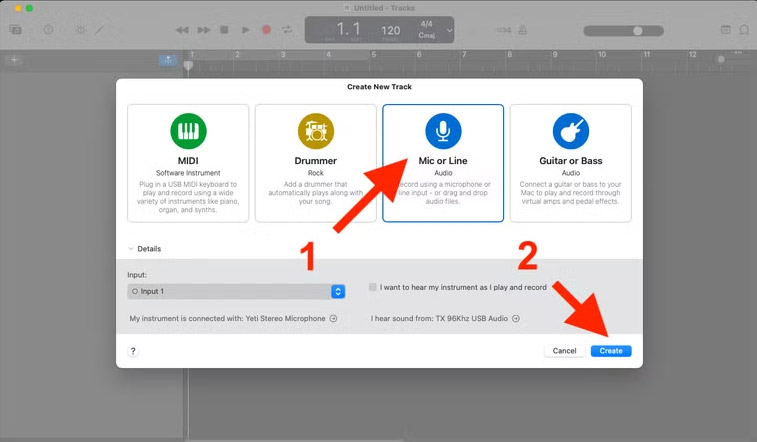
Show options for new project, we click on microphone track option and then click Create below.
Step 2:
We click the red record button on the toolbar or press the R key on the keyboard to start and stop recording.
Step 3:
Once you have your audio recording, you can edit it. Click and hold on the bottom left corner of the clip, then drag to the right to cut out the parts you want. Continue to adjust the end point of the audio. Adjust it so that you keep the audio you need in your podcast.

Step 4:
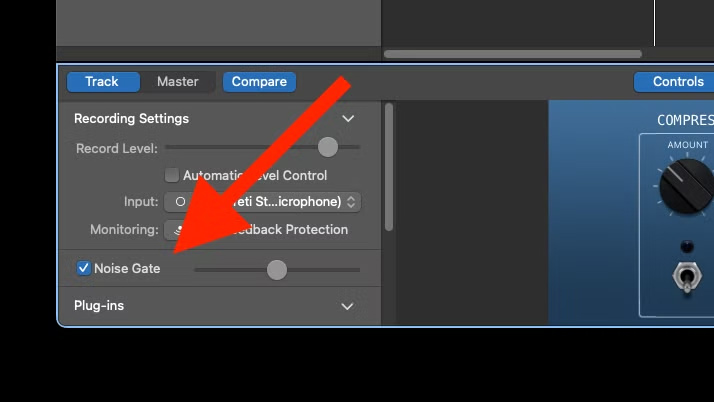
To remove background noise , we will use Noise Gate . This option will mute the track if the sound falls below a certain threshold. Click on Noise Gate below and adjust it so that the noise is completely removed.
If there is still noise, turn the volume up until you can't hear it anymore. If the noise starts to drown out someone's voice, turn the volume down. Background noise can still be heard when people are talking, but the track will be quiet when no one is talking.
Step 5:
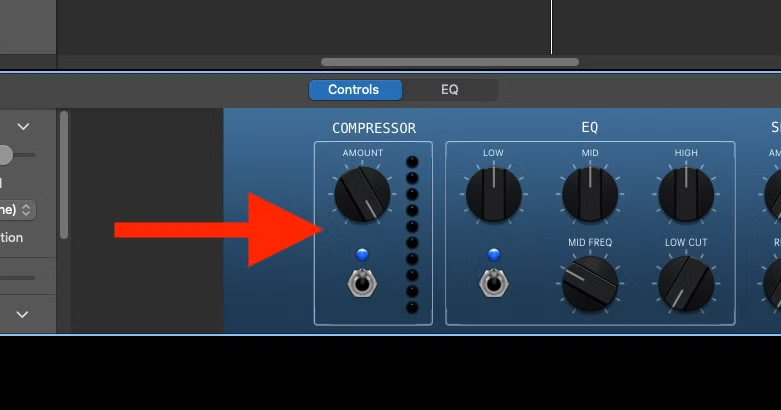
The Compressor tool limits the loudest and quietest parts of the recording, so you maintain a consistent volume while speaking. Tap the Compressor switch and adjust accordingly.
If you want the most consistent volume possible, set it to maximum. If you're recording a podcast that requires louder parts, set it to medium or low.
Step 6:
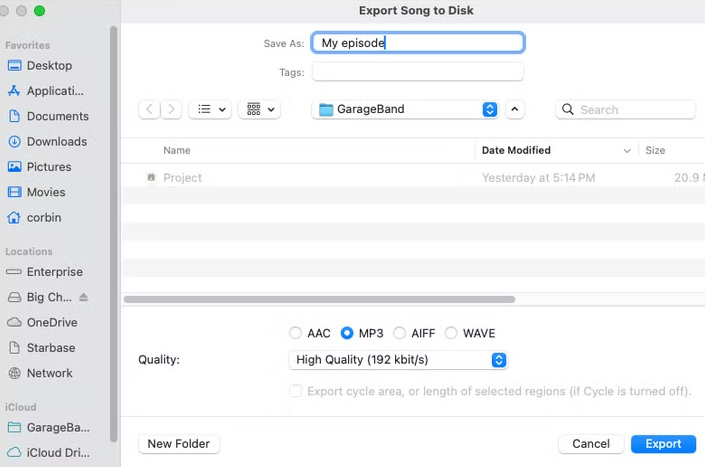
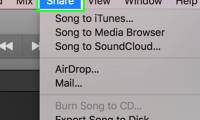
After editing the podcast, click Share > Export Song to Disk to do so.
Was this article helpful?
Your feedback helps us improve.
Related Articles
 4 GarageBand alternatives for Windows 105 minutes read
 Steps to record audio on a Mac4 minutes read
 Guide to improving Spotify podcast recommendations3 minutes read
 Learn about Akai's MPC Beats: GarageBand App for Windows5 minutes read
 How to create Podcast cover in Photoshop10 minutes read
 How to Edit Music on Mac13 minutes read
Reader Comments 0
Sign in with email or Google to join the discussion.