How to enable file compression to free up space in Windows 11
Windows 11 includes file compression settings to free up storage space on your computer. However, Windows 11's file compression feature only works with drives using the NTFS file system..
Windows 11 includes a file compression setting to free up storage space on your computer . This file compression feature only works with drives using the NTFS file system. When you move a compressed NTFS file to a different folder or drive, NTFS will decompress the files, move them to the new location, and then compress them again. Below are instructions on how to compress files to free up space in Windows 11.
Instructions on enabling file compression on Windows 11
Step 1:
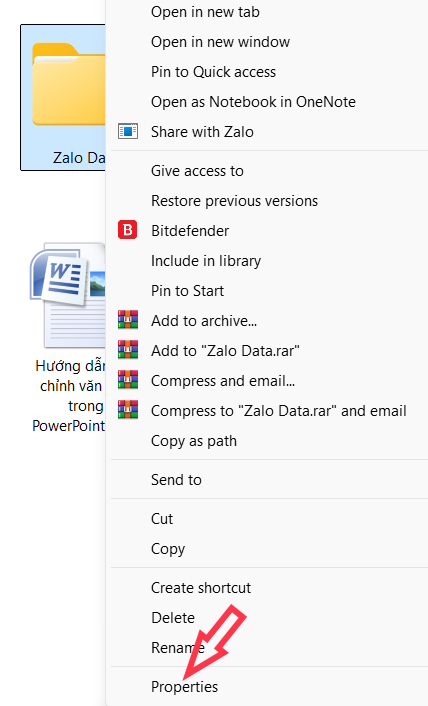
Right- click on the folder you want to compress to reduce the number of files and select Properties .
Step 2:
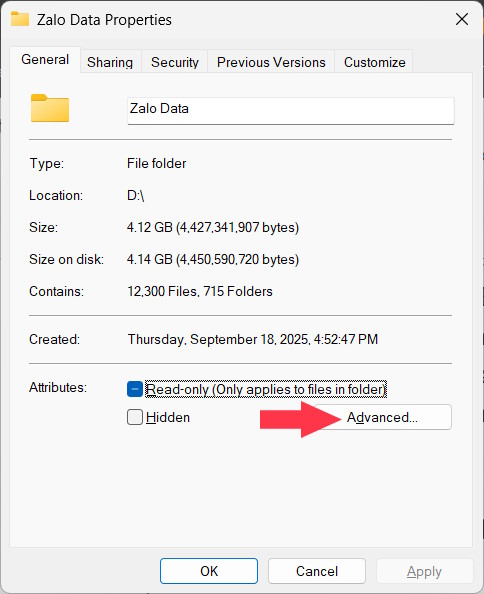
You click on the General tab , then click on the Advanced button .
Step 3:
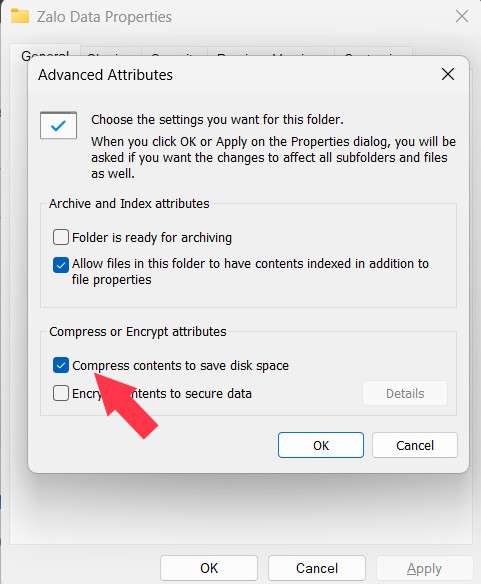
Switching to the new settings interface, we click on the option "Compress contents to save disk space" .
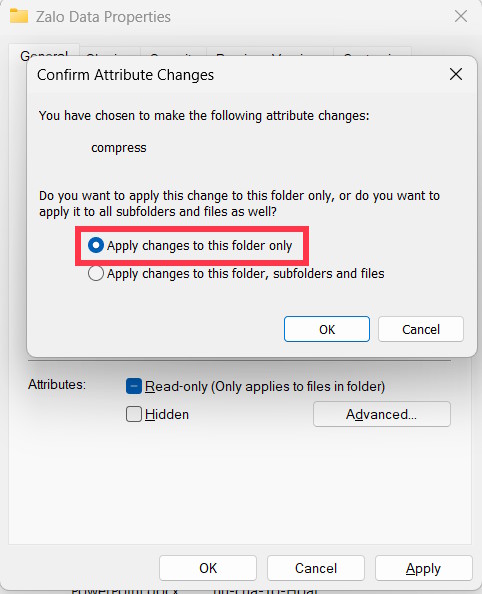
Click Apply to apply the new changes to the folder. You will then be asked which folder the changes apply to; click Apply changes to this folder only to apply them to this folder only.
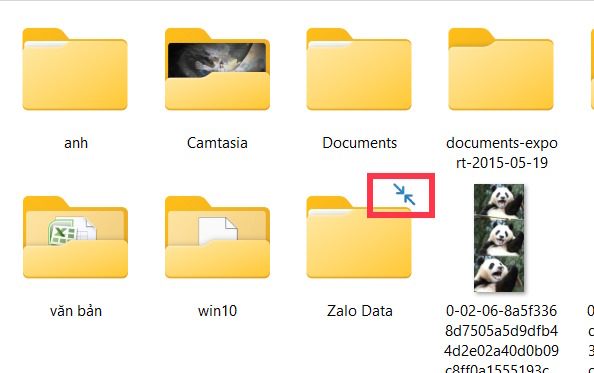
This action will activate NTFS file compression on the selected folder. You will see two blue arrows above the folder. These arrows indicate that the folder has been compressed.
Guide to compressing disk space on Windows 11
Step 1:
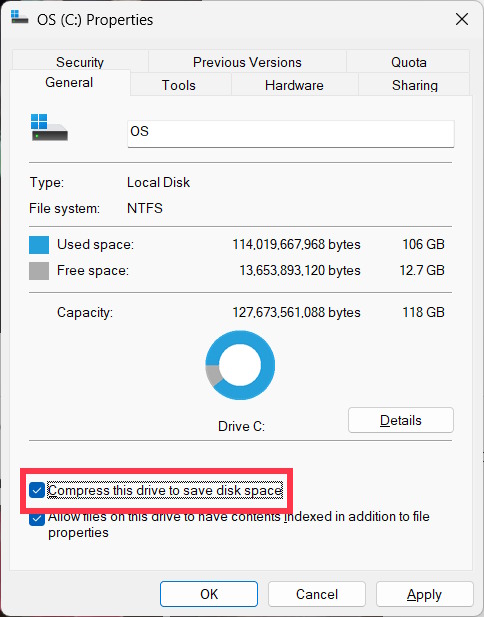
Right- click on the drive and select Properties from the list that appears.

Step 2:
To display the folder adjustment interface, click on "Compress this drive to save disk space" . Then select "Apply changes to this drive only" .
How to uncompress NTFS files via Command Prompt
Step 1:
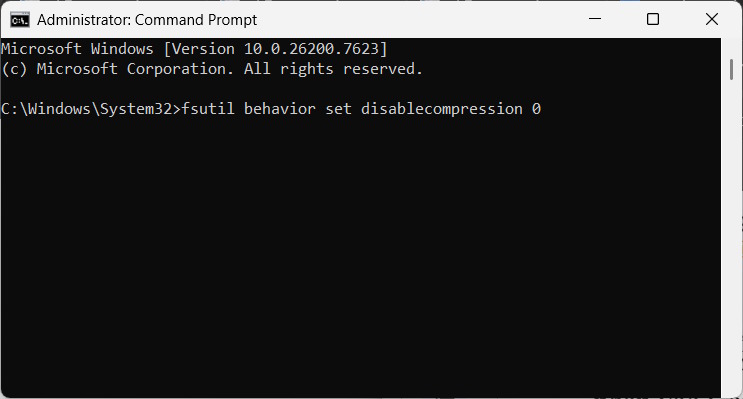
Type "Command Prompt" into the search bar and run it with administrator privileges . Then, enter the following command and press Enter.
fsutil behavior set disablecompression 0You will see a message indicating that you need to restart your computer for the changes to take effect.
Step 2:
We enter the following command to disable file compression on Windows 11.
fsutil behavior set disablecompression 1