How to Transform Mac Into Windows PC
Apple products are loved not only for their professional design, but also for their durability and security. A downfall however is not all programs are compatible with OS X. Running a specific Window's program or playing a Window games on...
Table of Contents
Part 1 of 4:
Preparing the computer
-
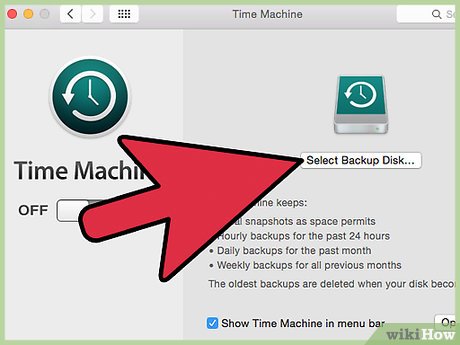 Back up your data on the Mac that will contain the new software.
 -
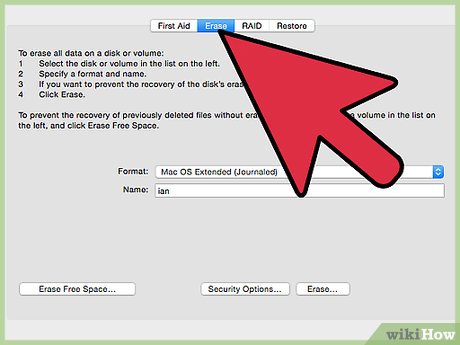 Clean the hard drive to ensure that you have enough space to occupy both OSX and Window's systems.
 -
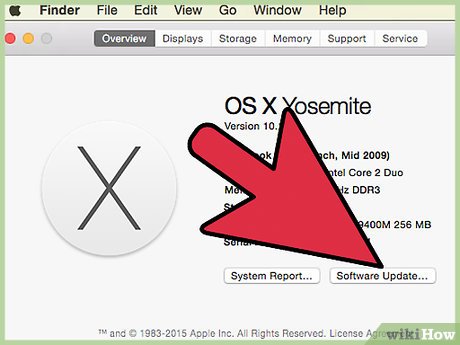 Update your Intel based Mac to latest OS X.
 -
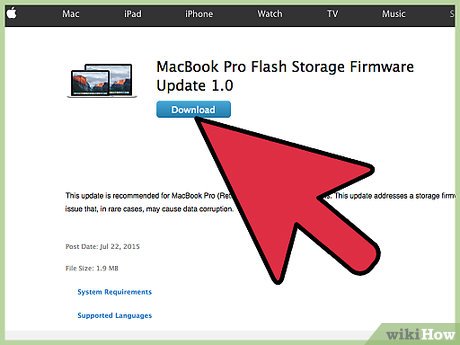 Download and install latest firmwares available to your Mac.
 -
 Close all open windows on the Mac.
 -
 If using portable computer make sure power adapter is connected.
Part 2 of 4:
Adding BootCamp Assistant
-
 Connect the external hard drive FAT format into the USB port on the Mac.
- Keep it connected while installing Windows support software.
-
 On the top right hand corner, type BootCamp Assistant in Spotlight. Then run the application.
 -
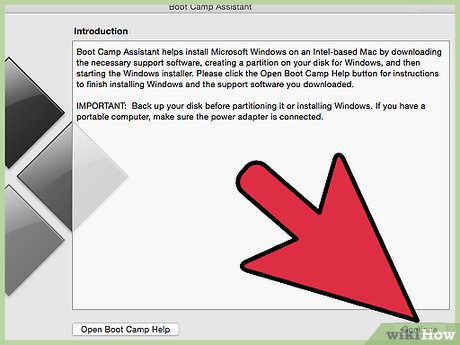 Click Continue after reading the introduction.
 -
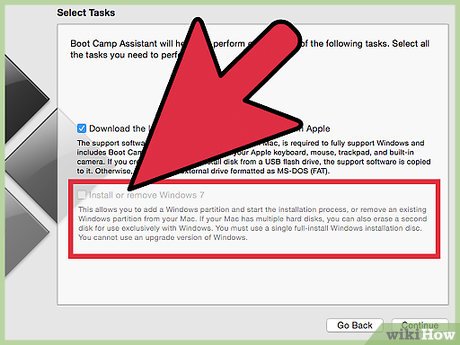
 Select Download the latest Windows support software from Apple task on page. Click Continue.
 -
 Quit. Once the installation is completed, quit and relaunch BootCamp Assistant.
Part 3 of 4:
Installing Windows 7 or higher
-
 Select Install Windows 7 or later version. Click Continue.
 -
 Drag the slider to adjust Windows' partition size. Click Install.
- Recommended 30 GB size for Windows.
-
 If BootCamp needs to update USB drive inserted, click Continue and allow it to update the USB.
 -
 Eject the USB drive from the desktop screen only. Leave the drive connected to the computer. The Mac will restart once the partition is completed.
 -
 Begin Windows installation by following the onscreen instructions displayed.
 -
 If asked which installation to use: Upgrade or Custom, choose Custom installation. If not asked anything, skip this step.
 -
 When asked to install Windows, scroll down until you find partition named BOOTCAMP. Click it.
 -
 Click Format then OK. Finally, click Next.
 -
 Continue the installation by following the simple onscreen instructions.
Part 4 of 4:
Switching from Windows to OS X
-
 Click the Boot Camp icon in the system tray. Choose Restart in OS X.
Was this article helpful?
Your feedback helps us improve.
Related Articles
 3D Transform in CSS3 minutes read
 2D Transform in CSS6 minutes read
 Turn Windows 11 interface into Windows 10 with just one click2 minutes read
 5 tools to help 'transform' Windows3 minutes read
 Appears a free game that allows you to practice being a hacker2 minutes read
 The trick to 'transform' the Lock screen of Windows 11 is more diverse2 minutes read
Reader Comments 0
Sign in with email or Google to join the discussion.