How to take a photo of a web page using the 'multi-zi-function' Marker
Marker: Screen capture tool for professionals is a utility installed on the Chrome browser, capable of taking photos of the entire website, editing photos and sharing them right on the Chrome browser.
Table of Contents
To take photos on a computer screen, we can use shortcuts or tools available on the Windows system. However, if you want to share that image right away, you must use photo editing programs such as Microsoft Paint, Adobe Photoshop, . to save the image to your computer, then proceed to share if you want.
There is a Chrome browser utility full of features, from computer screen capture, entire website, photo editing, photo sharing as Marker: Screen capture tool for professionals. The Marker utility supports you to take a picture of the entire website, or select a partition to take a picture. You can then edit, save in your account or share photos right from the Marker widget from Chrome browser.
Step 1:
First of all, we click on the link below to download and install the Marker utility on Chrome.
- Download the Marker utility
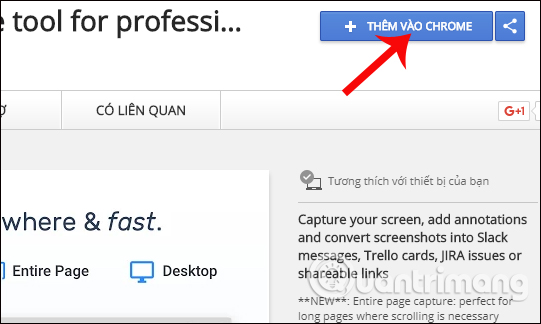
At the first interface, users click on Add to Chrome button to install.
Step 2:
A pop-up dialog box appears, click Add widget to complete the installation.

Finally, the Marker gadget's icon will appear at the end of the website address entry on the Chrome browser

Step 3:
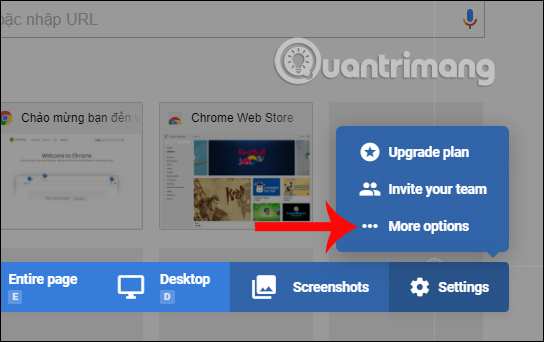
Next, double-click the utility icon on the browser. Show the Marker's custom bar, click the Settings tab and select the More options .
Step 4:
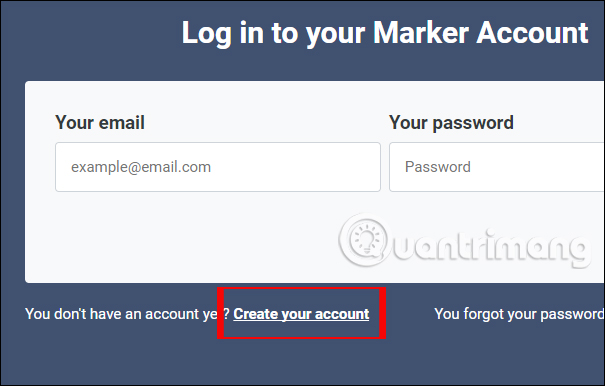
Switch to the new interface, click Create your account to create an account. Creating an account on the Marker utility will help users have more use options, than not registering an account.
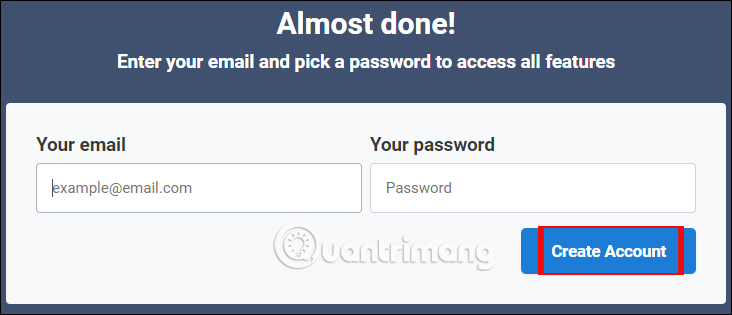
You only need to enter the required information and then click the Create Account button to create an account to use.
Step 5:
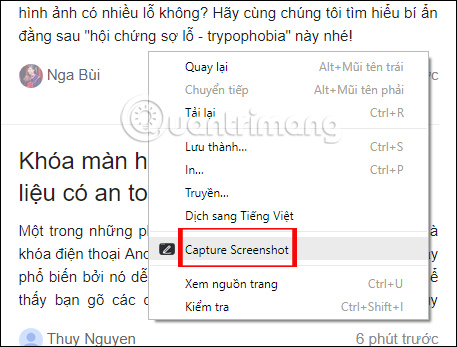
When creating an account using the Marker is completed, you access any website that wants to take a screenshot. To take a photo, right-click on the web page and select Capture Screensho t. Or click on the utility icon and also select Capture Screenshot.
Step 6:
Immediately after that, the screen interface will change to a black type. Below is a toolbar that provides shooting modes.
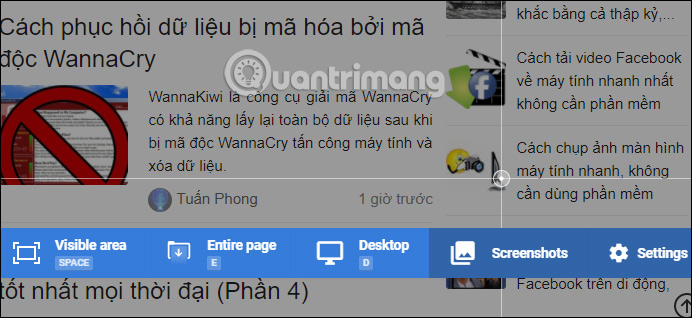
Here the tools will have different shooting modes:
Visible area : this tool's shortcut is Space or click Visible area to take a picture. Shooting mode is a screen capture of the browser page that is open.
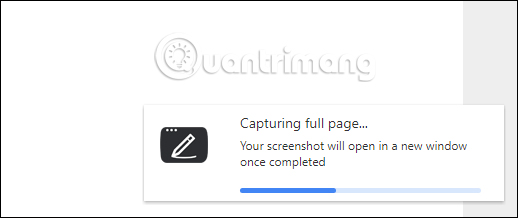
Entire page : full screen capture mode of the website. The shortcut key used is E. When used, the utility will automatically scroll the page and take a picture. If you are in the middle of the page, the utility will automatically scroll to the top of the page when it's done.
Desktop : allows you to capture the full screen of your computer. Shortcut is D. When shooting is complete, you can select your entire Screen capture (Your Entire Screen) or Application Window snapshot on Chrome (Application Window). Then, click Share at the photo card to save the results you choose.
Screenshots : users just need to drag the white circle button to capture any position on the web screen and release it to move to the editing step.
Users choose screen capture mode according to their needs. To exit the capture interface on the Marker, press the Esc key on the keyboard.
Step 7:
After the photo is taken, it will automatically switch to the image editing interface. As mentioned above, when we register for an account, we can proceed to edit images according to needs. Besides, photos after editing will be able to share on many services like Slack, Trello, GitHub, ., send emails with appointments.
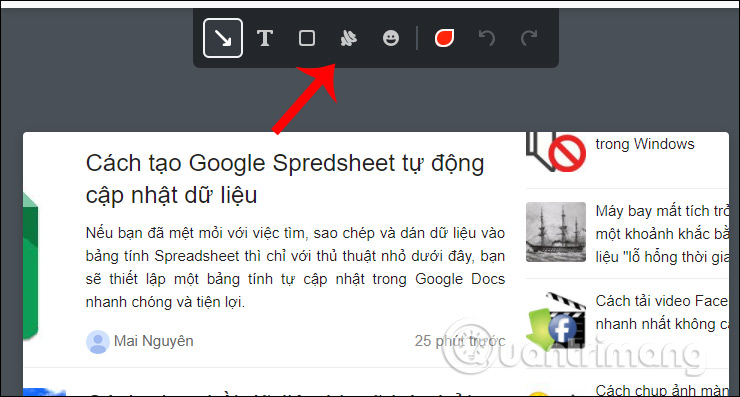
At the edit interface, the toolbar above includes functions from left to right: insert an arrow, insert text, create a square frame, draw a picture, specially insert emoji icons, change color history use, redo / undo button.
Step 8:
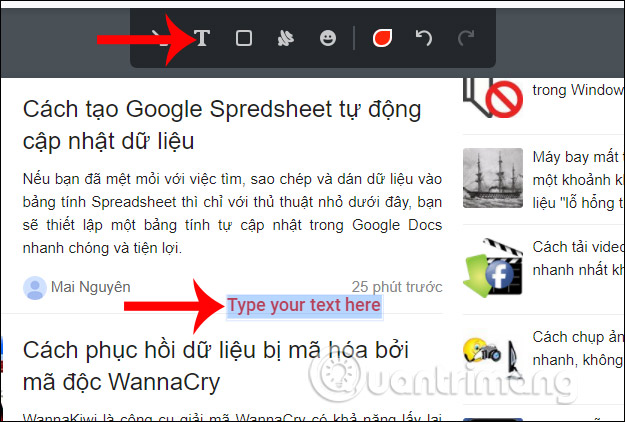
For example, if you want to add text to a photo , press the T icon and enter the text in the box Type your text here.
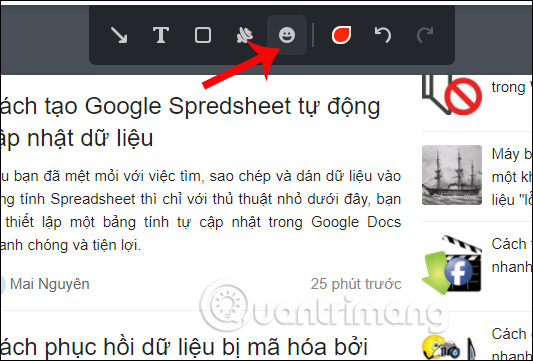
To add emoticons, click the smiley icon .
A list of emoji appears for users to choose. You can enter the emoji name in the search box above.
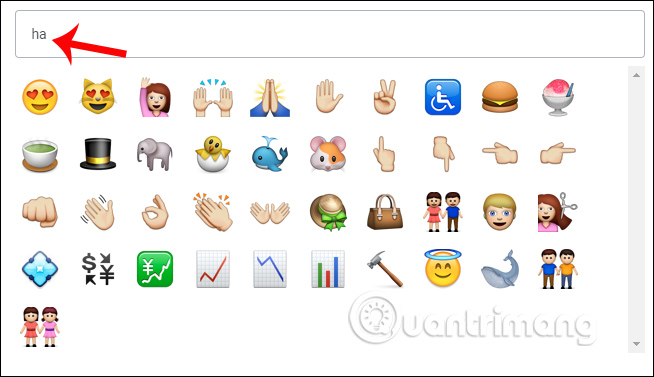
Once you have selected the emoji, click on emoji then click on the place you want to insert the icon and drag the mouse to show the emoji.
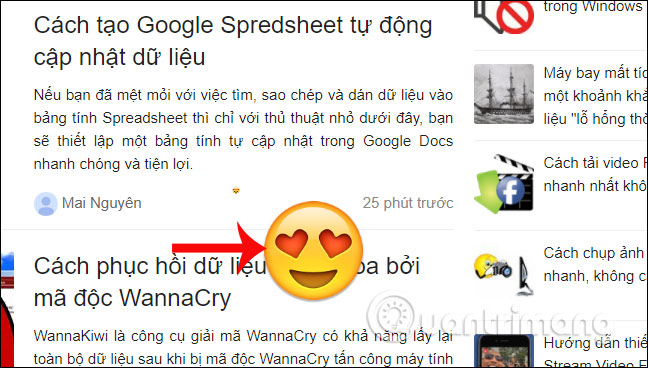
In addition, we can zoom in the size of the emoji or change the angle of the emoji by dragging the edges.

Step 9:
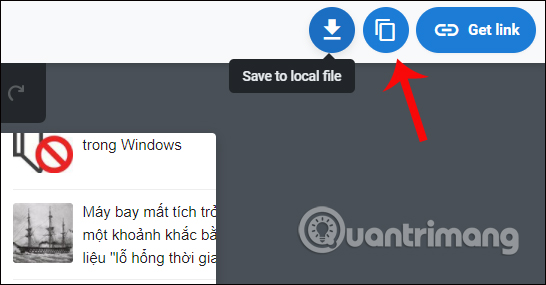
Finally, after editing, you can save it to your computer, copy it to clipboard, get the photo sharing link at the top right corner. Images will be saved in the Download folder with .png format.
Step 10:
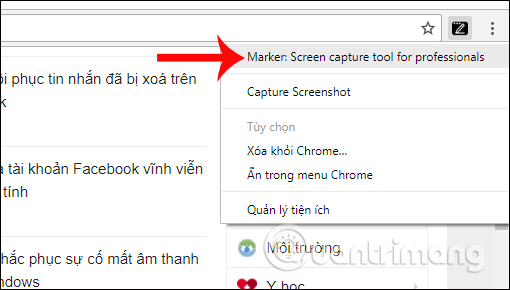
To check the captured image, right-click the utility icon on your browser, then select Marker: Screen capture tool for professionals .
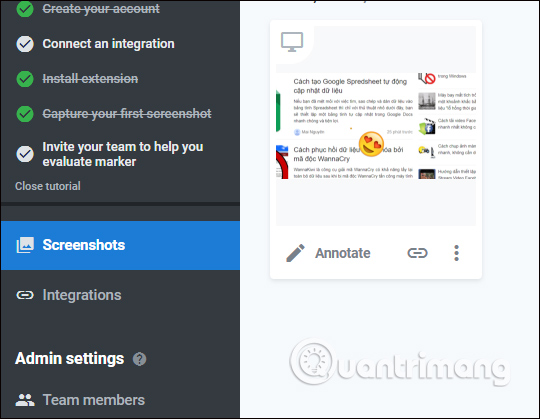
The account interface will then appear with the section Screenshots to save the captured image on the Marker.
Step 11:
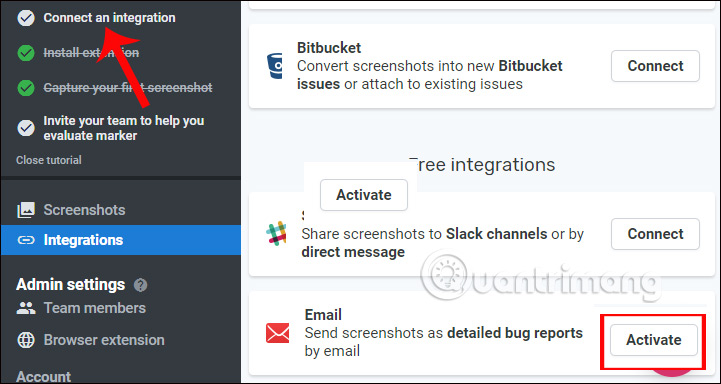
If you want to share the image, also in the Maker account interface, click on Connect an intergration .
We will see the services associated with the Marker utility. However, with the free version, you can only link to Slack service and send email.Active to email images.
Step 12:
Return to the item Screenshots and click on the image you want to send. Appearance of image editing interface. At the top, you will see the email toolbar. Click the To item, then enter the email address sent to the To dialog box . Reply-to box, enter the address used to register the Marker account to receive a reply.

Step 13:
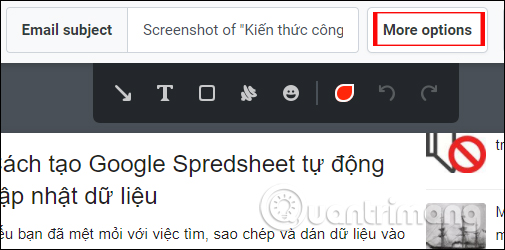
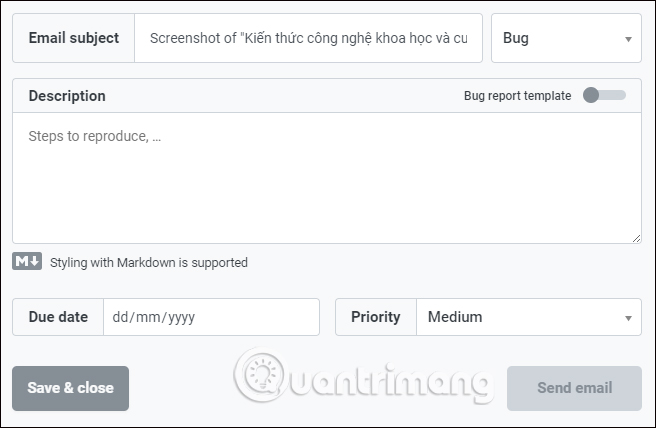
Email box Subject , the preset utility is the name of the web page you captured, you can reset the message header. To compose the message content click More Options .
A message edit dialog box appears, writing email content at Description .
Next, users can choose Due date and priority for sending this email (Priority). Finally, click Send email immediately or Save & close to save and send later.
A screen capture utility that is 'multi-function' right? Not only is the ability to take screenshots of web pages, but the Marker utility can also edit images with various tools, or store them on multiple services. In particular, the Marker supports emailing images with priority mode options, or timed to send. Please install the Marker and try to experience the rich features of this utility.
I wish you all success!
Was this article helpful?
Your feedback helps us improve.
Related Articles
 Download Photo! Editor 1.1: Multifunctional photo editor5 minutes read
 What is a universal laptop charger? What models does it apply to?4 minutes read
 Please download Folder Marker (24.95 USD) - The beautiful folder color changer on Windows is free2 minutes read
 Address buy cheap multipurpose folding bed in Ho Chi Minh City, Hanoi6 minutes read
 Should buy the best multi-purpose pressure cooker?8 minutes read
 Learn about Off-Page SEO techniques6 minutes read
Reader Comments 0
Sign in with email or Google to join the discussion.