How to Swipe Between Apps on a Mac
To swipe between full-screen apps on your Mac, place four fingers on your trackpad or two on your Magic Mouse. Swipe them left or right to move between full-screen apps. Apps will need to be in full-screen view for the gesture to work....
Table of Contents
Part 1 of 2:
Enabling the Gesture
-
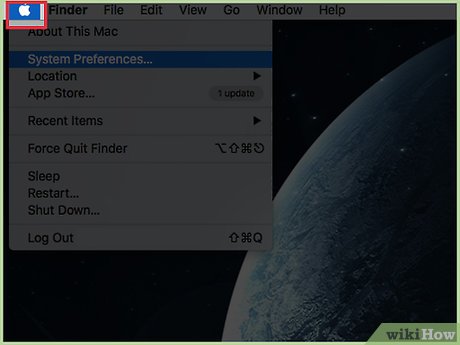 Click the Apple menu.
 -
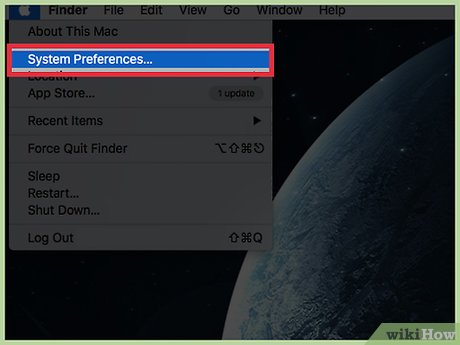 Click System Preferences. Click Show All at the top of the window if you don't see the main System Preferences options.
 -
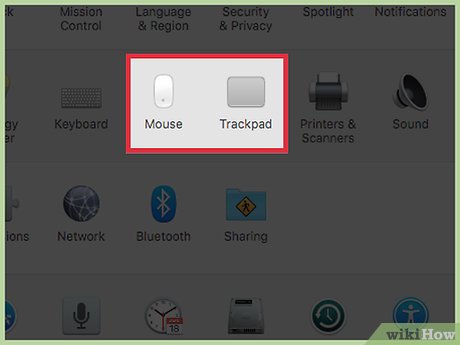 Click the Trackpad or Mouse option. Choose Trackpad if you're using a MacBook or a Magic Trackpad. Click Mouse if you're using a Magic Mouse.
 -
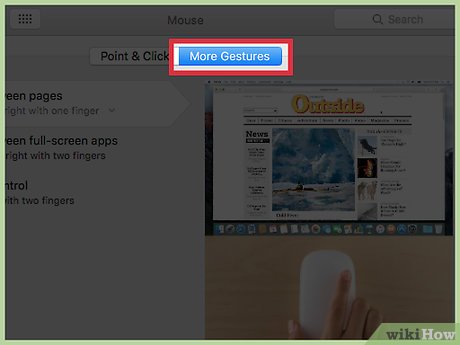 Click the More Gestures tab.
 -
 Check the Swipe between full-screen apps box. The number of fingers the gesture uses will be displayed below.
 -
 Click the menu underneath. If you're using a trackpad, you can change the number of fingers the gesture uses.
 -
 Click the number of fingers you want to use. You can switch between three fingers or four fingers for the gesture.[1]
Part 2 of 2:
Swiping Between Apps
-
 Place four fingers on your trackpad or two on your magic mouse. If you set your trackpad to use the three finger gesture instead, just use three fingers.
 -
 Open some apps in full-screen view. This gesture only works if you have two or more apps open in full-screen view. You can switch apps to full-screen view from their View menus or by pressing Ctrl+⌘ Command+F.
 -
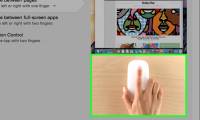
 Swipe left and right to switch between your full screen apps. Swipe all of your fingers at once to switch between your open full-screen apps.
Was this article helpful?
Your feedback helps us improve.
Related Articles
 This is how to surf Facebook, battery-free messaging and 3G3 minutes read
 How to Swipe Between Pages on a Mac2 minutes read
 Instructions for adjusting Gmail Android swipe gestures2 minutes read
 Instructions for setting up swipe to delete mail on iPhone2 minutes read
 How to set up swipe screen to turn off computer on Windows 102 minutes read
 Swipe tips to quickly delete emails in Gmail iPhone2 minutes read
Reader Comments 0
Sign in with email or Google to join the discussion.