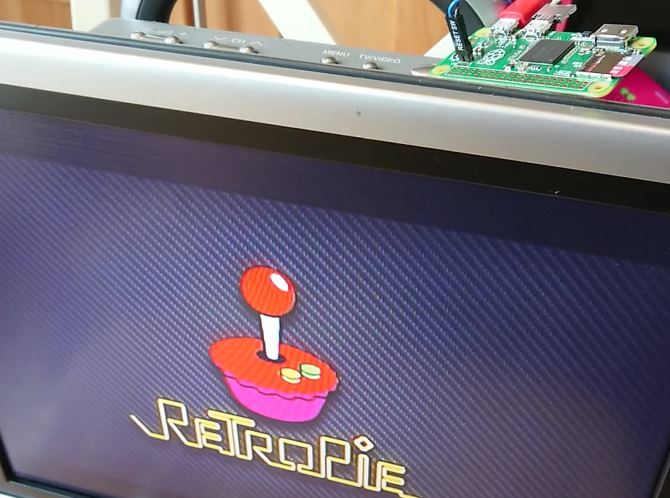
How to connect the Raspberry Pi Zero to a TV without HDMI
The Raspberry Pi Zero has an HDMI port, so it's easy to connect the Raspberry Pi Zero to the TV, right? But what if you don't want to use HDMI?
The standard Raspberry Pi has an alternative to HDMI, but the Raspberry Pi Zero doesn't. Here's what you need to know about connecting the Raspberry Pi Zero to the TV using HDMI and RCA composite.
How to connect the Raspberry Pi Zero to a TV without HDMI
- How to connect the Raspberry Pi Zero to the TV using HDMI
- How to connect the Raspberry Pi Zero to a TV using RCA
- What you need to create composite connections
- Create Composite DIY connection
- What if the signal does not automatically detect?
How to connect the Raspberry Pi Zero to the TV using HDMI
An easier option to connect the Raspberry Pi Zero to the TV is to use HDMI.
This device has a mini-HDMI port and is equipped with an adapter so you can easily connect the HDMI cable. If not, you can easily buy a Mini HDMI to HDMI adapter (HDMI to HDMI mini adapter) on Amazon at an affordable price.
In most cases, this is enough to connect the Raspberry Pi Zero to the TV. Of course, audio output also uses this connection. The Raspberry Pi Zero has the same display quality as the Raspberry Pi 2 and 3. In short, HDMI must be your default option.
How to connect the Raspberry Pi Zero to a TV using RCA
But not all projects allow you to use HDMI. Although the connection is more compact than previous versions, the dongles (hardware protection devices) and adapters (adapters) are still quite cumbersome. Compact sized Raspberry Pi Zero projects will often remove the HDMI option.
Fortunately, there is an alternative solution: the Raspberry Pi Zero has a "TV Out" feature, which you can connect custom homemade cables (or even solder existing cables).

You will find it to the right of the symbol of raspberry (raspberry). It is labeled 'TV' so it is not difficult to detect this feature. Note that this is a pair of connectors: The square head is the signal, and the circular end will land.
This feature can be used to export videos to a synthetic RCA connector on the Raspberry Pi Zero.
What you need to create composite connections
If you do not want to use an existing RCA cable, you will need to create your own cable. To do this, you will need:
- 2 connecting cable segments
- 2 pin header
- 1 screw connector RCA connector (RCA connector with screws)
- soldering iron
- Wire cutters
You can easily find these devices. However, don't start doing it until you have prepared all the necessary items!
Create Composite DIY connection
Start by taking wire cutters and cutting cables so that they can be connected to the screws on the RCA connector.
Next, remove the insulation and solder these wires. If you are unfamiliar with soldering iron, learn some techniques before proceeding.

Solder the pin header to the TV out pins. Note that you can solder the cable (or existing RCA composite cable) directly to Pi. However, the header pin will look more neat and beautiful.

All that's left to do is remove the terminal connectors, insert the wires in and tighten the screws. Note that the wires you connect to the terminal + are wires that carry TV signals.
After performing this step, connect the remaining heads on the cable with the pin header. You are ready to connect the Raspberry Pi Zero to the TV's AV port, usually a yellow RCA socket.
Now, when you start the Raspberry Pi Zero, you'll see the output on the screen. Note that when you are using RCA, the signal will not have a high resolution, so the output will not be as sharp as you expected.

What if the signal is not automatically detected?
If the signal is not detected automatically (and you have confirmed that the operating system and microSD card are working properly, using another HDMI or Pi connection), you need to make some modifications. with config.txt file .
Confirm the active signal light (ACT) does not blink, then power off your Raspberry Pi Zero. Remove the SD card and insert the card into the PC. Open the file manager and find the / boot partition, then find the file config.txt.
Note : If you are using Linux, you can do this from the command line using nano or any other favorite text editor.
After opening the config.txt file, you need to make some modifications. First, find the line:
# sdtv_mode = 2
Change it and remove # . Now this line will become:
sdtv_mode = 2
Next, find the line:
hdmi_force_hotplug = 1
This time, add the # sign to the beginning:
# hdmi_force_hotplug = 1
Save config.txt, then close the document. Safely remove the microSD memory card and plug it into the Raspberry Pi Zero. Reboot again, you will see output from Pi Zero on the screen you selected!
Whether you are using a Raspberry Pi Zero, Zero W or Zero WH, the TV header pin can be used instead of standard HDMI. This is especially useful in tight spaces where there is no room for mini HDMI-to-HDMI adapter equipment.
Would you like to have more fun with your Raspberry Pi Zero? Take a look at some Raspberry Pi projects for more ideas! Good luck!
See more:
- How to connect Raspberry Pi remotely to a Windows computer
- How to run, Raspberry Pi emulator on computer?
- 10 operating systems you can run with Raspberry Pi