How to set edit permissions for spreadsheets in Google Sheets
Knowing how to set editing permissions for spreadsheets in Google Sheets helps you use Google Sheets effectively, allowing you to easily grant or restrict access to everyone who can view and edit your spreadsheets.
Table of Contents
Setting edit permissions for spreadsheets on Google Sheets is one of the important techniques when using Google Sheets today, allowing you to limit the number of people who can access and edit the spreadsheet. Here are the steps to enable edit permissions on Google Sheets on your computer.

How to grant editing permissions to a Google Sheets spreadsheet.
Article contents:
1. How to set cell permissions by area in Google Sheets.
2. How to set spreadsheet editing permissions in Google Sheets.
3. How to manage editing permissions in Google Sheets.
1. How to set cell permissions by region in Google Sheets
In each worksheet, you can set appropriate permissions for each user, protecting your data on Google Sheets and preventing others from accidentally or intentionally changing it.
Step 1 : Access the Google Sheet you want to install the protection on.
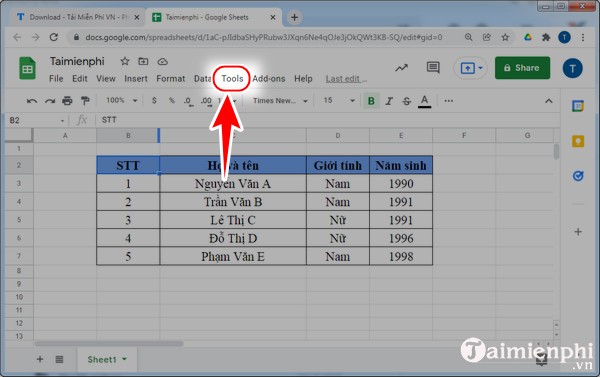
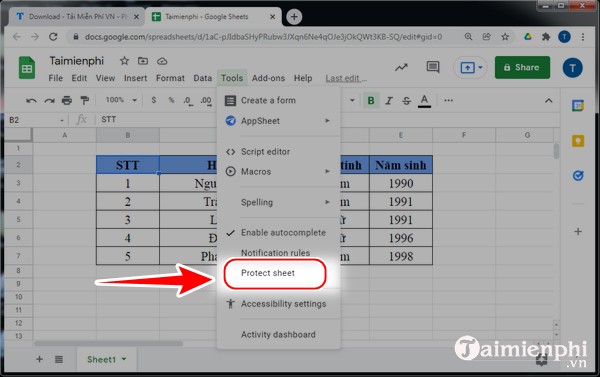
Step 2 : Click " Tools " and then click " Protect Sheet ".

Step 3 : Click " Range " and then click the spreadsheet icon .
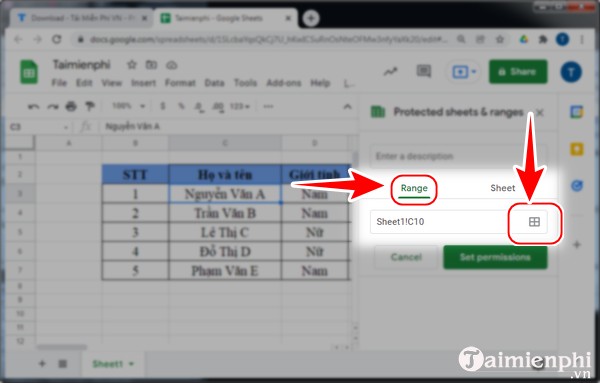
Step 4 : Now, select any data range you want, whether it's a row or a column. Then, click " OK ".
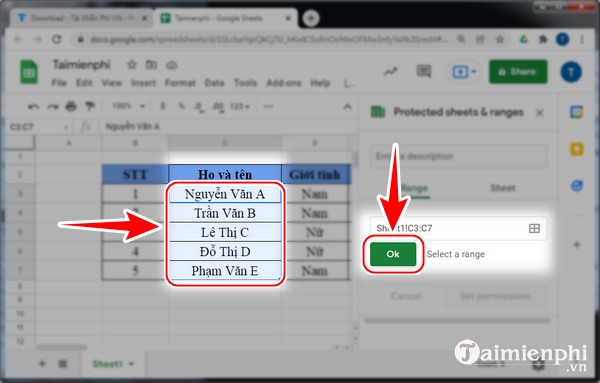
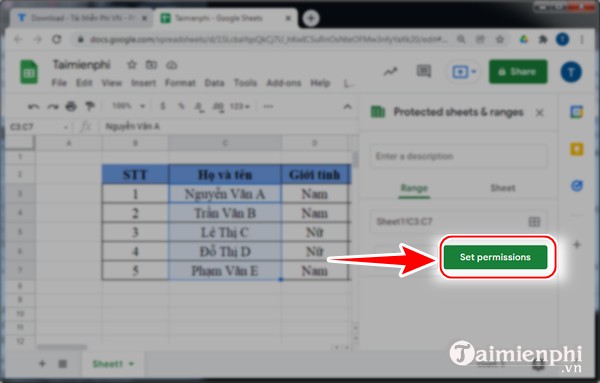
Step 5 : Click " Set permissions ".
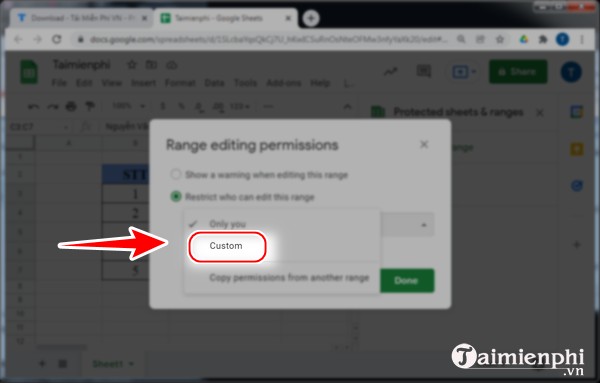
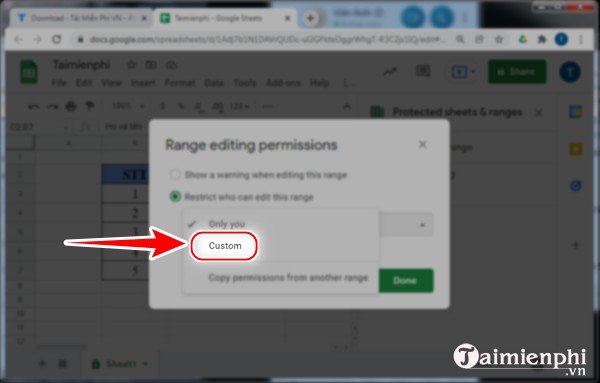
Step 6 : Click " Only you ".
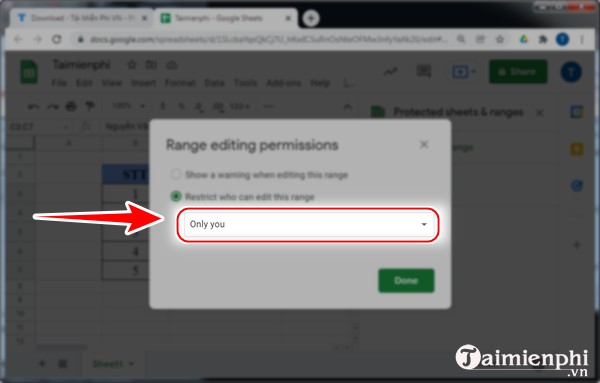
Next, click " Custom ".
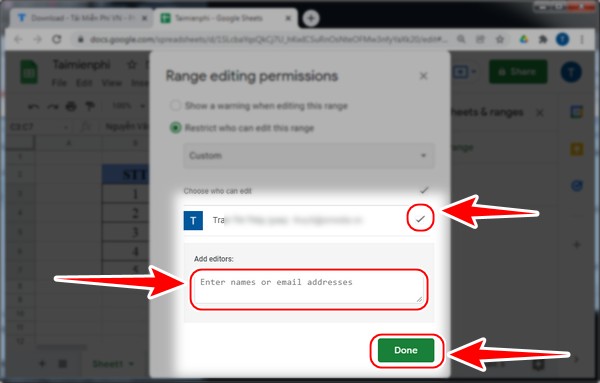
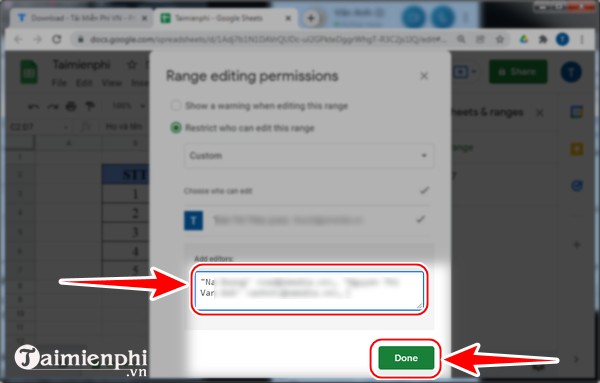
Step 7 : If you want to remove a member from the editing team, simply uncheck the box . To add a new editor, enter their email address in the "Add editor" field and click " Done " to save.
2. How to set edit permissions for spreadsheets in Google Sheets
Step 1: Access the Google Sheet you want to assign permissions to.
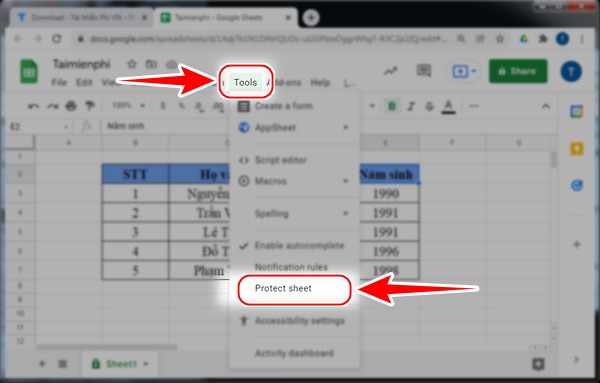
Step 2 : Click on " Tools ".
You click on " Protect sheet ".
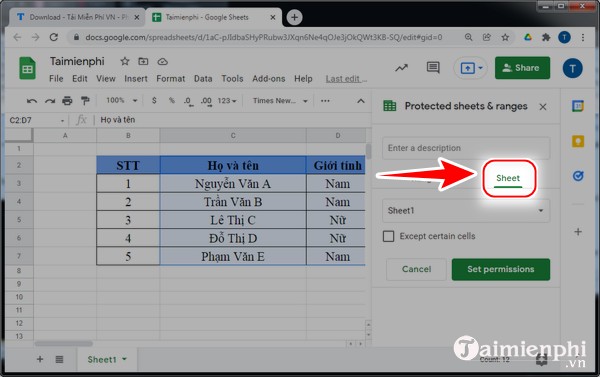
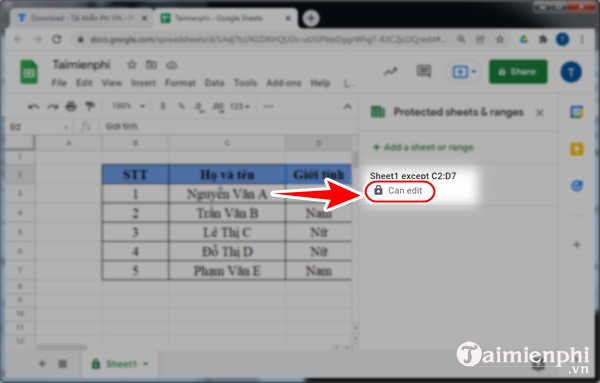
Step 3 : To display Protected sheet & ranges, click " sheet " as shown in the image.
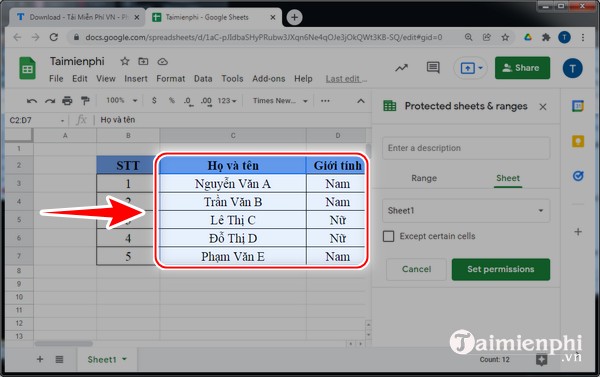
Step 4 : Select the cells and columns you want to set up edit access sharing for.
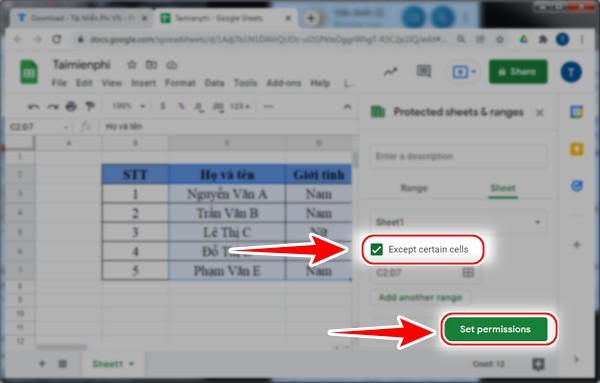
Step 5: Check the box " Except certain cells " and then click " Set permissions ".
Step 6 : Click " Only you ".
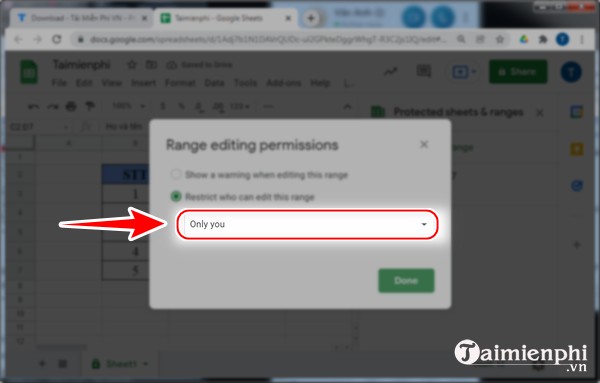
Next, click " Custom ".
Step 7 : Enter the email address you want to share in the " Add editors " box and then click " Done ".
3. How to manage edit permissions in Google Sheets
Step 1 : Access the Google Sheet you want to protect.
Step 2 : Click " Tools " and then click " Protect Sheet ".
Step 3 : Click " Can edit ".
Step 4 : Add a description for the permissions, edit the members, and then click "Change Permissions" to apply the changes.
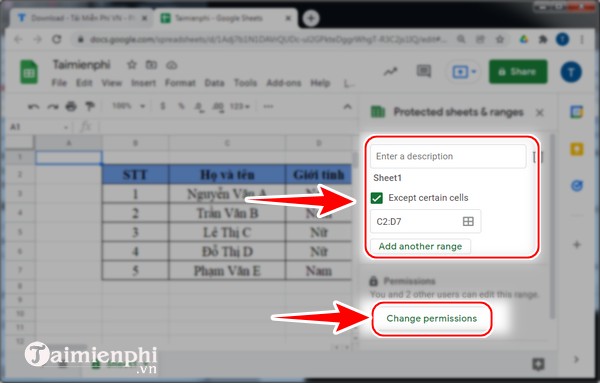
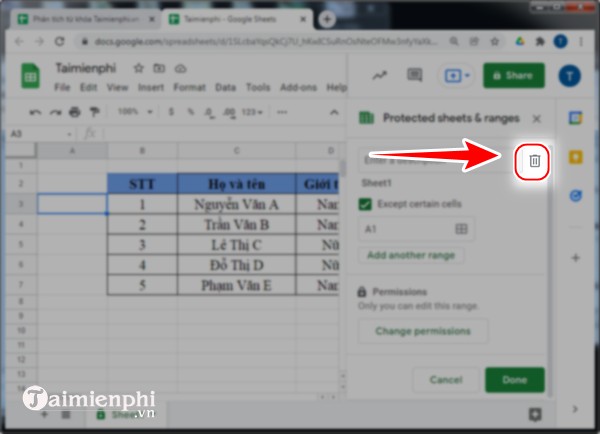
If you want to delete something, click on the Recycle Bin icon and follow the instructions to delete the initial settings.
Now, simply by correctly setting up spreadsheet editor permissions in Google Sheets , you can easily change who can edit and grant editing rights on your worksheet.
Was this article helpful?
Your feedback helps us improve.
Related Articles
 How to set up the right to edit spreadsheets on Google Sheets5 minutes read
 Familiarize yourself with spreadsheets, rows, columns, and cells.10 minutes read
 5 Google Sheets features you should know6 minutes read
 How to align spreadsheets before printing on Google Sheets3 minutes read
 Working with Sheets4 minutes read
 How to link data between spreadsheets in Google Sheets4 minutes read
Reader Comments 0
Sign in with email or Google to join the discussion.