Table of Contents
This practical guide walks through how to separate Sound from Video and Music from Clip Is. It organizes the required steps, settings, and checks so you can complete the task with fewer mistakes.
To help users Separate sound from video , in this article TipsMake explains how to use an extremely simple software on Camtasia Studio. Camtasia Studio will help you separate sound from video with just a few basic steps and also supports many features such as video recording and multi-format video export.
How to Separate Sound from Video on PC
Step 1: Download Camtasia Studio software from the official provider:
=> official download source
>> See instructions For installing Camtasia Studio For your computer here if you don't know how to install.
After installing Camtasia Studio, we open the Camtasia Studio software, this is its basic working interface.

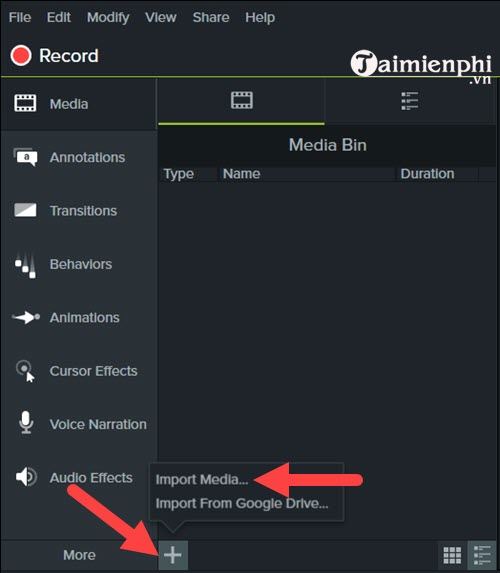
Step 2: Here, pay attention to the interface on the left, select The plus icon > select Import Media In the Media section to proceed to load the video that needs to be separated from the audio to capture the image into Camtasia Studio.
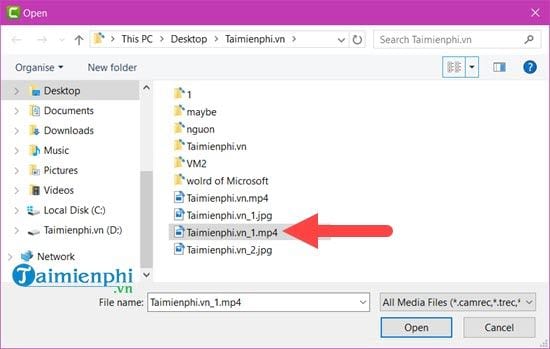
Step 3: Select the video you want to separate the sound for and select Open .
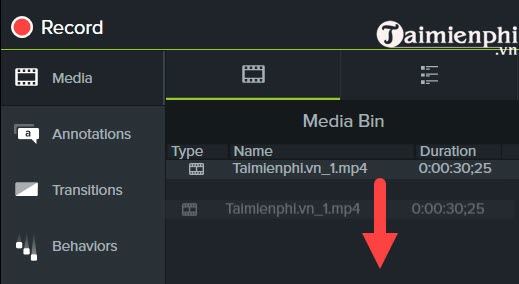
Step 4: Once the video is added in Camtasia Studio, long Select on the video and drag and drop it to the Working layer below.
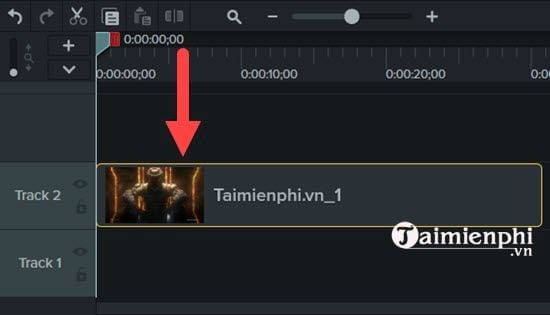
You will see the video layer appear below and we will proceed to separate the audio from the video here.
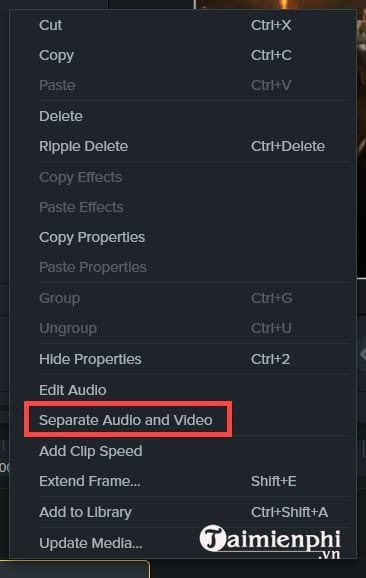
Step 5: To separate the audio from the video, just Right-select On that layer > select Seperate audio and video .
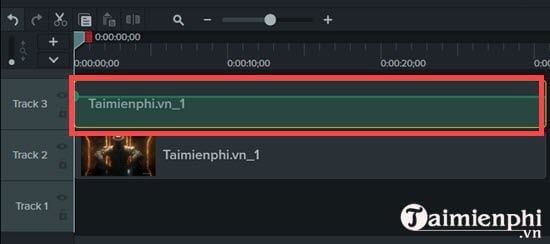
Step 6: You will immediately see your original layer divided into 2 parts with the upper part being the sound and the lower part being the image. Right-select On the audio section.
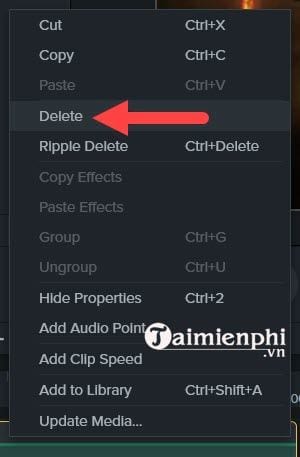
Here you select Delete To delete the audio of this video.
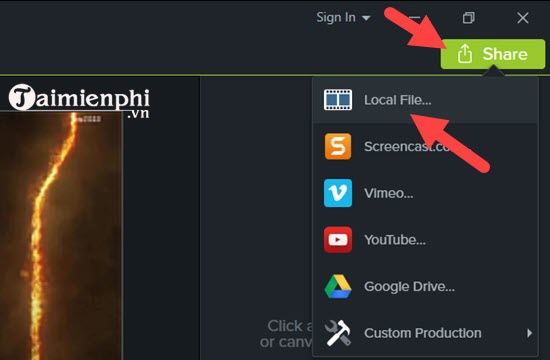
Step 7: After deleting, separating the sound from the video is almost complete and the last step we have to do is export the video. Look at the right corner of Camtasia Studio > select Share Then choose Local file.
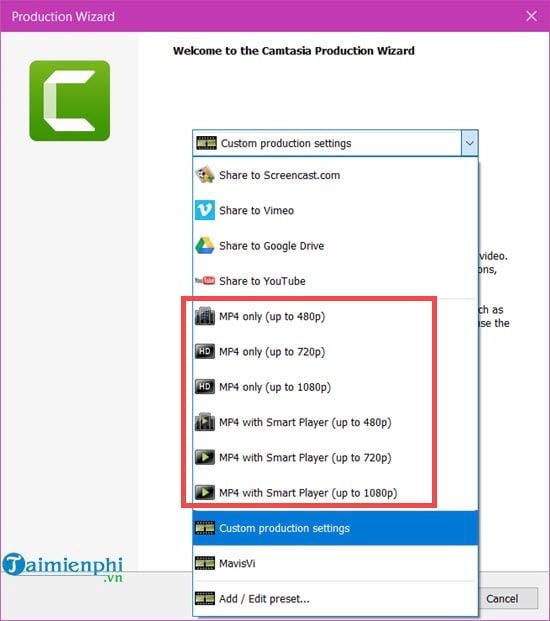
Step 8: Here is the resolution option, it is best to choose the original resolution for the video where you separate the sound from the video.
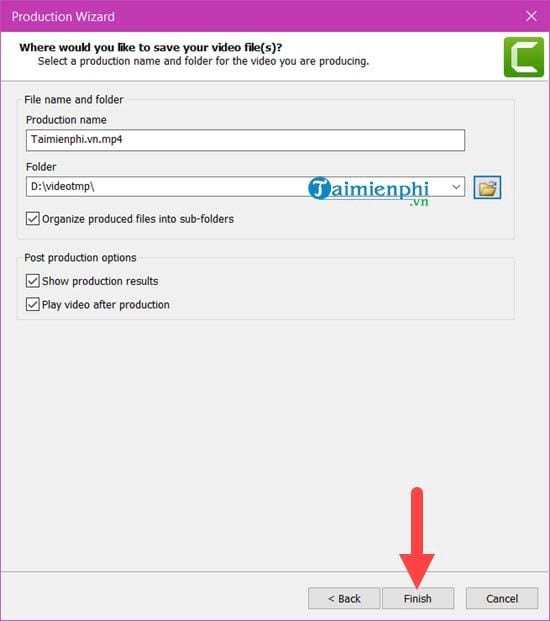
Step 9: Name and enter the path to save the video and select Finish To proceed with Render.
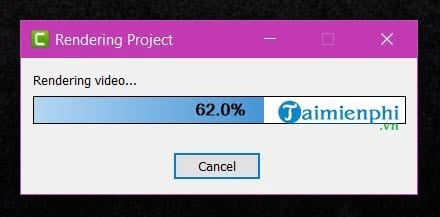
How fast or slow the Render Process is completely depends on your video and also depends on your computer configuration.
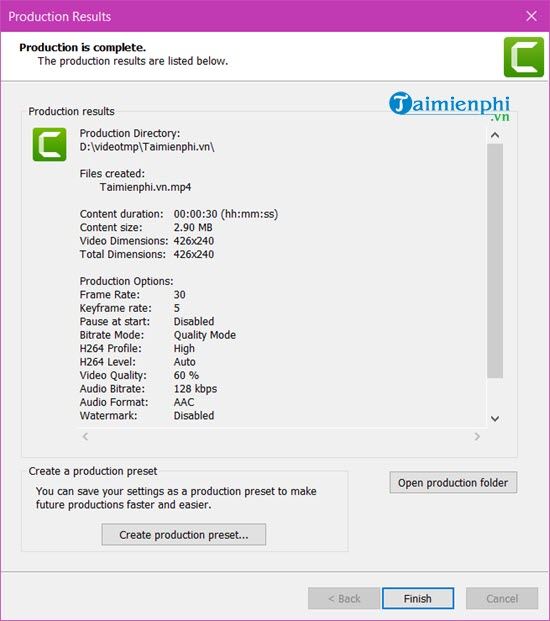
Step 10: When the video is completed, you will be notified with a link, and will also open the video so readers can rest assured.
Above is a quick guide on how to separate audio from video, the steps are extremely simple to separate audio from video. This is not all of what Camtasia Studio can do if you use this tool to record videos or edit post-production. Camtasia Studio is a very good software for those who are new to video editing today. Above is how to separate the sound from the video, so what if you want to get the music? Is there any way to extract music from video? The following instructions for Extracting music from any video will give you the best choice to do this.
In addition, if you like Camtasia Studio, you can learn more about how to use Camtasia Studio to record videos and edit images because this tool possesses many features that when combined give you extremely satisfactory results. Before coming to professional software, Using Camtasia Studio Is the best choice at the present time.
FAQ
What do I need before I separate Sound from Video and Music from Clip Is?
Prepare the required device, software, account access, and any files mentioned in the steps. Back up important data before changing system settings.
Why does the process look different on my device?
Menus and options can vary by operating system, app version, device model, or region. Use the closest matching setting and check the official documentation when needed.
What should I do if a step does not work?
Restart the app or device, confirm permissions and connectivity, update the software, and repeat the step carefully. Avoid unofficial downloads or tools.
Related Articles
 6 Easy Ways to Separate Audio from Video: Recommended Choices9 minutes read
 Instructions on How to Isolate Audio from Video5 minutes read
 Review JBL Clip 3: Durable Speaker, Big Sound5 minutes read
 How to Pair Music, Insert Music into Videos on Android Phones, IPhones4 minutes read
 Instructions on How to Separate Music from Videos3 minutes read
 How to Combine Music into Videos on Inshot Is Extremely4 minutes read
Reader Comments 0
Sign in with email or Google to join the discussion.