How to reset Notepad to its original default settings.
If Notepad has been significantly modified and its usability is affected, you can reset it to its original state using the instructions below.
Table of Contents
Notepad is a basic but useful text editor that's built into Windows. You can customize the default font, font style, and font size in Notepad, as well as many other settings to suit your work requirements. If Notepad has been changed too much and is affecting your usage, you can reset it to its original state, as shown in the guide below.
Reset Notepad to its original state via Settings.
Step 1:
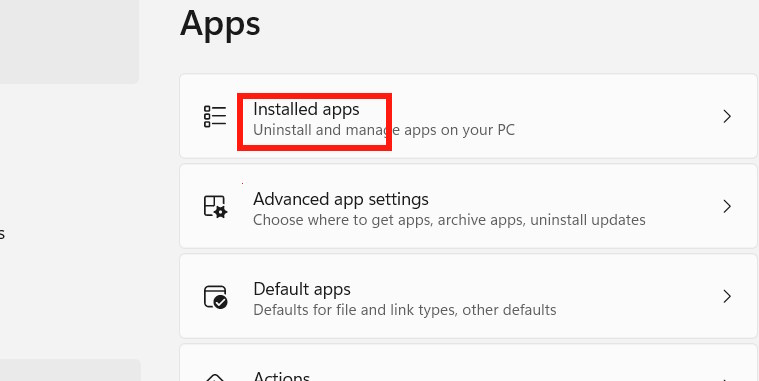
Open Settings on your computer, then click on Apps on the left side of the interface, then look to the right and select Installed apps .
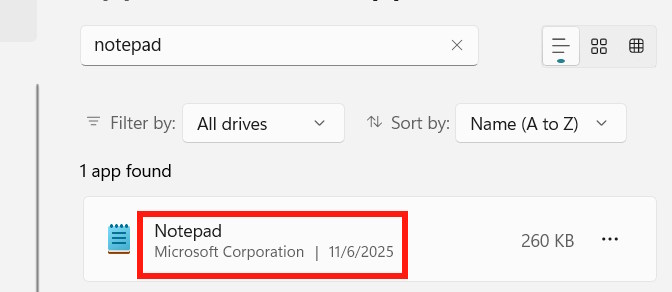
Now we can find the Notepad application through the search bar.
Step 2:
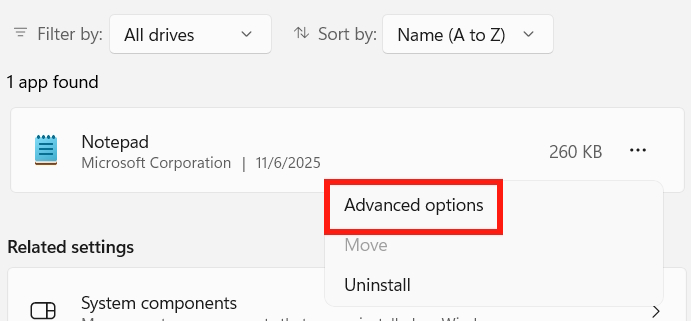
Tap the three-dot icon next to the app name and select Advanced options to expand advanced settings.
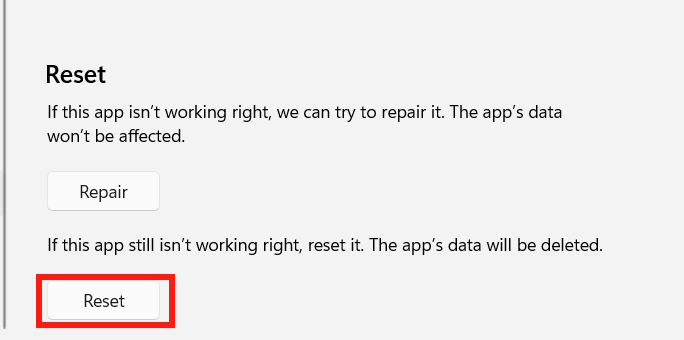
To access the Notepad application settings interface, scroll down to the Reset section and click the Reset button to restore the application and delete its data.
Reset Notepad to default settings via the Registry.
Step 1:
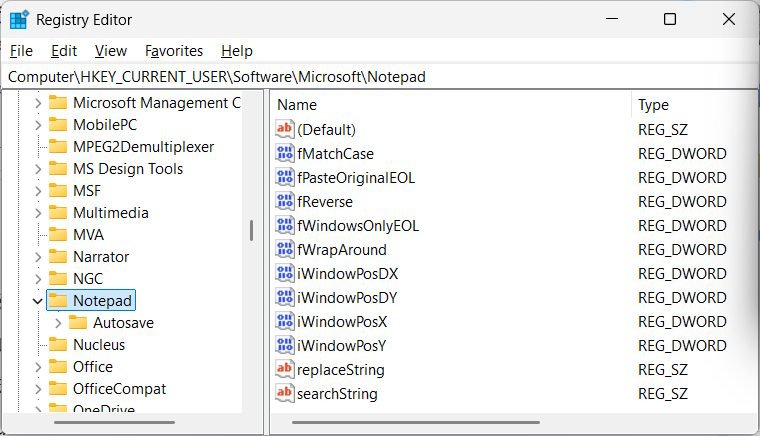
Type "Registry" into the search bar and press Enter to access it. Then, navigate to the following path.
HKEY_CURRENT_USERSoftwareMicrosoftNotepad
Step 2:
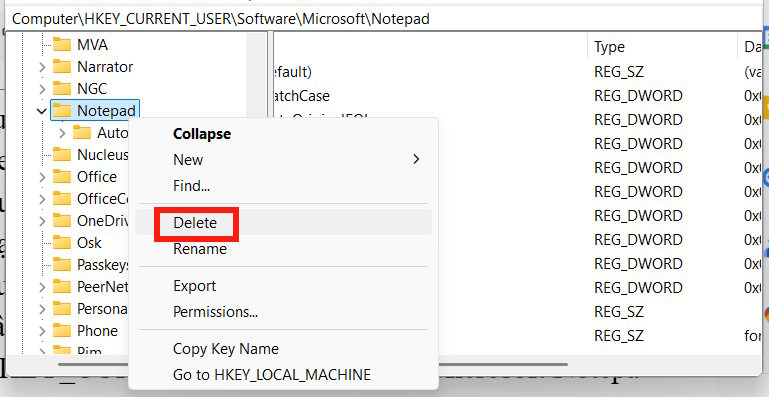
Next, right-click on the Notepad key and select Delete from the list that appears.
After reopening Notepad, the application was restored to its original settings.
Was this article helpful?
Your feedback helps us improve.
Related Articles
 Reset Notepad to the initial default setting state2 minutes read
 How to reset iPhone, restore original settings with iTunes3 minutes read
 3 How to reset Win 7, Factory reset Windows 77 minutes read
 How to restore original settings Reset iPhone2 minutes read
 Instructions for bringing Windows 10 back to the default 'root' installation state3 minutes read
 Steps to reset all apps on Windows 103 minutes read
Reader Comments 0
Sign in with email or Google to join the discussion.