How to remove the root virus ExtTag.exe / ExtTags.exe
ExtTag.exe and ExtTags.exe are malicious adware programs that are installed in addition to plugins (toolbars, extensions or add-ons) on your Web browser to redirect you to other websites without have your permission or to display unwanted ads or popup windows on the website you visit.
Part 1: What is ExtTag.exe / ExtTags.exe
ExtTag.exe and ExtTags.exe are malicious adware programs that are installed in addition to plugins (toolbars, extensions or add-ons) on your Web browser to redirect you to other websites without have your permission or to display unwanted ads or popup windows on the website you visit.
ExtTag.exe and ExtTags.exe can be installed on popular browsers like Internet Explorer, Google Chrome or Firefox without user permission. Adware programs like this can contain malware (malware) in their code to 'compromise' security issues on the computer and make the computer vulnerable to hackers or attacks. Internet attack.
Technically, ExtTag.exe and ExtTags.exe are not a virus form and it is classified as an unwanted program (PUP - Potentially Unwanted Program) that can contain and install malicious programs on the computer. Your properties, such as adware (adware), toolbars or viruses. If your computer is infected with adware ExtTag.exe and ExtTags.exe, then on your computer screen will appear popup windows, banners and sponsorship links. or in some cases the browsing speed of browsers is slow due to malicious programs running in the background.
The advertising programs ExtTag.exe and ExtTags.exe are installed without the user knowing, the reason is because these programs are packaged inside other free software and when the user downloads the parts. If this software is about to install, it accidentally installs all the advertising programs of ExtTag.exe, ExtTags.exe.
Therefore, when installing any program on your computer, you should:
- On the application installation screen, do not click the Next button too fast.
- Read the terms carefully before clicking Accept .
- Always select 'Custom' installation - customize the settings.
- Reject the installation of additional software that you do not want to install.
- Uncheck any options saying that the homepage and search settings will be edited.
Part 2: Remove the root of ExtTag.exe / ExtTags.exe
Step 1: Start your computer in Safe Mode with Networking
To start your computer in Safe Mode with Netowrking, follow the steps below:
- On Windows 7, Vista and Windows XP:
1. Close all programs and then restart your computer.
2. Press the F8 key while the computer restarts, before the Apple logo appears.
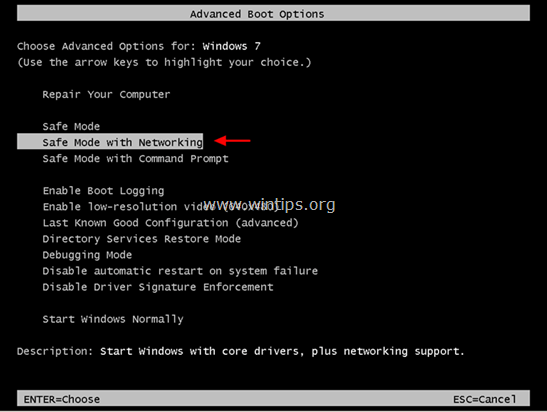
3. At this time, the menu "Windows Advanced Options Menu" appears, use the arrow keys to select Safe Mode with Networking and press Enter.
- On Windows 8 and 8.1:
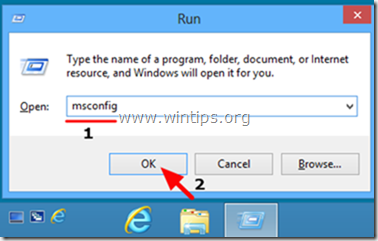
1. Press the Windows + R key combination to open the Run command window.
2. On the Run command window, type ' msconfig' and press Enter.
3. At this time, the System Configuration window appears, where you click the Boot tab , then select Safe Boot and Network.
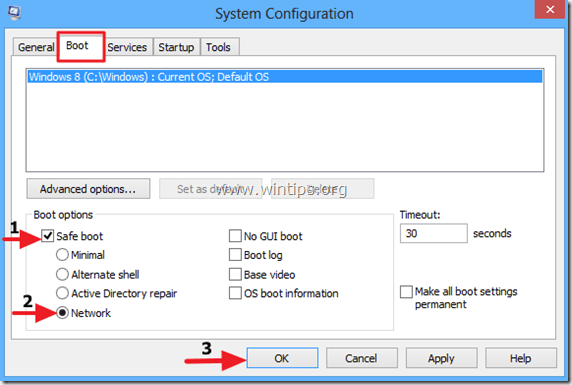
4. Click OK and then restart your computer.
Note:
To restart Windows to normal mode (Normal Mode), you perform the same steps and then remove Safe Boot item is finished.
Step 2: Uninstall Registry settings and ExTag extensions with RogueKiller
1. Download RogueKiller to your device and install it. RogueKiller is an antivirus program, capable of finding, blocking and removing malware and some other software like rootkits, rogues, worms, .
Download RogueKiller to your device and install it here.
2. Double click to run RogueKiller.
3. After the previous scan finishes, click the Scan button to perform a system-wide scan.
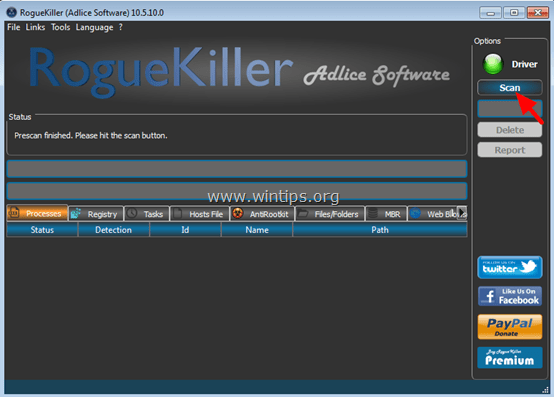
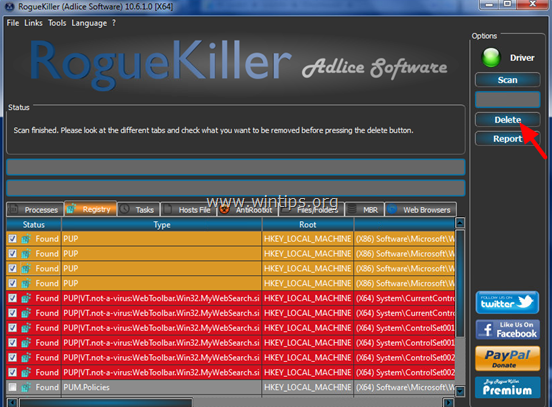
4. When the scan finishes, select all the items found on the Registry tab and the Web Browsers tab and then click Delete to remove all items.
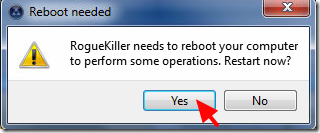
If required, click Yes to restart the computer.
Step 3: Remove the malicious programs ExTag & SafeFinder on Control Panel
1. To do this:
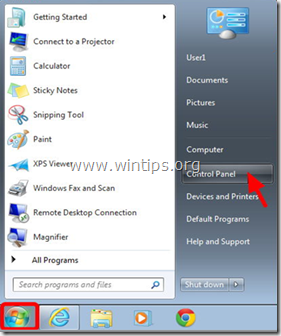
- On Windows 7 and Windows Vista: Go to Start => Control Panel .
- On Windows XP: go to Start => Settings => Control Panel.
- On Windows 8 and 8.1:
Press the Windows + R key combination to open the Run command window.
Next enter Control Panel there and press Enter.
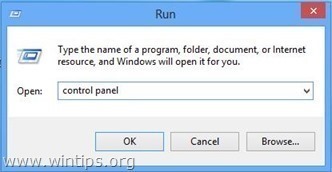
2. On the Control Panel command window:
- On Windows XP: double-click Add or Remove Programs.
- On Windows Vista, 7 and Windows 8: double-click Programs and Features or Uninstall a Program .
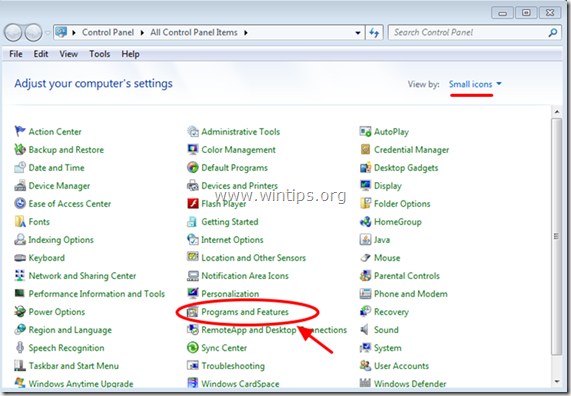
3. On the window of the programs displayed:
- Arrange the programs displayed by the installation date (click Installed On).
- Uninstall recently unidentified programs installed on your system.
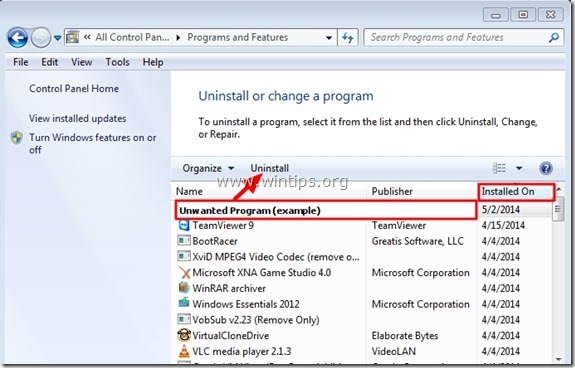
- Uninstall applications:
- ExtTag
- ExtTags
- SafeFinder
Note:
- If an unwanted program is not found, follow the steps below.
Step 4: Remove the ExtTag ad with AdwCleaner
1. Download AdwCleaner to your device and install it.
Download AdwCleaner to your device and install it here.
2. Close all the programs you are open, then double-click AdwCleaner to open the program on your computer.
3. Accept the terms and then click the Scan button.
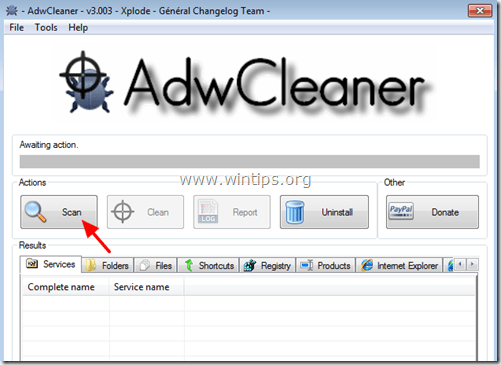
4. After the scan finishes, click Clean to remove all malicious programs and unwanted programs.
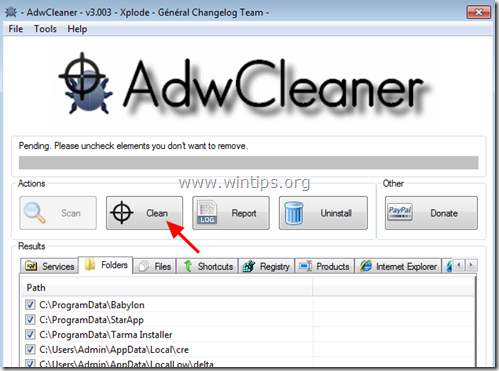
5. On the AdwCleaner - Information window, click OK, then click OK again to restart your computer.
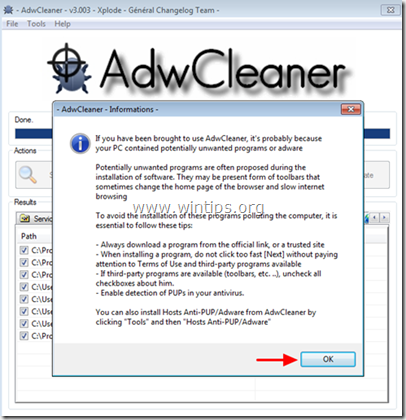
6. After the computer has finished booting, close the AdwCleaner "information (readme) window again and follow the steps below.
Step 5: Remove ExtTag.exe and ExtTags Ads with the Junkware Removal Tool
1. Download the Junkware Removal Tool to your computer and install it.
Download the Junkware Removal Tool to your computer and install it here.
2. After successfully downloading and installing the Junkware Removal Tool, proceed to open the program.
Press any key to start scanning your computer with JRT - Junkware Removal Tool.
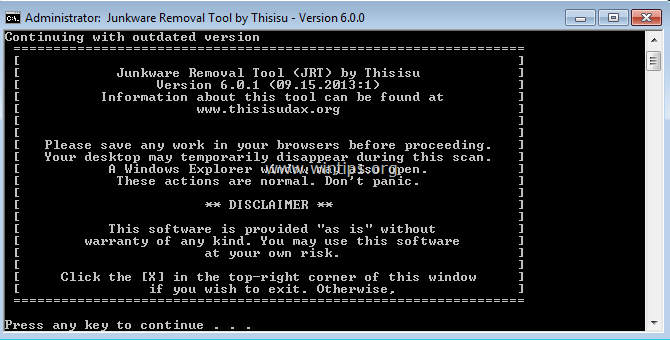
3. Wait for JRT to scan and clean your system.
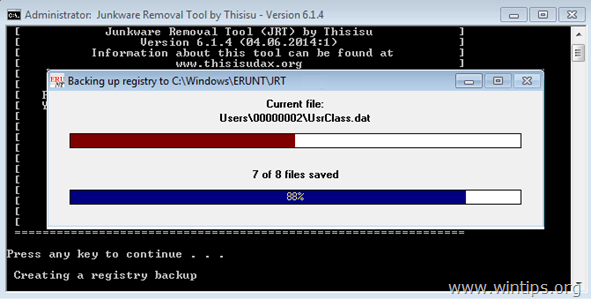
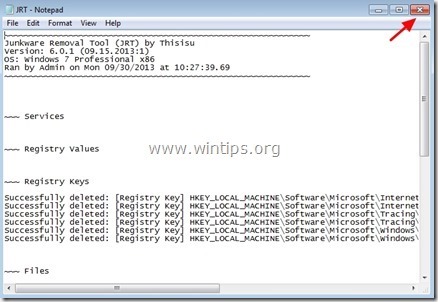
4. Close the JRT log file and restart your computer.
Step 6: Remove files and service ExtTag
1. Disable services: Check Service and Ext Tag.
2. Delete the folder according to the path below on your computer:
C: Program Filesschk32 (or C: Program Filesschk32schk32.exe)
Step 7: Remove ExtTag with Malwarebytes Anti-Malware Free
Malwarebytes Anti-Malware is one of the free programs that removes all effective malware.
Download Malwarebytes Anti-Malware to your computer and install it here.
Scan and clean your computer with Malwarebytes Anti-Malware:
1. Run Malwarebytes Anti-Malware and allow the program to update to the latest version as needed.
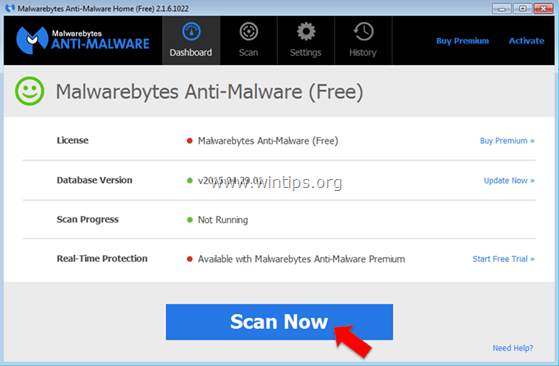
2. After the update process finishes, click Scan Now to start the scan of your system and remove unwanted programs.
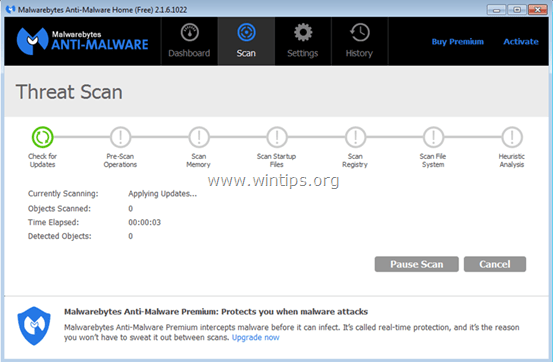
3. Wait for Malwarebytes Anti-Malware to complete the scanning process on your system.
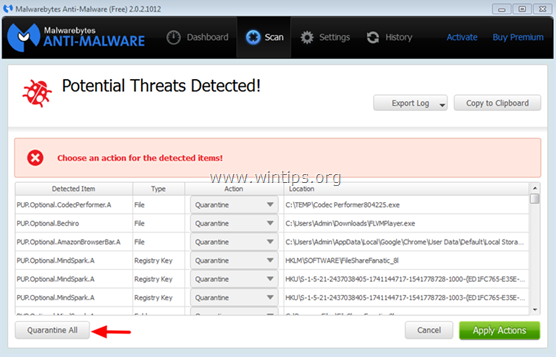
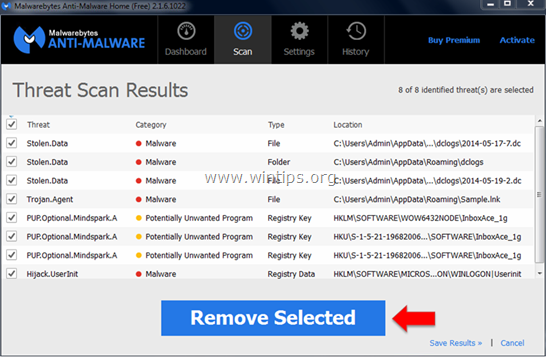
4. After the scanning process is finished, click Quarantine All (Remove Selected) to remove all detected malicious files.
5. Wait until Malwarebytes Anti-Malware removes all malicious files on the system, then proceed to restart your computer to complete the process of removing the malware.
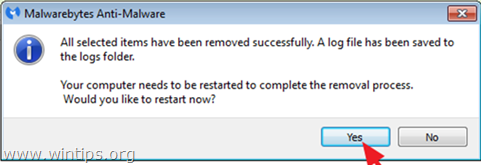
6. After booting, run Malwarebytes Anti-Malware again to confirm that there is no "malware" on your system.
The advice for you is to make sure your computer has been cleared of viruses and in a safe state, you should scan your computer with Malwarebytes Anti-Malware in Safe mode.
Step 8: Remove ExtTag in Internet Explorer, Chrome and Firefox browsers
To ensure that ExtTag is completely removed from Internet Explorer, reset Internet Explorer settings to its original default state.
- Internet Explorer browser:
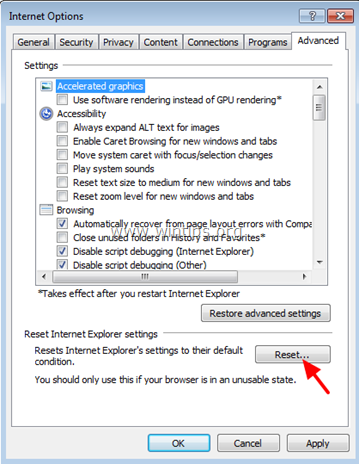
1. On the Internet Explorer browser window, find and click the jag icon in the top right corner of the screen, select Internet Options .
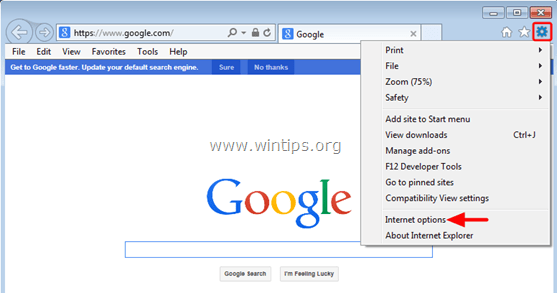
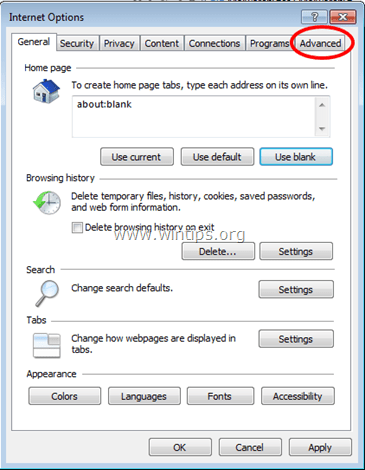
2. Next on the Internet Option window, find and click the Advanced tab .
3. Select Reset.
4. Select 'Delete personal settings' and select Reset .
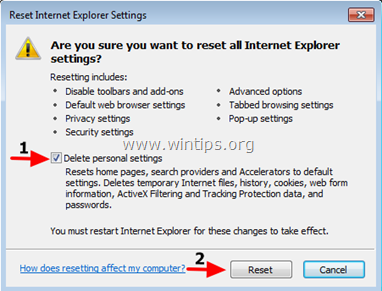
5. After the reset process finishes, click Close and then click OK to close the Internet Options window.
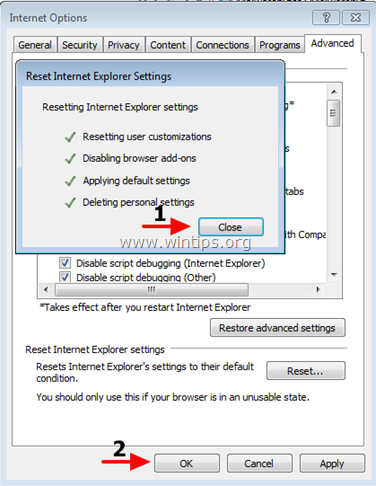
6. Close all windows, then restart your Internet Explorer browser.
- Google Chrome browser:
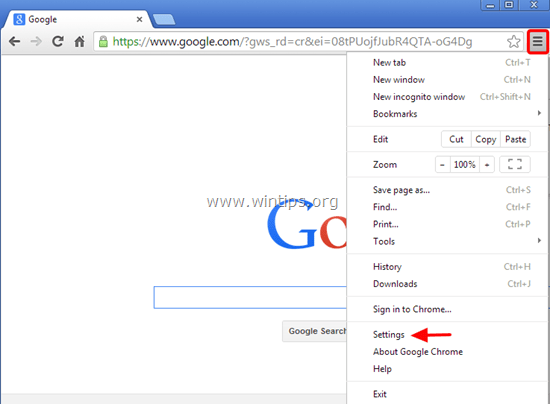
1. Open your Chrome browser, then click the 3 dash line icon in the top right corner of the screen, select Settings.
2. On the Settings window, scroll down to find and select Show advanced settings (show advanced settings ).
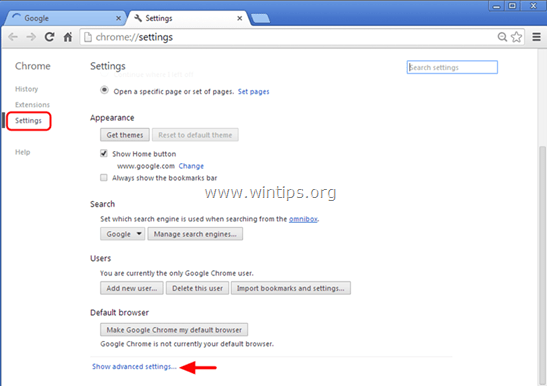
3. Scroll down to find and select 'Reset Browser Settings '.
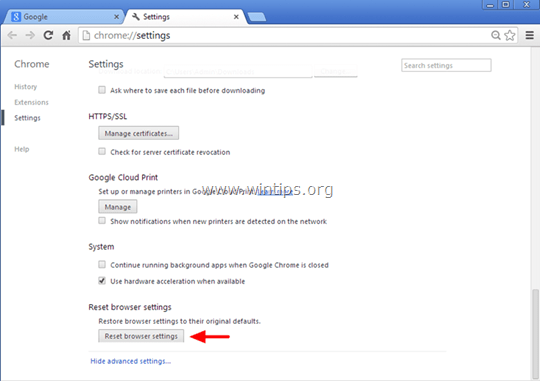
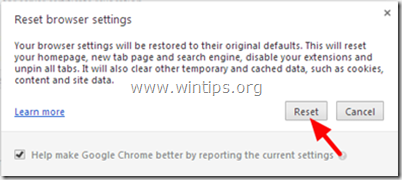
4. Click the Reset button again.
5. Restart your Chrome browser.
Note:
If an error occurs, then you will have to uninstall Chrome completely, then proceed to reinstall.
- Firefox browser:
1. From the Firefox Menu, click Help => Troubleshooting Information .
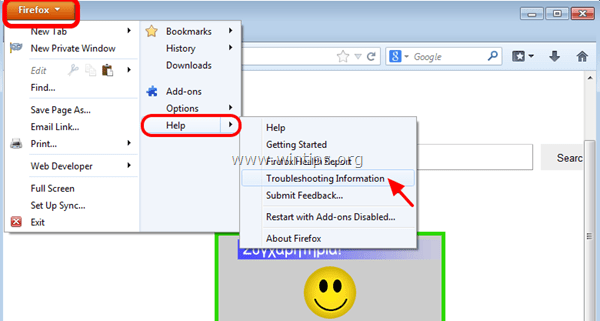
2. On the Troubleshooting Information window, click Reset Firefox to reset your Firefox browser to its default state.
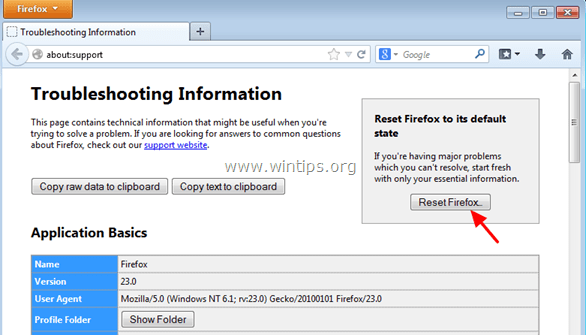
3. Next, click Reset Firefox again.
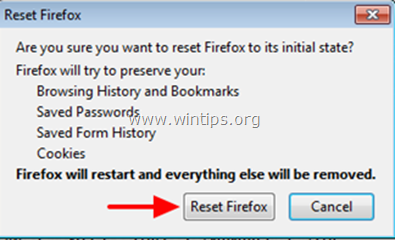
4. After the reset process finishes, restart your Firefox browser.
Refer to some of the following articles:
- To remove web ads - Social 2 Search Ads, read this article
- 17 clear signs that your computer has been attacked by a virus
- Use the CMD command to remove viruses on Windows computers
Good luck!