How to Record on an iPod for Free
Have you ever wanted to record audio with your iPod? Follow these steps to do it. Open Voice Memos. Voice Memos is an app that will come pre-loaded on your iPod. Find it under Utilities.
Table of Contents
Method 1 of 3:
iPod Touch
-
 Open Voice Memos. Voice Memos is an app that will come pre-loaded on your iPod. Find it under Utilities.
 -
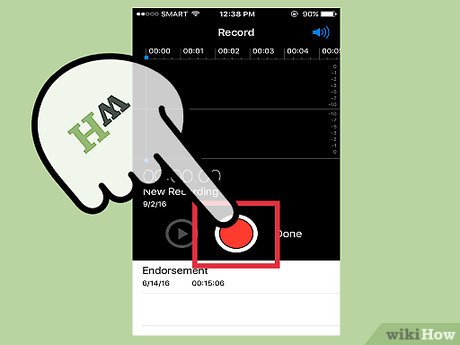 Tap the red button on the left to record. You'll be able to see your volume on the meter in the middle. Use the iPod's built-in microphone, the microphone on your earbuds or a bluetooth mic to record.
 -
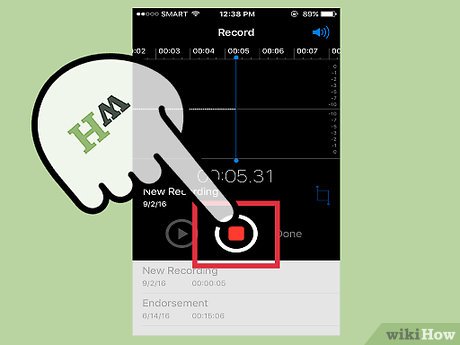 Tap pause to stop. The red record button on the left will become a red pause button while you're recording. Tap it when you're finished.
 -
 Play back your recording. Tap the list button on the bottom right of the screen. Select your recording and tap it to play it back.
 -
 Label your recording. Tap the blue arrow on the right of the recording. Tap the information box to select a label, or type in your own.
 -
 Share the recording. You can tap share at the bottom of the screen to send the recording via iMessage, or over email if you're in a WiFi hotspot.
- Download the recording on iTunes. Alternatively, you can save the recording to your computer next time your iPod is syncing with iTunes. Click the "Music" tab at the top of the screen, select "Sync Music," and check "Include Voice Memos."
Method 2 of 3:
iPod Nano (5th Generation)
-
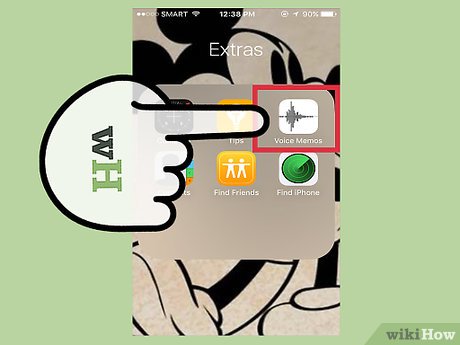
 Find Voice Memos. It's listed under Extras.
 -
 Select "Record". Use your earbud microphone or an external microphone to record your voice memo.
 -
 Select Menu, then "Stop and Save."
 -
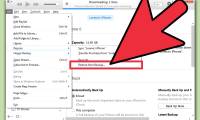
 Sync the Voice Memos to iTunes. Under the Music tab, select "Include Voice Memos." Click "Sync Music."
Method 3 of 3:
Older iPods
-
 Install iPod Linux. If you have a first-, second-, or third-generation iPod, this can be easily done through the downloads and instructions at the link listed below. Some other solutions exist for the newer iPods, but they aren't "officially" supported by iPod Linux. See external links below for more information.
- If you have a 1G, 2G, or Mini, you will not be able to record, though iPod Linux will install and all of the other features will be there.
-
 Boot into Linux from your iPod. To do this, eject and unplug your iPod. It should reset automatically. If it doesn't, then reset it (flick the hold switch on, then off, and hold down "MENU" and "Select" until it resets). As soon as you see the Apple logo, flick on the hold switch. After the Apple logo goes, you should see briefly a picture of a penguin holding an iPod. Then a bunch of text should whiz past. Now you may turn off the hold switch. If you use the new boot loader it will give you a menu to chose which operating system to boot into.
 -
 After the text has disappeared, your iPod should boot into iPod Linux. Even if the backlight was on when the text went past, it will probably switch off now. Hold down "MENU" to switch it on. Scroll down to the "Extras" menu (just like you would normally) and select "Recordings." Click the select button.
 -
 Adjust the settings. Scroll down to the bottom where it says "Sample Rate" and click the select button to change it. 8kHz is the default setting and produces the lowest-quality audio. Even so, the audio is perfectly legible and will sound OK, but a little fuzzy. The maximum is 96kHz, which is excellent quality, but makes enormous files and sometimes skips a lot. Instead of these, go for the 32, 44.1, or 88.2 kHz options. Try them out to see what you like best (see Tips below).
 -
 Decide how you are going to record. You can use the "Mic Record" or the "Line In Record" options. "Mic record" functions by using a microphone or headphones plugged into the headphone jack, and "Line in Record" works by plugging your iPod into a dock, and then plugging headphones or microphone for recording purposes into the line out plug on your dock (normally in the middle on the back of the dock).
 -
 Record.
- If you've selected "Mic Record," then plug either a microphone or the Apple earbuds (other headphones are less easy to use) into the headphone port. Now, select "Mic Record" and click the select button. Press the select button and begin to record. To do this, yell, scream, talk, or sing into the left earbud (marked with an "L") or yell, scream, talk, or sing into the microphone if you plugged one in instead.
- If you've selected "Line In Record", then plug your iPod into a dock (make sure the dock is unplugged) and plug a microphone or headphones into the dock's line out plug. Press the select button to begin recording, and yell, scream, talk, or sing into the microphone or left channel of the headphones.
-
 To pause the recording, press play/pause, and press the action button again when your recording is over.
 -
 Play back your file. Go back to the "Recordings" menu, selecting "Playback", and scrolling down to find your file. (Files are named for when they were created; the newest file should be at the bottom.) You can also play them back using the iPod's default system. Reboot your iPod, let Apple's default OS load, then go into the Extras menu, then the "Voice Memos" menu, and select your recording.
Was this article helpful?
Your feedback helps us improve.
Related Articles
 How to Copy Music from Your iPod to Your Computer15 minutes read
 How to Unlock a Disabled iPod8 minutes read
 How to Remove Songs from Your iPod4 minutes read
 How to Transfer Pictures from iPod to Computer8 minutes read
 Apple officially kills iPod Touch and iPod product line3 minutes read
 Control VLC with iPhone or iPod Touch3 minutes read
Reader Comments 0
Sign in with email or Google to join the discussion.