Table of Contents
GameLoop, formerly called Tencent Gaming Buddy, includes a screen-recording feature that can capture PUBG Mobile gameplay without a separate recorder. The interface in the screenshots uses the older name, but the basic process remains: open the recorder from the emulator toolbar, start the session, then stop it and open the saved clip list.
If you are comparing emulators before recording, see the Android emulator comparison and these lightweight Android emulators for lower-spec PCs. Recording adds extra CPU, GPU and storage load, so stable gameplay should be the first priority.
Before you start recording
- Check that the drive used for recordings has enough free space.
- Close unnecessary applications to leave more resources for the emulator and encoder.
- Set the game resolution and graphics level you can run consistently.
- Make a short test clip and confirm that game sound and microphone audio are captured as intended.
- Use headphones if microphone feedback or speaker echo appears in the recording.
Record PUBG Mobile with the built-in GameLoop recorder
1. Open the recording tool
Launch PUBG Mobile in GameLoop. When you are ready to record, open the emulator's side toolbar and select the circular recording icon. The toolbar layout may differ between GameLoop versions.

2. Start the recording
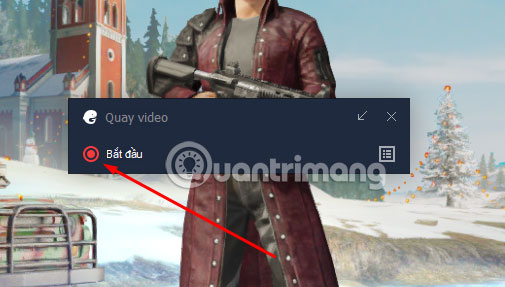
Choose Start in the recording controls. Wait for the recording indicator before returning to the match, especially if you need the clip to include the first seconds of an action.
3. Pause or stop the session
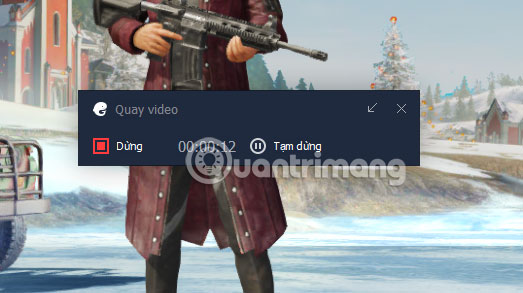
Use Pause when you want to omit a short interruption but continue the same video file. Use Stop to finish the recording and save the clip. Do not close the emulator until the file has finished processing.
4. Open the recorded clip list
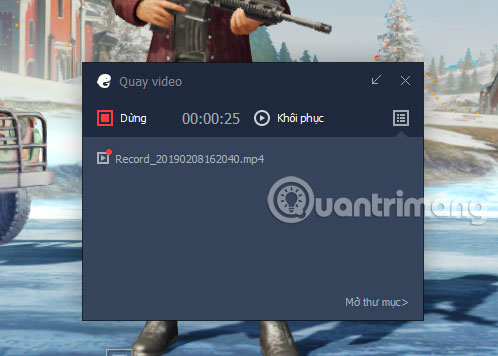
After stopping, open the recording notification or clip list shown near the emulator window. Confirm that the newest file has a duration and can be played before deleting any temporary footage.
5. Find the video file
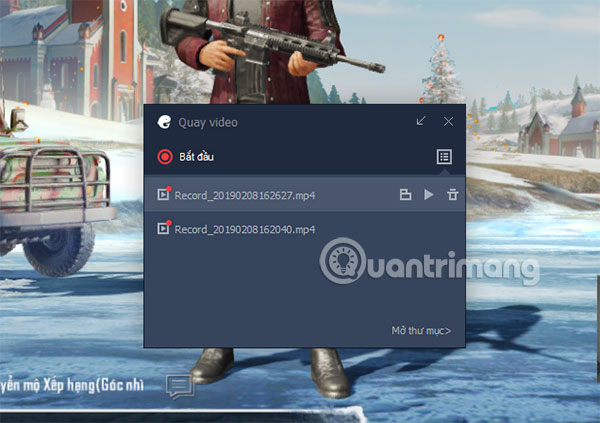
Use the folder button beside a clip to open its storage location. Current GameLoop settings also include a Screenshot & Screen Recording location, which shows or changes where captures are saved.
Recommended recording workflow
- Record a 20–30 second test in the lobby or training area.
- Play the file and check resolution, frame rate and both audio sources.
- Lower recording or game quality if the test introduces stutter.
- Record the full session only after the test is stable.
- Rename or move important clips after the match so they are easy to identify.
If the recording button is missing
Update GameLoop, restart the emulator and expand any collapsed toolbar menu. Some builds or display modes may move the control. Check the emulator settings for the screenshot and recording section, and confirm that the selected storage folder is accessible.
If the built-in feature is unavailable, Windows' gaming capture or a trusted desktop recorder can capture the emulator window. Test the alternative in a non-competitive area first because recording overhead can reduce frame rate.
If a clip has no sound or is not saved
- Verify the playback device, microphone permission and GameLoop audio settings.
- Make sure the recording folder exists and the drive is not full.
- Avoid changing the storage path while a recording is active.
- Run one short test after every major GameLoop or audio-driver update.
- If the file exists but cannot be played, record another short clip before assuming the entire session is recoverable.
The built-in recorder is convenient for quick clips. A brief test before the match is the simplest way to avoid a long recording with missing audio, poor performance or an incorrect save location.
Related Articles
 How to Download and Install PUBG Mobile VNG on Tencent Gaming Buddy10 minutes read
 Summary of Common Tencent Gaming Buddy Errors12 minutes read
 How to Configure PUBG Mobile VNG to HD on Tencent Gaming Buddy5 minutes read
 How to Install Coalition on Your Computer with Tencent Gaming5 minutes read
 How to Fix Mouse Rotation Error on PUBG Mobile VNG5 minutes read
 Quick Update Guide Tencent Gaming Buddy4 minutes read
Reader Comments 0
Sign in with email or Google to join the discussion.