Table of Contents
This practical guide walks through how to quickly delete photo albums on iPhone, iPad and Mac, explains the main requirements, and highlights common issues that may appear along the way.
Quickly delete photo albums on iPhone and iPad
The Photos app on iPhone and iPad makes it easy to add, organize, and delete albums. In particular, you can also delete multiple albums at once if you want.
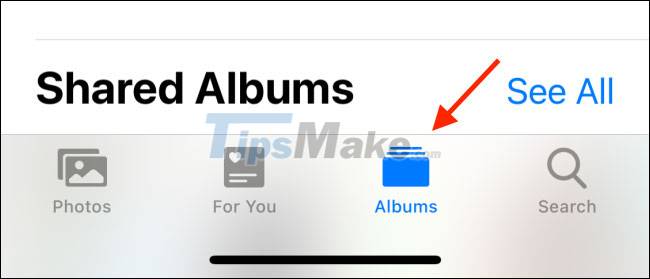
First, open the 'Photos' app on your iPhone or iPad, then navigate to the 'Albums' tab.
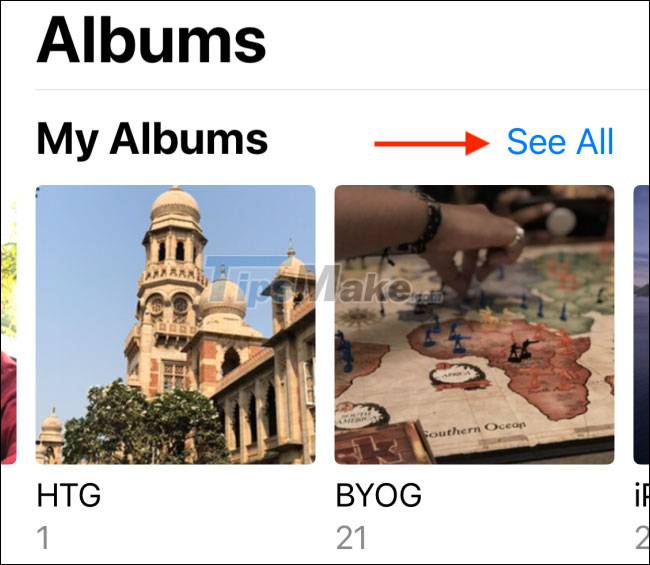
You'll find all the albums available on your device in the 'My Albums' section at the top of the page. Here, tap the 'See All' button in the upper right corner.
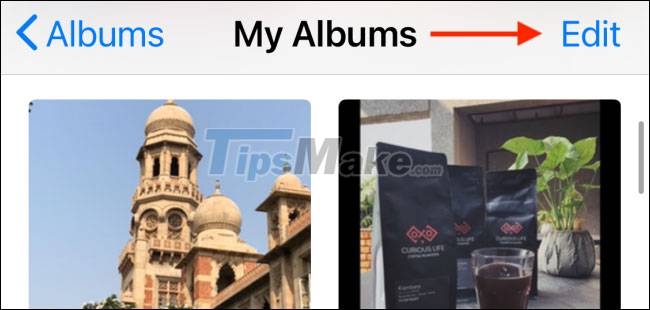
You will now see a list of all your photo and video albums. Tap the 'Edit' button in the upper right corner of the screen.
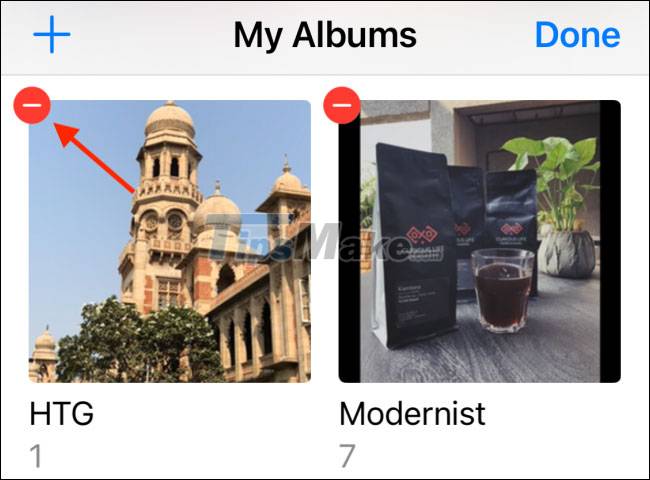
Album editing mode is now active, similar to home screen editing mode. Here, you can drag and drop albums to rearrange their positions.
To delete an album, simply tap the red '-' button in the upper left corner of that album.
There will be a pop-up asking you to confirm the action. Click to select 'Delete Album'. You can delete any album other than the default ones of 'Recents' and 'Favorites'.
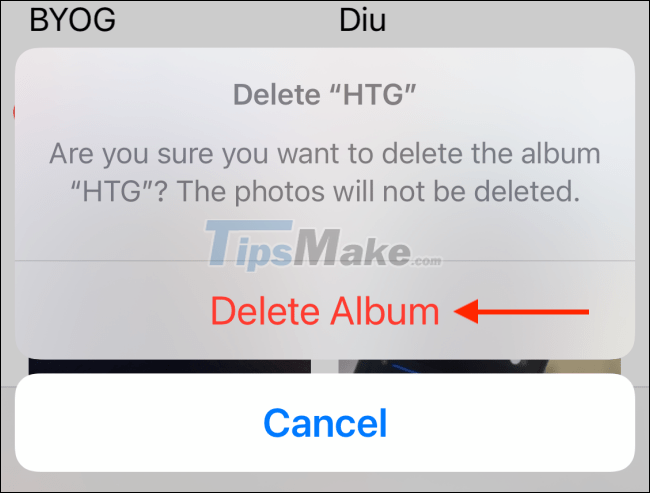
Once confirmed, you will notice that the selected album is immediately removed from the list. Repeat the same process to delete other albums. When you're done, tap the 'Done' button to return to the normal view of the photo gallery.

Delete Photo Albums on Mac
Deleting photo albums from the Photos app on a Mac is even simpler than on iPhone and iPad.
First, open the 'Photos' app on your Mac. Then navigate to the left menu and expand the 'My Albums' folder. Here, find the folder that you want to delete, then right click on it.
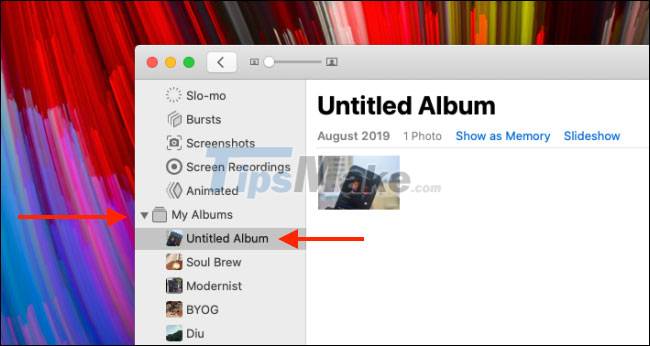
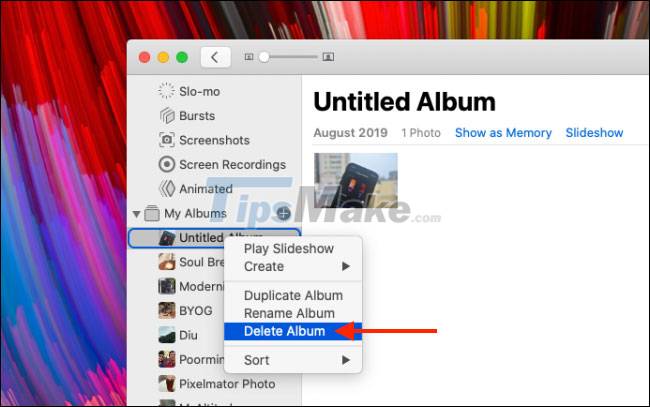
From the context menu that appears, select the 'Delete Album' option.
You will now see a pop-up asking for confirmation. Please click the 'Delete' button.
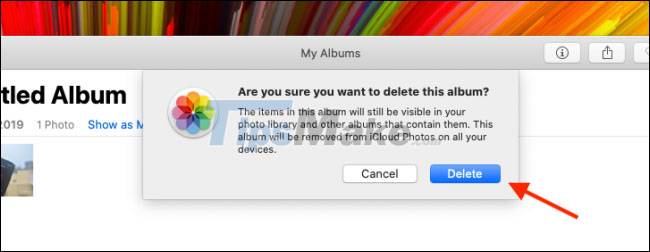
The selected album will be deleted from your iCloud photo library, and the changes will be synced across all devices.
Key Takeaways
Use the information above as a practical reference for how to quickly delete photo albums on iPhone, iPad and Mac. Review each step carefully, confirm any requirements, and choose the option that best fits your situation.
FAQ
What does this guide explain about Quickly Delete Photo Albums on iPhone, iPad and Mac?
It explains the main concepts, practical considerations, and useful steps related to quickly delete photo albums on iPhone, iPad and Mac without requiring advanced knowledge.
Who can benefit from learning about Quickly Delete Photo Albums on iPhone, iPad and Mac?
This information is useful for readers who want a clear overview, practical guidance, and reliable steps related to quickly delete photo albums on iPhone, iPad and Mac.
What should I check before applying this information?
Review the requirements, confirm that your device, software, or situation matches the instructions, and back up important data before making major changes.
Related Articles
 Complete on Photos Apps on iPhone and iPad - Part 13 minutes read
 How to Delete, Restore Photos and Videos on iPhone and iPad5 minutes read
 How to Delete Browsing History on iPhone, iPad Quickly2 minutes read
 How to Create Photo Albums on iPhone to Help You Easily Manage: Complete Guide4 minutes read
 How to Turn on Icloud Photo Sharing on Iphone, Ipad, Mac and Windows4 minutes read
 Complete the Photos App on iPhone / iPad - Part 4: Edit Photos13 minutes read
Reader Comments 0
Sign in with email or Google to join the discussion.