Table of Contents
This device will significantly reduce your monthly electricity bill if you are a forgetful person. This article explains the key facts and context behind light sensor switch.
In our house, there must be a light bulb that needs to be turned on when it is dark and when it is light, turn it off. It could be a light bulb outside, a garden light bulb. Usually we will have to actively turn on these lights when it's dark and turn them off when it's morning.
Funny to say it is turned off by "rice". In today's tutorial we will help you build devices that are able to turn on and off the lights automatically when it is dark / bright super simple. With this device, if you forget to turn off the power every morning, it will no longer happen. Let us begin with!

Activity description clip:
Prepare:

- A light sensor module (price range: VND 25,000).
- A Relay module (price range: VND 30,000).
- A plastic box (take advantage of old items not used in the house).
- A piece of power cord with plug.
- 7 color strings.
- An old phone adapter does not work.
Step 1: Attach light sensor module to the box.
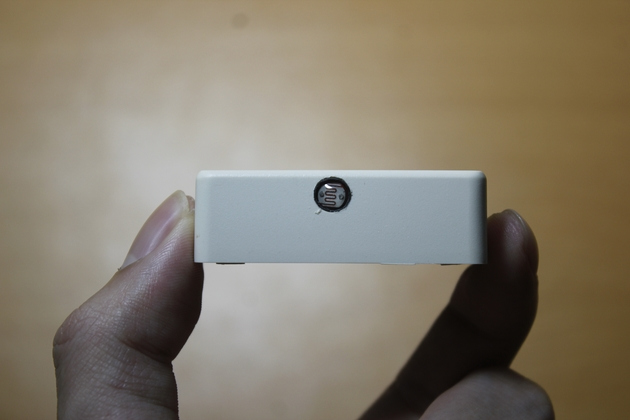
You chisel a hole in the plastic box, fit the optical head on the light sensor.
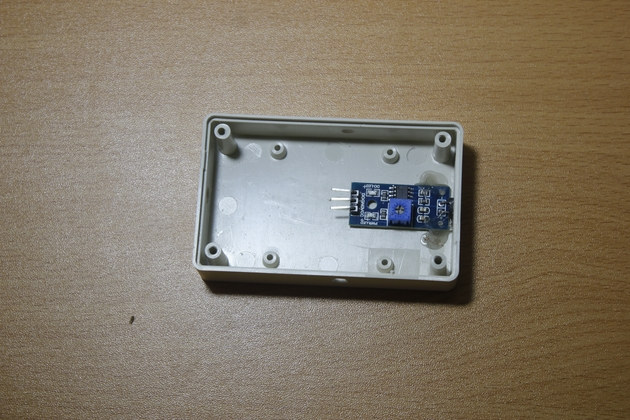
Then fix the light sensor module into the box with candle glue.
Step 2: Connect the signal between 2 modules.
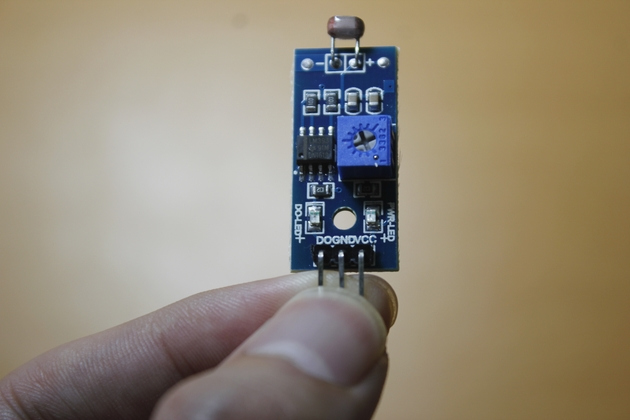
On the light sensor module we have 3 pins: the DO pin is the signal foot, the VCC GND is the 2 pins that supply power to the active module.
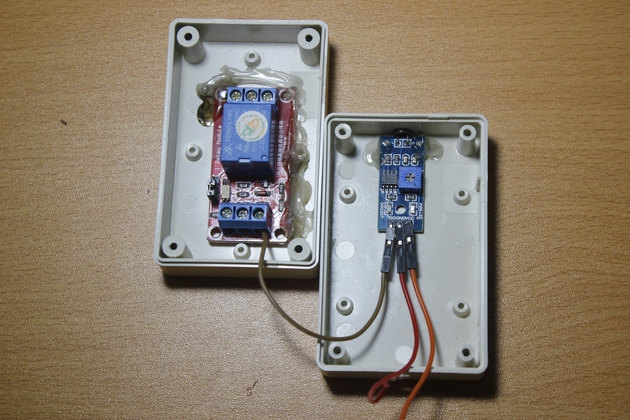
Connect the DO pin of the light sensor module to the IN pin on the Relay module.
Talk a little bit about Relay module. This module has 6 pins.
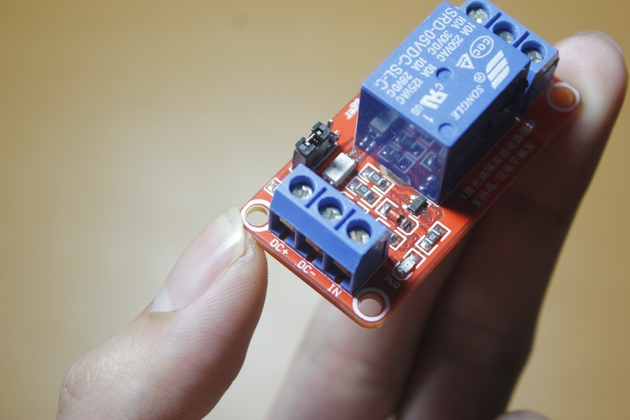
In which 3 pins DC + DC - is the power pin, IN is the input signal pin to enable Relay.
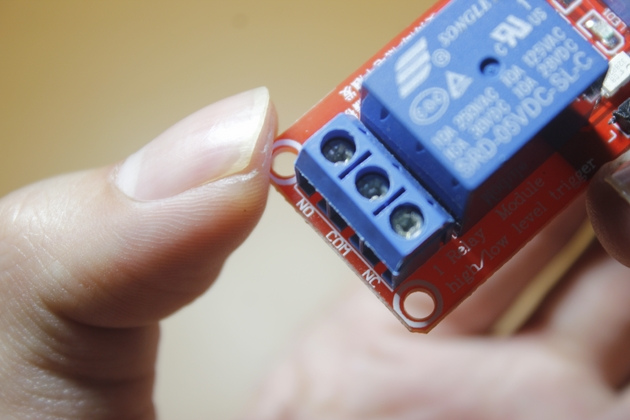
The other three pins are: COM and NC NO are the pins for us to use to close the electrical devices. COM is the middle foot. NC stands for Normal Close which means normally closed. NO is Normal Open meaning normally open.
Step 3: Connect the power supply cable to the Relay Module and the active light sensor module.
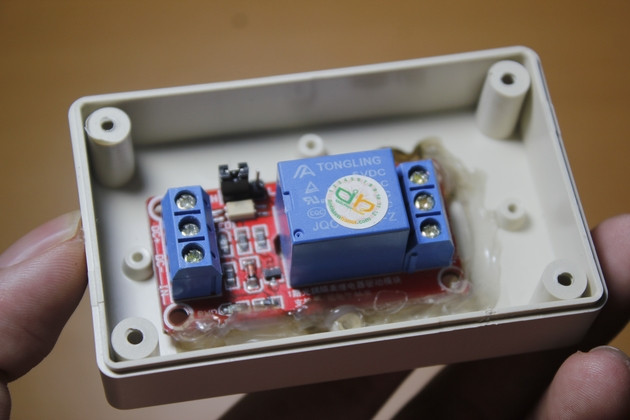
Fixed module relay on plastic box with candle glue.
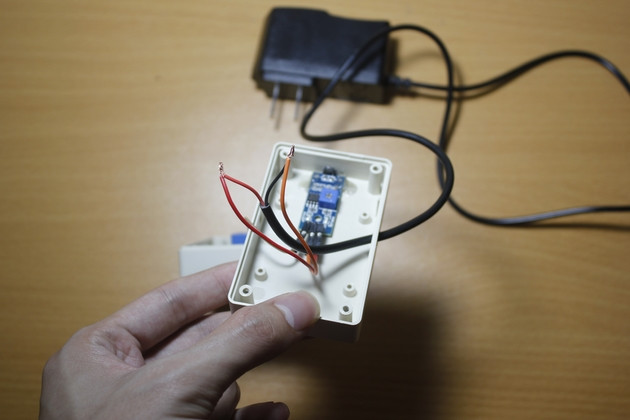
Connect 2 power cords of light sensor with 2 power adapter.
In order for these two modules to work, we need to power them. The power supply is 5V DC, since both modules use 5V DC power, so we connect the two power cords together.
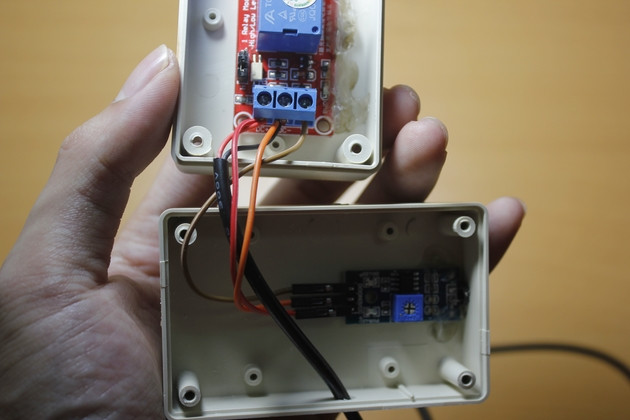
Then connect to DC + and DC- pins.
You use the Adapter Red wire connected to the VCC pin of the 2 modules, the black wire is connected to the GND pin.
Step 4: Connect the control lamp from the Relay module.
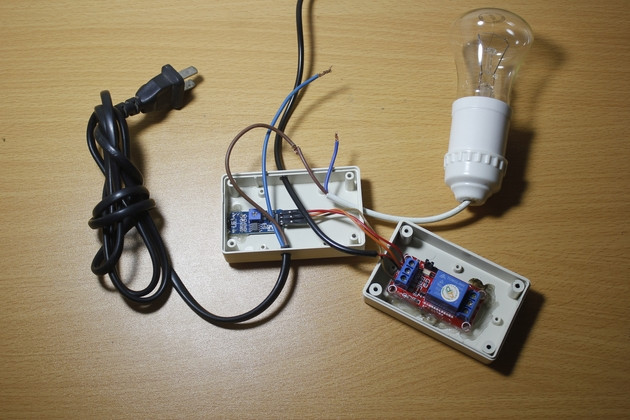
You connect the power cord to a light bulb.
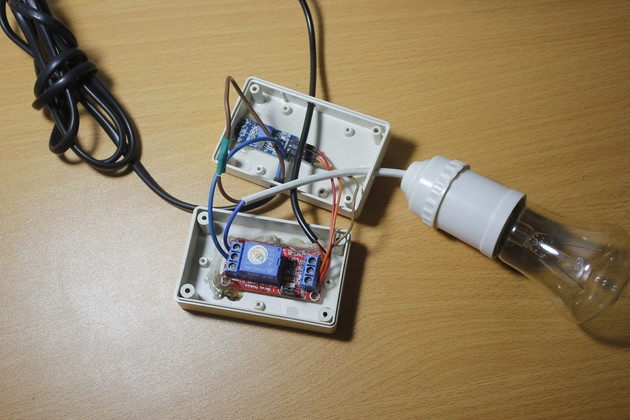
The other two wires of the light bulb connect to the NO pin on the Relay module, the other end of the power supply is connected to the COM pin.
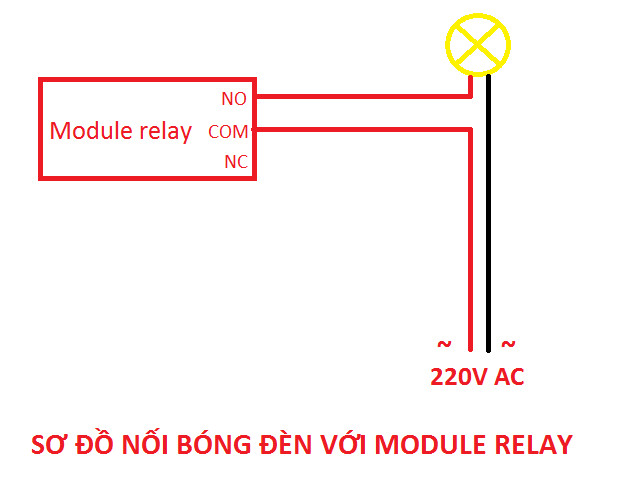
You can look at this diagram to see more clearly how to connect.
To adjust the sensitivity of the light sensor, you use a variable screw screwdriver on the module to adjust the parameters accordingly.
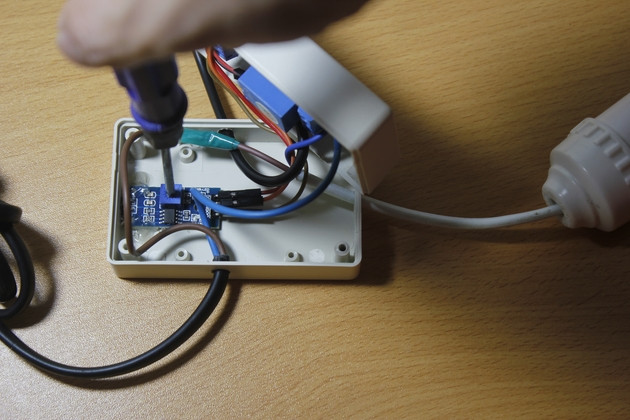
So we have completed the steps to create a device that automatically turns on and off the light.
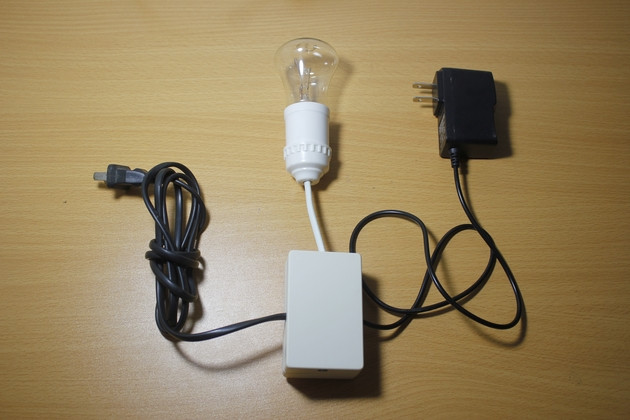
Good luck!
- Instructions for homemade readers to clap the device to turn on the lamp / fan very simply.
- Homemade the Asphalt 8 steering wheel set with extremely high quality flange box.
FAQ
What is light sensor switch?
Connect the DO pin of the light sensor module to the IN pin on the Relay module.
What makes light sensor switch notable?
This module has 6 pins.
What are the key facts about light sensor switch?
Connect 2 power cords of light sensor with 2 power adapter.
Related Articles
 Homemade Ultra-light Light Switch, Only You Can Turn It On7 minutes read
 Japanese Youths Make Emergency Lights from Smartphones and3 minutes read
 How to Automatically Turn on Dark Mode Iphone Day and Night3 minutes read
 What Color Is the Turn Signal Light? It's Easy to Think but 90%3 minutes read
 8 Simple and Quick Ways to Turn Off the LED Fan Light8 minutes read
 How to Fix Christmas Tree Lights: Step-by-Step Guide7 minutes read
Reader Comments 0
Sign in with email or Google to join the discussion.