Table of Contents
1. Set in Power Option
On Windows 7
This guide explains how to keep the Computer Screen On, with clear steps, practical tips, and important checks before you begin.

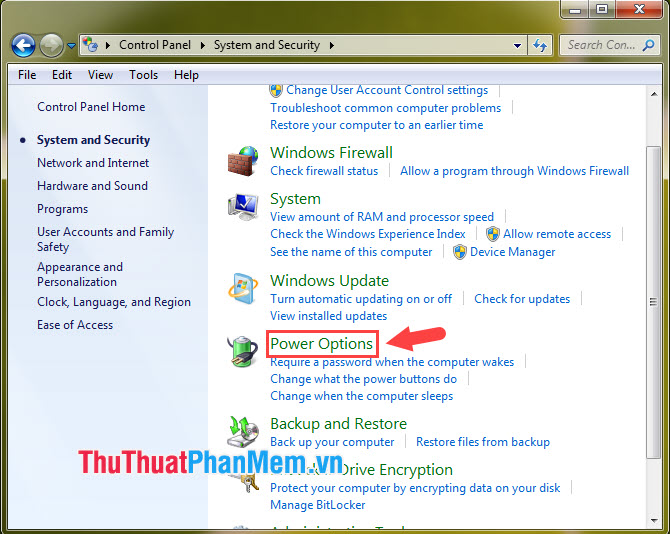
Step 2: Select the item System and Security .

Next, click on Power Options .
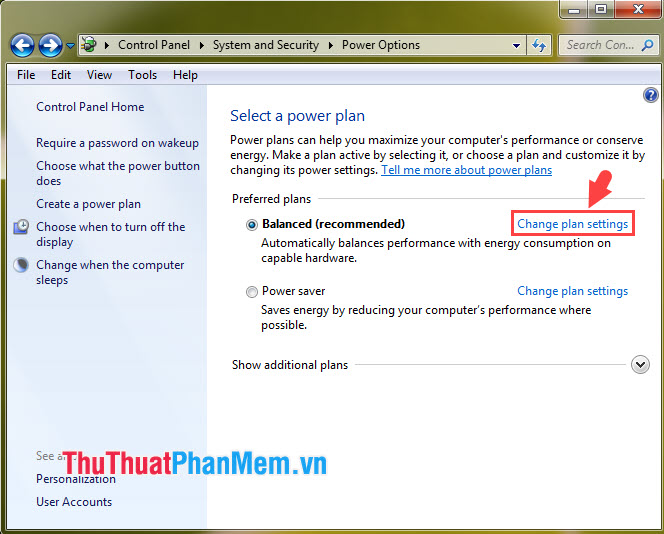
Step 3: Choose Change plan settings .
Step 4: Click the option of Turn off the display (1) and turn it into Never (2) .

Do the same thing for Put the computer to sleep (3) to Never and click Save changes (4) .

On Windows 10
Step 1: Go to Start (1) => Settings (2) .

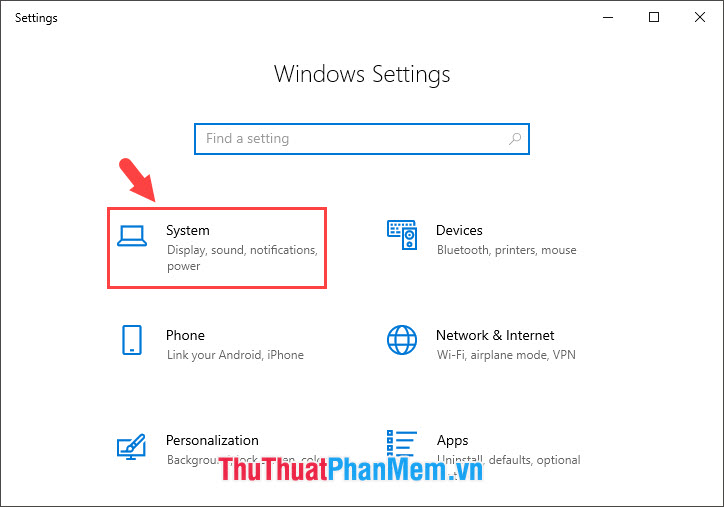
Step 2: Go to the System section.
Step 3: Next, go to Power & Sleep (1) => click on the option of When plugged in, turn off after (2) = > Never (3) .

Step 4: Go to Sleep (1) => switch When plugged in, PC goes to sleep after to Never (2) .

2. Turn off the Screen Saver feature
On Windows 7
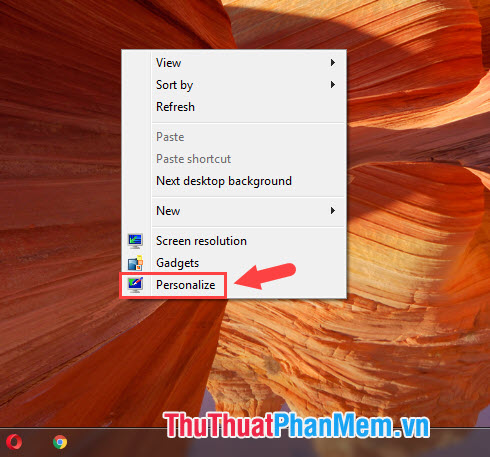
Step 1: Right-click on the screen and select Personalize .
Step 2: Select the Screen Saver section.
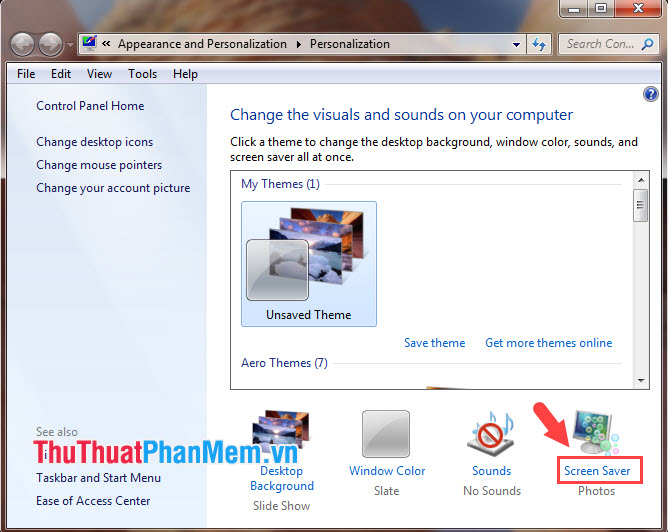
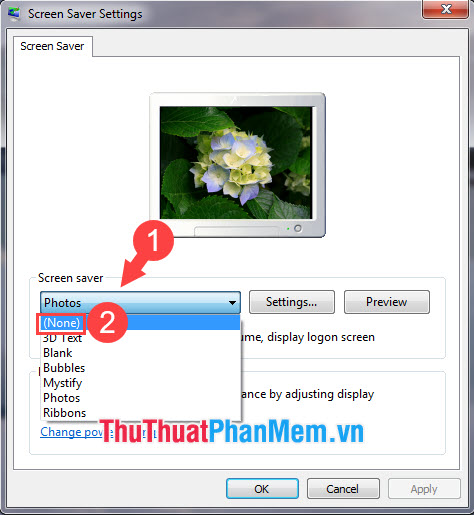
Step 3: Click the Screen Saver (1) => (None) (2) .
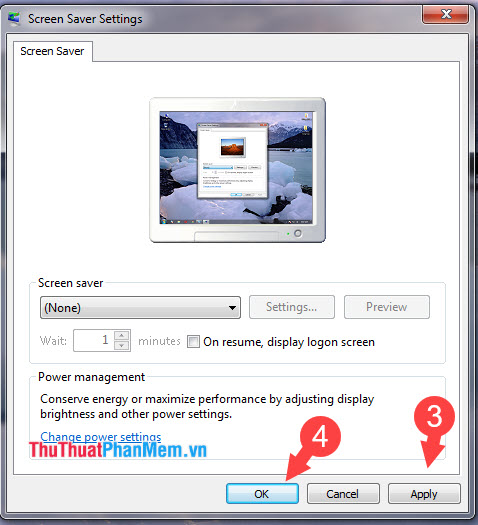
Next, click Apply (3) => OK (4) is done.
On Windows 10
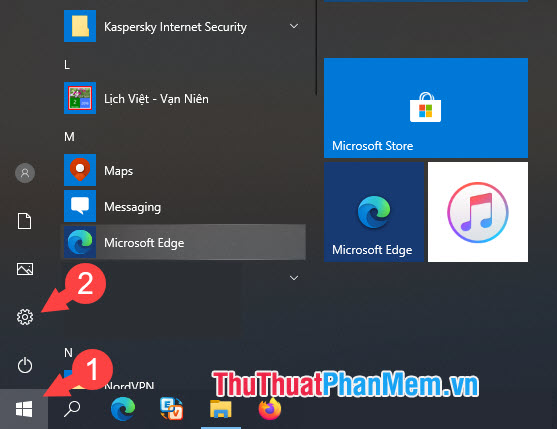
Step 1 : Click on Start (1) => Settings (2) .
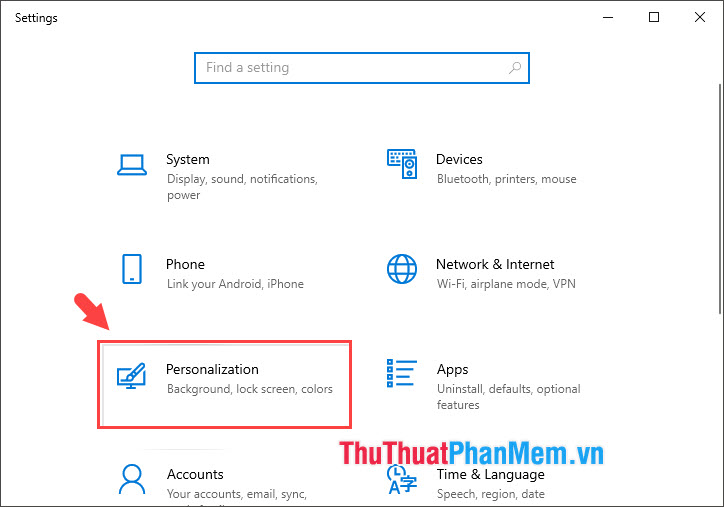
Step 2: Choose Personalization .
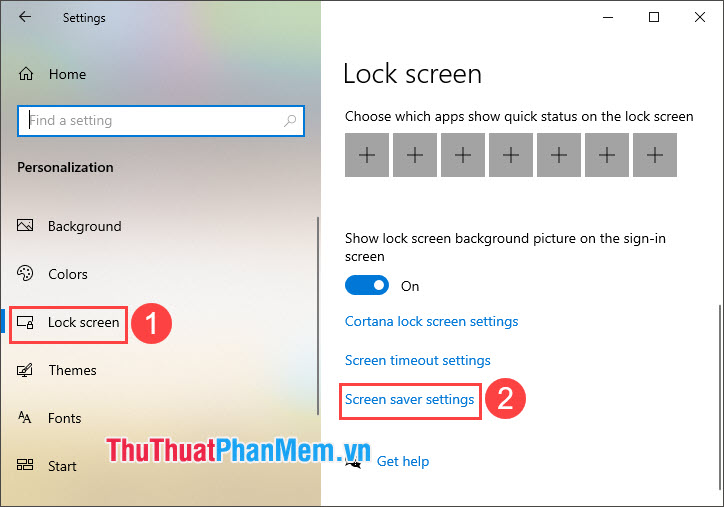
Step 3: Choose Lock screen (1) => Screen saver settings (2) .
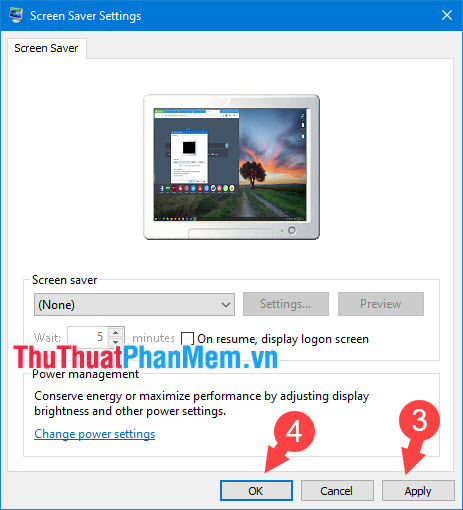
Step 4: Click the Screen Saver (1) => (None) (2) .

Then, choose Apply (3) and OK (4) and you 're done.
With the simple manipulations in the article, you can help the computer screen always bright to show and work. Good luck!
FAQ
What should I know about Keep the Computer Screen On?
Focus on the key features, requirements, limitations, and practical use cases explained in this guide.
How do I get the best results with Keep the Computer Screen On?
Follow the recommended steps, use current software or information, confirm compatibility, and review settings before major changes.
Are there any risks or limitations?
Potential limitations depend on compatibility, data quality, cost, privacy, support, and how the product or method is used.
Related Articles
 How to Fix a Skewed Computer Screen: Step-by-Step Guide3 minutes read
 How to Use 4K TV as a Computer Screen9 minutes read
 How to Use a TV as a Second Computer Monitor: Step-by-Step Guide10 minutes read
 How to Project an Android Screen on a Computer14 minutes read
 Instructions to Fix Blue Screen Error on Computer15 minutes read
 Streaky Computer Screen - Cause and Fix6 minutes read
Reader Comments 0
Sign in with email or Google to join the discussion.