Table of Contents
You can install Windows 10 from a bootable USB by creating trusted installation media, starting the PC from that drive, and following Windows Setup. A clean installation can erase every file and application on the selected disk, so make a verified backup before you begin.
Windows 10 is an older platform. For an everyday internet-connected PC, confirm that it remains the correct operating system for your hardware and support needs before installing it.
What you need
- A blank USB drive with at least 8 GB. Creating installation media erases it.
- A trusted Windows 10 ISO or Microsoft installation-media tool.
- A valid license for the Windows edition you intend to install.
- A backup of personal files, encryption recovery keys, and important application licenses.
- Drivers for critical storage or network hardware if the manufacturer requires them.
Disconnect extra external drives before setup where practical. This reduces the risk of erasing or installing boot files on the wrong disk.
1. Create the Windows 10 installation USB
Use Microsoft’s current installation-media method or a reputable USB-writing utility such as Rufus. Select the correct USB device, ISO, language, edition, architecture, and partition scheme. For most modern UEFI PCs, use GPT; older legacy-BIOS systems may require MBR.
Do not download an ISO from an unknown mirror. A plausible filename does not prove that an operating-system image is genuine. The Windows installation and recovery guides provide more preparation and media options.
2. Boot the PC from USB
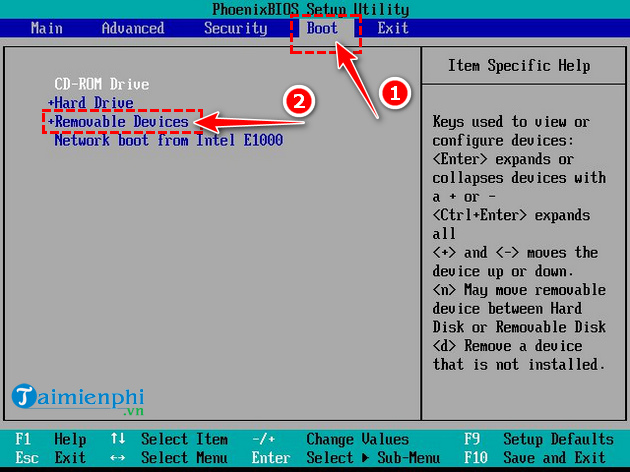
Insert the installer, restart, and open the one-time boot menu. Common keys include F12, F9, F10, Esc, or a manufacturer-specific key displayed at startup. Prefer the one-time boot menu over permanently changing the firmware order.
If necessary, open UEFI/BIOS settings and locate the boot options.
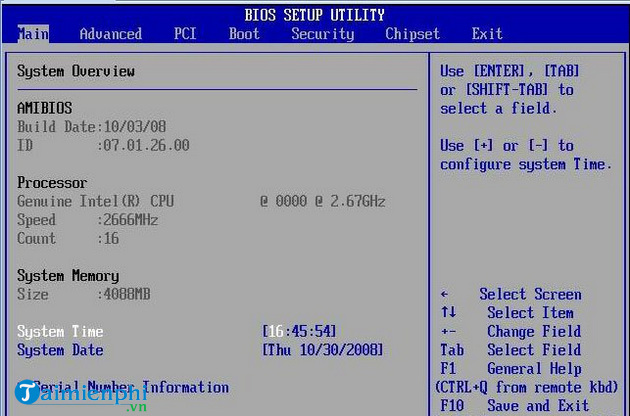
Select the USB entry that matches the media mode. A modern system will usually show a UEFI entry for the drive.
3. Start Windows Setup
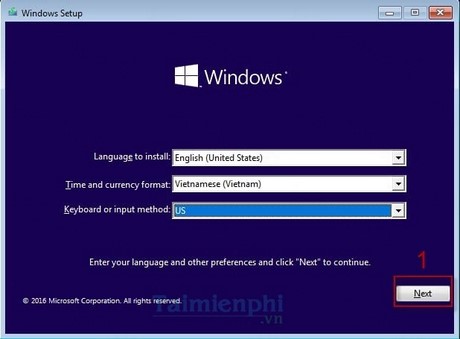
Step 1: Choose the installation language, time and currency format, and keyboard layout, then select Next.
Step 2: Select Install now. If your goal is to repair an existing installation, use the recovery option instead of starting a clean install.
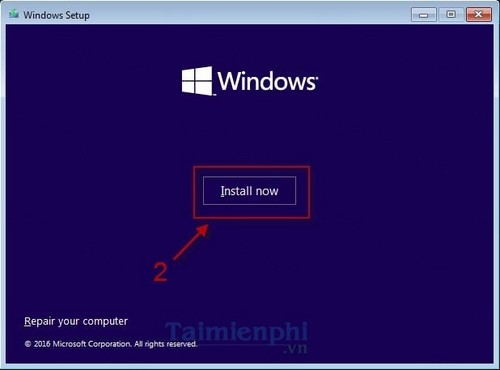
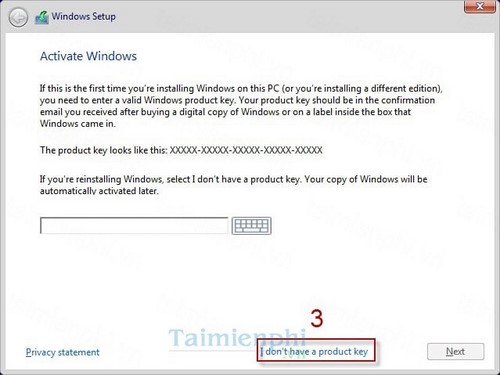
Step 3: Enter a valid product key. Choose I don’t have a product key only when the PC already has a matching digital license or you plan to activate it legitimately later.
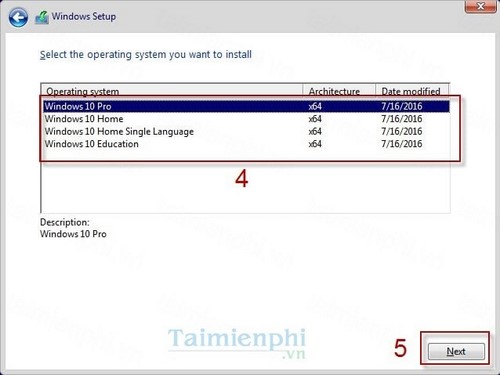
Step 4: If Setup asks for an edition, select the one covered by the license—typically Home or Pro. A digital license for Home will not activate Pro.
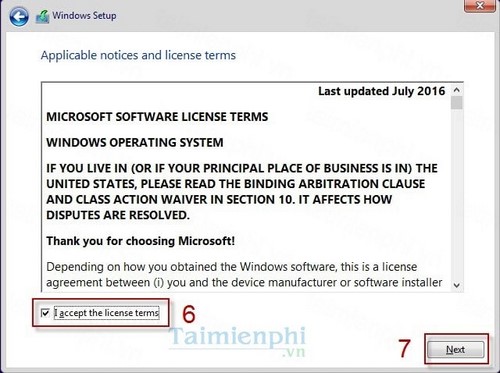
Step 5: Read the license terms and accept them only if you agree.
4. Choose upgrade or custom installation
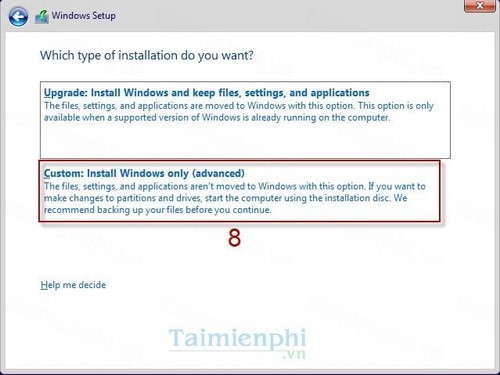
Step 6: Select Custom: Install Windows only (advanced) for a clean installation started from bootable media. The Upgrade option is intended for an in-place setup launched from a running compatible Windows installation.
5. Select the destination disk carefully
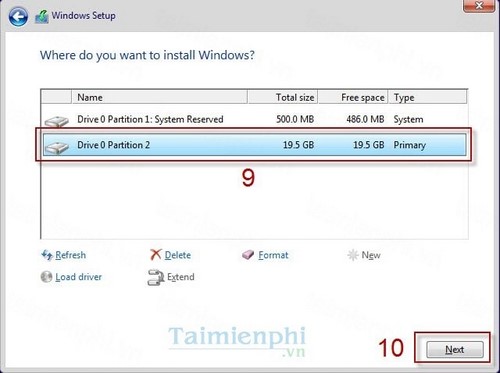
Step 7: Identify the correct physical disk by its capacity and existing partitions. This is the most dangerous stage of the process.
- For a true clean install on a fully backed-up target disk, delete only the partitions on that target until it shows unallocated space, then select the unallocated space and choose Next.
- If you need files from any displayed partition, stop. Do not delete or format it.
- Do not assume “Drive 0” is always the intended disk.
- If several disks look similar, shut down and disconnect the disks that must not be changed.
6. Let Windows copy and install files
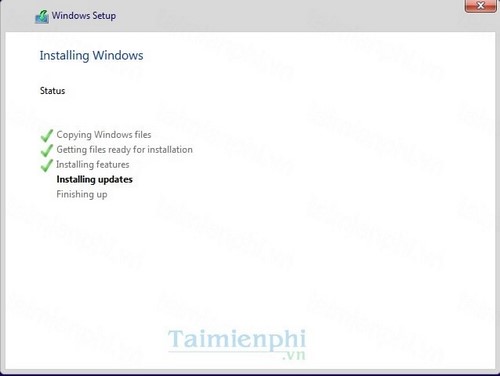
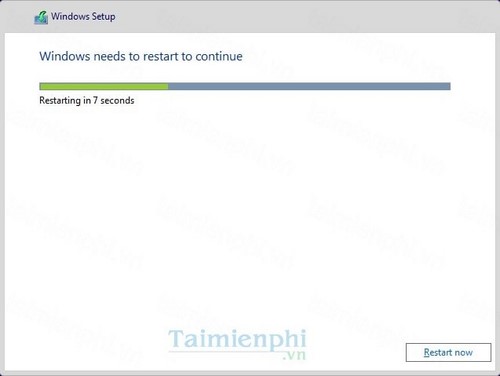
Step 8: Setup copies files and restarts the PC several times. The duration depends on the USB drive, storage device, and hardware. Do not remove power. When the first restart occurs, avoid booting from the USB again; remove it if the PC repeatedly returns to the first setup screen.
Step 9: After installation, Windows opens the first-run setup experience.
7. Complete first-run setup
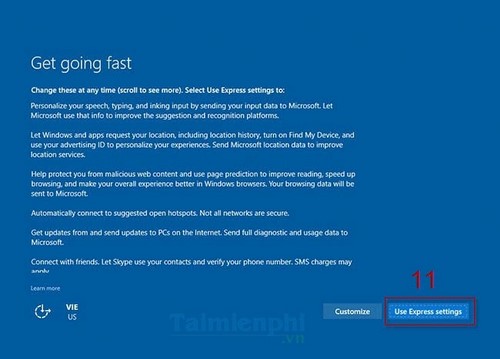
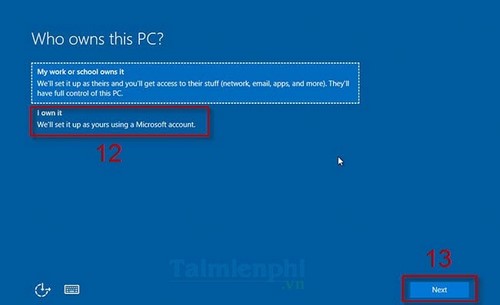
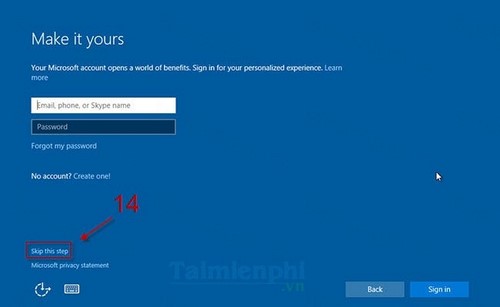
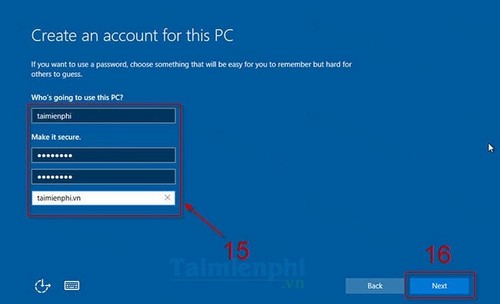
The following screenshots show an older Windows 10 out-of-box experience. Current prompts vary by build, edition, region, and network connection. Read each screen instead of copying an outdated choice automatically.
Step 10: Review privacy and device settings. Customize them according to your needs rather than accepting every default without reading it.
Step 11: If asked, identify whether the PC belongs to you or an organization. A managed work or school device may need its administrator’s enrollment process.
Step 12: Sign in with the account type offered for your edition and setup state. The old Skip this step button shown below may not appear in newer setup flows.
Step 13: Create the account and a strong sign-in method. Store account-recovery information safely.
Step 14: Review any assistant or optional-service prompts. Cortana options shown in older versions may no longer be present.
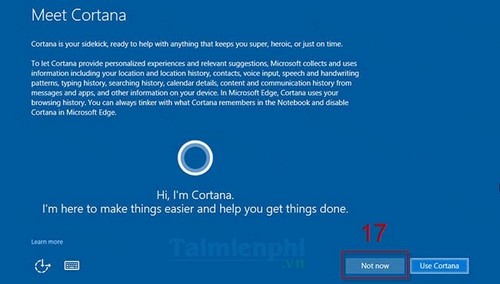
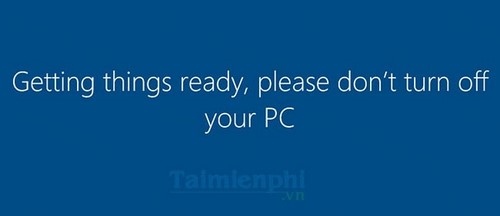
Step 15: Wait while Windows prepares the desktop. Do not power off the computer.
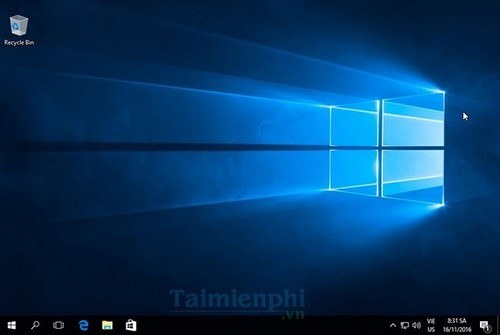
When the desktop appears, installation is complete.
After installation
- Run Windows Update and restart until no required updates remain.
- Install chipset, graphics, network, and specialty drivers from the PC or component manufacturer when needed.
- Check activation under Settings > Update & Security > Activation.
- Restore personal files only after confirming the system is stable and protected.
- Test audio, network, printers, sleep, and critical applications.
For supported update paths rather than a clean install, see the Windows 10 update guide.
Common Windows 10 USB installation errors
“A required CD/DVD drive device driver is missing”
Despite the wording, the cause may be unreadable or incomplete installation media, a problematic USB port, or a storage-controller driver that Setup cannot see. Recreate the USB from a verified ISO, try another USB port, and obtain storage drivers from the computer or motherboard manufacturer. See common Windows installation errors.
The bootable USB does not work
Recreate it after verifying the ISO and target device. Match GPT/UEFI or MBR/legacy mode to the computer. Antivirus should not be disabled routinely; investigate a specific warning and use a trusted media-creation tool.
The PC will not open the boot menu or UEFI settings
Check the manufacturer’s support page for the exact model and key. Fast Startup may make timing difficult; use Windows advanced startup options when an existing installation still boots.
“The selected disk has an MBR partition table”
The installer boot mode and destination partition style do not match. Prefer booting in UEFI mode and using GPT on modern hardware. Converting or cleaning a disk can erase it, so back up first and follow the dedicated guide to fix the MBR partition-table error.
Related Articles
 Detailed Guide on Creating a Multi-Purpose Bootable USB Drive4 minutes read
 4 Tools to Create USB Boot Install Windows 105 minutes read
 Guide to Quickly Creating a Bootable USB Drive with Hiren's BootCD11 minutes read
 How to Create a Hiren's BootCD Bootable USB Drive for Windows Rescue4 minutes read
 How to Create a Bootable Windows 7 or Vista USB Drive7 minutes read
 How to Easily Check a Bootable USB Drive on Windows 105 minutes read
Reader Comments 0
Sign in with email or Google to join the discussion.