Detailed guide on creating a multi-purpose bootable USB drive.
A multi-purpose bootable USB drive is an essential tool for troubleshooting Windows errors, recovering data, and quickly installing the operating system. If your computer malfunctions and won't boot, use a bootable USB drive immediately..
A computer experiencing startup problems can lead to the loss of important data. A bootable recovery USB drive can help fix Windows errors, recover data, and reinstall the operating system.
Guide to creating a multi-purpose bootable USB drive.
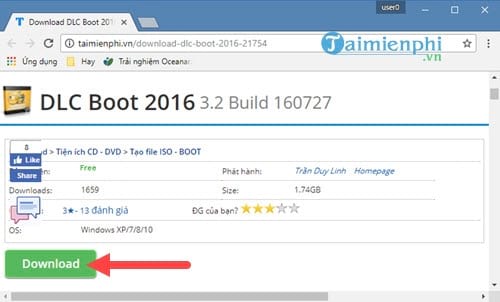
Step 1: Download the latest version of DLC Boot 2016 software .
Note: Although named DLC Boot 2016, this version is actually the latest version of DLC Boot 2017.
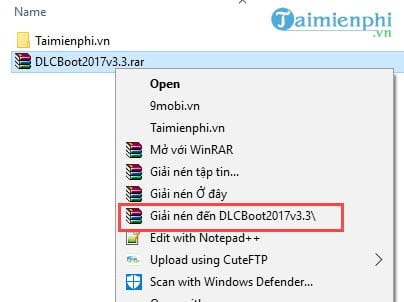
Step 2: After the DLC Boot 2017 download is complete, we proceed to extract the software using WinRAR or the default Zip file on your computer.
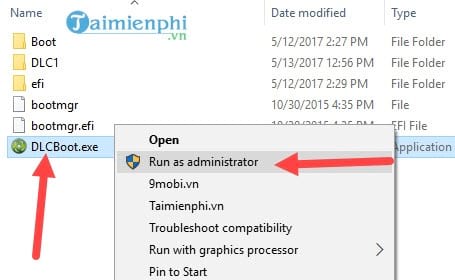
Step 3: Inside the DLC Boot 2017 folder, you will find DLCBoot.exe . Right-click on it and select "Run as Administrator ".
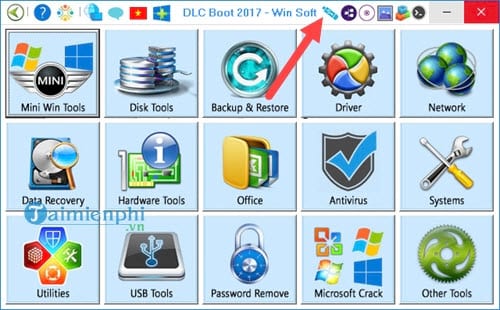
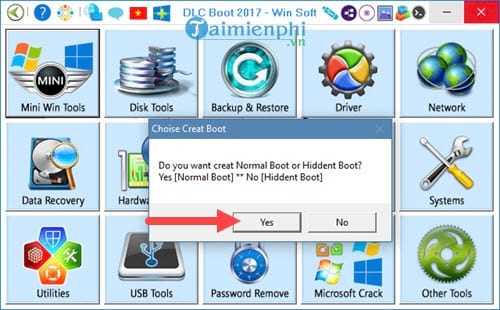
Step 4: The DLC Boot 2017 interface will appear; click on the USB icon .
Step 5: The system will ask you to confirm whether you want to create a multi-purpose bootable USB drive in a regular or hidden format. If you don't want anyone to know about this boot folder, choose NO - hidden format; otherwise, choose Yes - normal format .
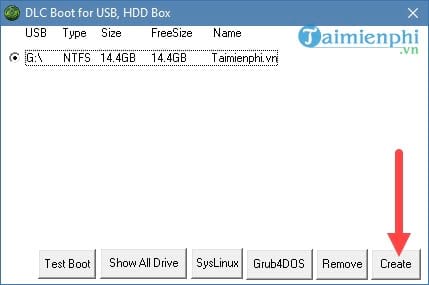
Step 6: Select the USB drive currently plugged into the computer and click Create .
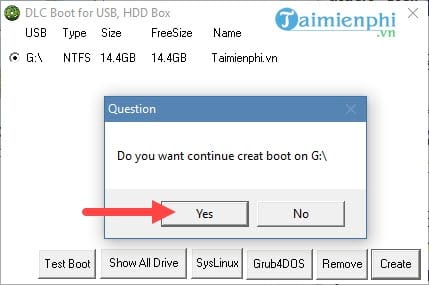
- Next, confirm by clicking Yes; this process will erase all existing data on your USB drive.
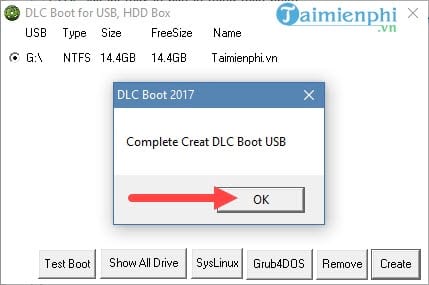
Step 7: You will then have to wait approximately 10 minutes for DLC Boot 2017 to copy the files to the USB drive.
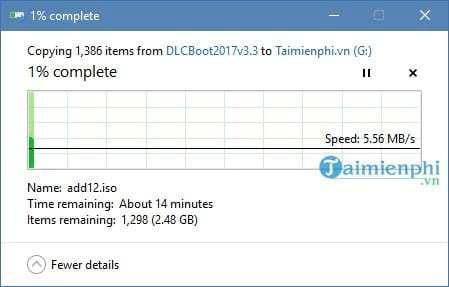
- And when the message " Complete Create DLC Boot USB " appears , that means you're done.
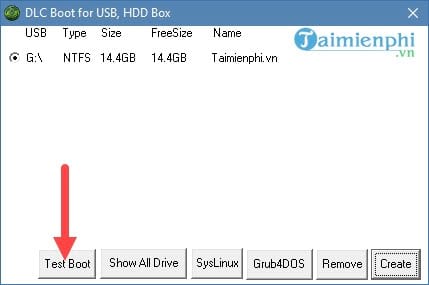
Step 8: The next step is to test whether the multi-purpose bootable USB drive was successfully created. Fortunately, DLC Boot 2017 includes a built-in QEMU tool to help you accurately test the boot process. Select " Test Boot" on the interface you just saw.
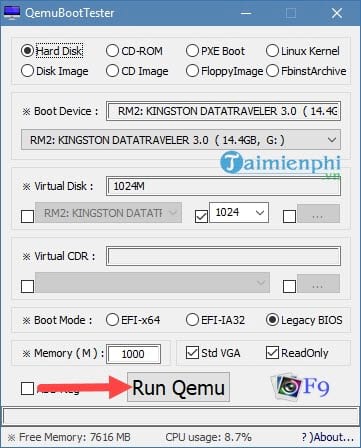
Step 9: The QEMU software will appear, and you just need to click on Run Qemu to start it; you don't need to worry about the other settings.
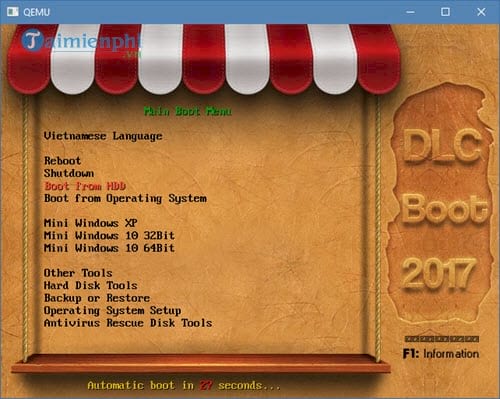
Step 10: This is the interface you'll see when you use the newly created bootable USB drive, complete with all the necessary tools.
Owning a bootable USB drive for computer rescue helps you fix operating system errors, recover data, and easily install Windows. Regularly check to ensure your multi-purpose bootable USB drive is always working properly.