How to install two versions of macOS on a Mac
Not many people know that it's possible to have two versions of macOS installed on your Mac at the same time - you should have no trouble partitioning your drive. If you have macOS 10.13 or later, you can simply create an APFS volume and use that location to install the second version of macOS you want.
If you use professional software that often has compatibility issues with recent macOS updates, this is a great solution, as it allows you to continue running it on your version of macOS. stability. Other uses include testing the software with different versions of macOS or using it to safely install beta versions of macOS.
APFS makes it easy to install multiple versions of macOS
Previously, installing two versions of macOS on a Mac required creating a dedicated partition on your drive and allocating some storage space to it. But that changed when Apple switched from a file system called Mac OS Extended to use the Apple File System (APFS).
If you have macOS High Sierra (10.3) or later, your computer will by default use the APFS format required for this method to work. Using a feature called Space Sharing, you can create multiple volumes in a container and automatically share storage space between them if needed.
All you have to do is create a new volume, download the second version of macOS to this location, then select the new volume when starting your computer.
It's easy to set up, much more flexible than the old method, and that means you no longer have to choose how much space to permanently assign to a partition, although the option is also available if you want. That aside, see the steps below for how to install a second version of macOS on a computer.
Can Apple Silicon Macs run two versions of macOS?
Apple Silicon Macs also use APFS volumes, so you can also install the second version of macOS on these computers using the method that the article will describe below. However, an important point to note is that macOS versions older than Big Sur will not work on Mac silicon due to a change in processor architecture from Intel chips to Apple silicon chips.
While you won't be able to download older versions of macOS, that still leaves you with a few options including installing macOS Big Sur, Monterey, macOS betas, and new macOS updates. when they are released.
Step 1. Back up your Mac
As always, it's a good idea to back up your Mac in case anything goes wrong in the process. Don't worry, if you've never done it before, there are several easy methods you can choose to back up your Mac.
Step 2. Create a new volume
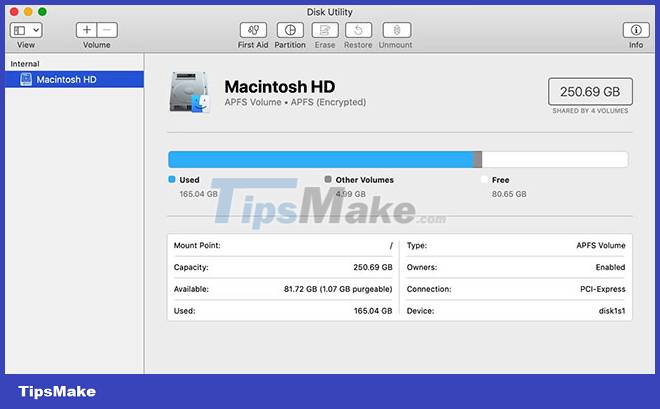
Start by creating a new APFS volume using Disk Utility on your Mac. You can find it by opening Finder and choosing Go > Utilities > Disk Utility from the menu bar.
With the program open, press the plus (+) button near the top of the window area or choose Edit > Add APFS Volume from the menu bar. In the dialog window that appears, enter a new name for the volume and make sure the format is set to APFS. Once you're done, click Add.
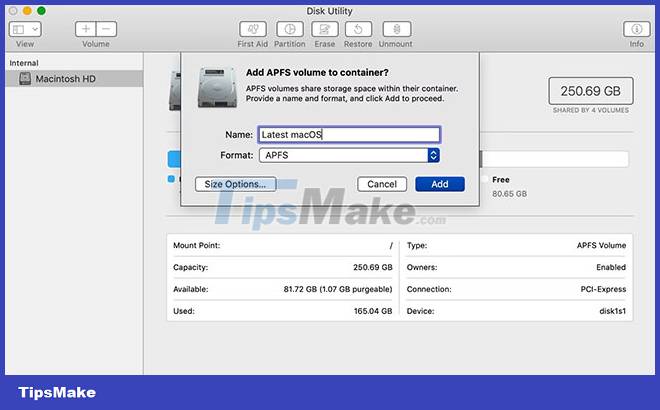
The new volume should now be listed under the left column, along with your original Macintosh HD drive.
Step 3. Download macOS
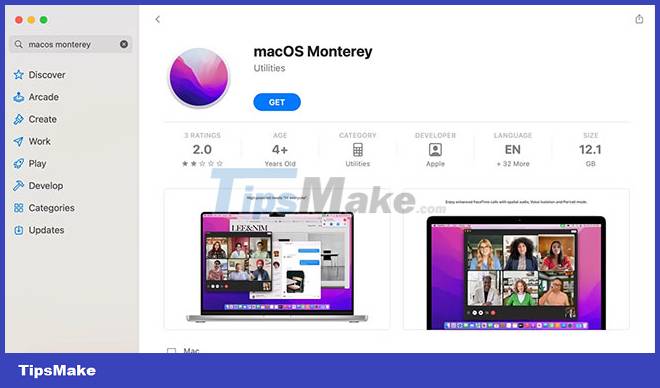
Next, download the version of macOS that you want to install on your computer. In this case, the article wants to install macOS Monterey on a separate volume. There are also ways to downgrade to an older version of macOS if you want to go the other way.
To download the latest macOS, open the Applications folder on your computer and click App Store . Search for the latest version of macOS and press Get to start the download.
You can also check for recent updates by clicking the Apple icon in the top left corner of your computer screen and choosing About This Mac . Then in the Overview tab , click Software Update to check for the latest available updates.
To find older versions of macOS, simply search for them on the App Store or on Apple's website.
Step 4. Choose the installation location
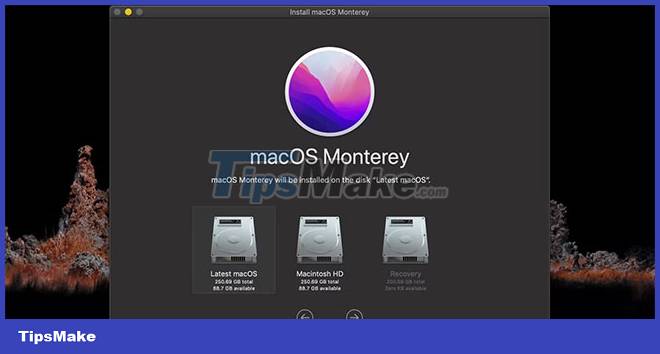
Open the macOS installer once it has been downloaded; you can find it in the Applications folder on your computer. When it launches, you will be prompted to choose an installation location. Make sure to select the APFS volume you created in step two, then follow the rest of the installation steps.
It will take some time to install, but once it's done, you'll have a second version of macOS to use on your Mac. You can now switch between versions of macOS when starting your computer, or set a new volume as the default drive.
Step 5. Switch between macOS versions
To use the new version of macOS or switch between volumes, start by shutting down your Mac.
Next, turn on your Mac while holding down the Option (alt) key on the keyboard. If you have an Apple silicon Mac, just press and hold the power button. You can stop pressing the key when you see the option to choose the boot drive. Using the arrow keys, select the volume you want to start, and press Return on your keyboard.
Your computer will now boot with the version of macOS on the volume you selected.
Step 6. Set a New Default Boot Drive (Optional)
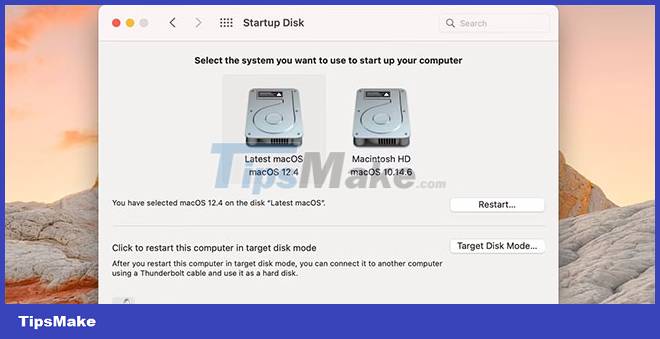
If you think you'll be using the new version of macOS often, you can set it as your default startup drive, which opens whenever you power on your computer.
Changing the default boot drive is simple, just navigate to System Preferences , then select Startup Disk . From here, click the padlock icon in the bottom left corner and enter the admin password to make changes. Then just select the volume you want to use by default at startup and click the padlock icon again to save your selection.
With new macOS updates released every year, it's hard for software developers to keep programs running smoothly. Using this method, you have a safe option to upgrade your computer while keeping the old version of macOS to wait for all your apps to be fully compatible.
Running two versions of macOS on your computer is also a great solution if you need to test software on different versions of macOS or run the macOS beta.
You should read it
- 6 reasons why Windows 11 is better than macOS
- How to change the default macOS Sierra wallpaper
- How to turn off the Gatekeeper on macOS Sierra install the application outside the App Store
- How to fix common errors when upgrading to macOS Sierra
- Free space on macOS Sierra with Optimize Storage
- How to delete automatic file versions on macOS
 How to enable/disable Turbo Boost on Mac
 How to download the macOS 12 Monterey installer with gibMacOS
 How to reset Mac, How to Factory Reset MAC
 10 best macOS screenshot apps 2021
 Top 5 useful Terminal tips for Mac users
 How to enable root user on a Mac to take complete control of the device