How to Install MS DOS 7.1
Part 1 of 3:
Downloading MS DOS 7.1
- Go to winworldpc.com.

- It is possible to download from other sources but winworldpc is a trusted website which also provide MS-DOS programs.
-
 Click Library.
 -
-
 Click MS-DOS in the DOS section.
 -
-
 Click the tab 7.1.
 -
 Choose which file you want to download.
- The CD-ISO was chosen for this tutorial.

-
-
 Choose a mirror site (any will do) and wait for the download to finish.
- If the download doesn't start, allow your browser to allow websites to know where you've come from.
Part 2 of 3:
Installing MS DOS 7.1
- Insert the CD or floppy disk, with MS-DOS 7.1 on it, into your computer and start it.
-
 Press Enter.
 -
 Click Next.
 -
 Click Next.
 -
 Make sure the 'I agree.' box is checked and click Next.
 -
 Click Continue.
 -
 Click Create a FAT32/16/12 Primary Partition.
 -
 Leave all the disks in their drives and click Reboot now.
 -
 Press Enter.
- The next few steps will look exactly the same as the last few (to a point) but it's vital that you repeat them.
-
 Click Next.
 -
 Click Next.
 -
 Make sure the 'I agree.' box is checked and click Next.
 -
 Click Continue.
 -
 Click Yes.
 -
 Decide where you want MS-DOS 7.1 to install and click Next.
 -
 Click Yes.
 -

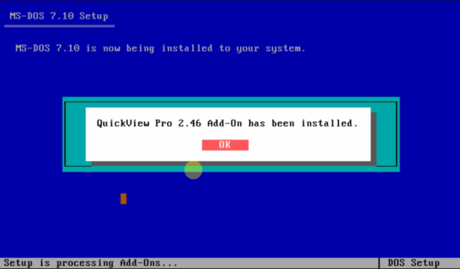
 Consider installing the add-ons. The next few steps are all down to personal preferences but it is recommended that you do install all the add-ons as it makes using MS-DOS easier.
- 'Full installation' and 'Install Add-Ons' were checked and the Next was clicked.
-
 Click Yes.
 -
 Confirm that the above settings are correct and click OK.
 -
 Click Continue if you wish to install additional add-ons (this was selected in the tutorial).
 -
 Click Yes.
 -
 Click Yes.
 -
 Decide whether you want to install drivers for your sound cards (Yes was chosen here).
 -
 Click Yes.
 -
 Choose your sound card and click Continue.
- Sound Blaster AWE Pnp was chosen in this tutorial.
-
 Click OK.
 -
 Click Yes.
 -
 Click OK.
 -
 Click Yes.
 -
 Click OK.
 -
 Click Yes.
 -
 Click OK.
 -
 Click Yes.
 -
 Click Yes.
 -
 Click OK.
 -
 Click Yes.
 -
 Click OK.
 -
 Click Yes.
 -
 Click OK.
 -
 Click Yes.
 -
 Click Yes.
 -
 Click Yes.
 -
 Click Yes.
 -
 Click Yes.
 -
 Click Yes.
 -
 Click Yes.
 -
 Click Yes.
 -
 Click Yes.
 -
 Click Yes.
 -
 Click Yes.
 -
 Click Yes.
 -
 Click Yes.
 -
 Click No.
- It will put you in an endless loop if you click Yes.
-
 Click Yes.
 -
 Click Yes.
 -
 Click Yes.
 -
 Click Yes.
 -
 Click Enable both UMB and EMS.
 -
 Click Load both.
 -
 Ensure all the options are checked and click Continue.
 -
 Choose your keyboard and click Continue.
- UK users, check the 850 box.
-
 Choose the keyboard layout you would like and click Continue.
 -
 Click OK.
 -
 Remove the setup disk and click Yes to reboot the computer.
 -
 Press any key to continue.
 -
 The setup is now complete and you can now explore all that MS-DOS 7.1 has to offer.
Part 3 of 3:
Shutting Down
-
 Make sure the DOS prompt shows only C:
 - Type, without the quotation marks, "shutdown".

- Type S. Your computer should now shutdown.

- To restart the computer, type 'shutdown' then press r or press the following keys Ctrl Alt
 Share by Jessica TannerUpdate 24 March 2020


