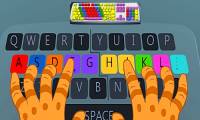
How to install Mario on Windows 7, an effective software for practicing 10-finger typing.
The Mario typing practice software is relatively difficult to install, and the installation method varies depending on the version of Windows. To install Mario on Windows 7, users need to follow the steps below.
Table of Contents
Mario can be installed and used on Windows 10, so why not install Mario on Windows 7? Installing Mario on Windows 10 is not complicated at all and is very convenient to use, making it easy to practice 10-finger typing with Mario. Alternatively, you can use the Typingtop.com typing practice tool ; it requires no installation, works immediately upon access, and is compatible with various platforms and operating systems. In this article, TipsMake will guide you on how to install Mario on Windows 7 so you can learn and play at the same time.
How to install Mario on Windows 7
First, readers can download the Mario 10-finger typing software here: Download Mario .
1. Install MARIO.
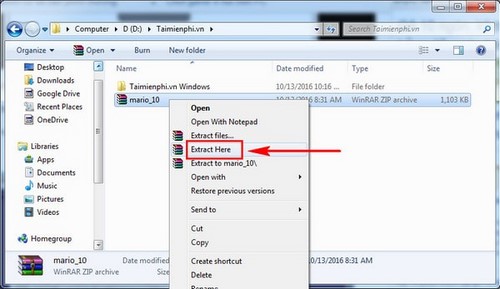
Step 1: Download the Mario software to your computer. Then extract the file.
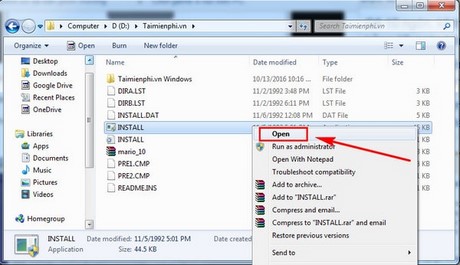
Step 2: Select the INSTALL file , right-click, and choose Open to begin the installation.
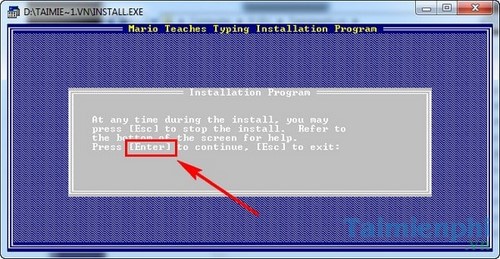
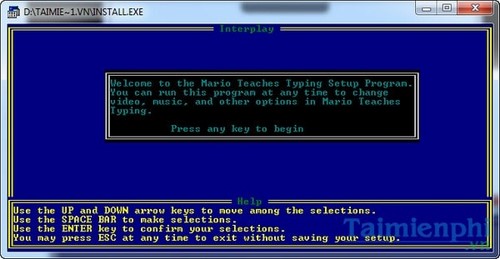
Step 3: Press Enter .
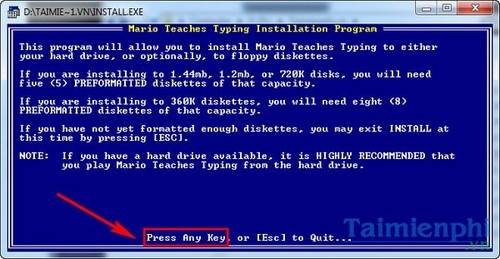
Step 4: You can press any key to continue installing Mario on Windows 7.
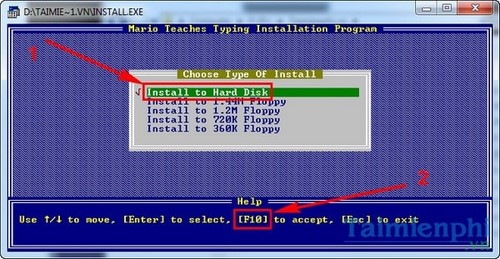
Step 5: In this step, select Install to Hard Disk and press F10 .
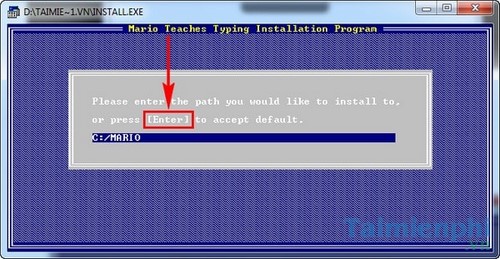
Step 6: Accept the installation of Mario on drive C, press Enter .
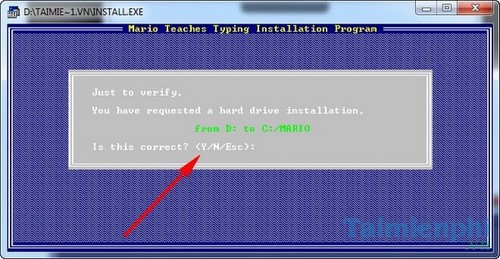
Step 7: Select Y (Yes) to confirm.
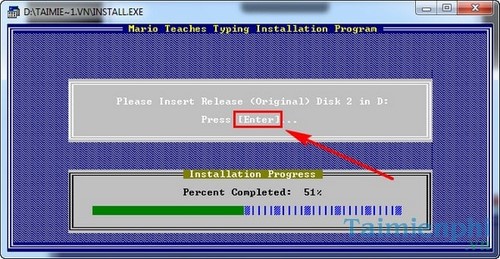
Step 8: When the installation reaches 51%, you must press Enter to continue the installation.
Step 9: Press any key and then press Esc to finish the Mario installation process.
2. Run MARIO on DOSBox.
Step 1: Download DOSBox here: Download DoSBox and install this software on your computer.
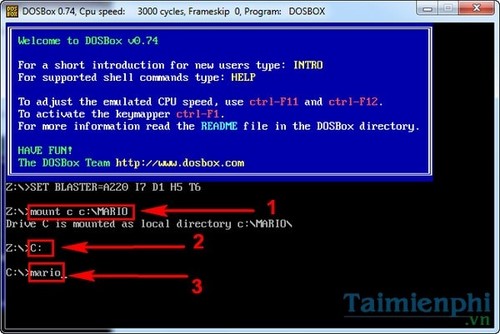
Step 2: Run the DOSBox software and enter:
mount cc:MARIO > press Enter
Next, type C: and press Enter.
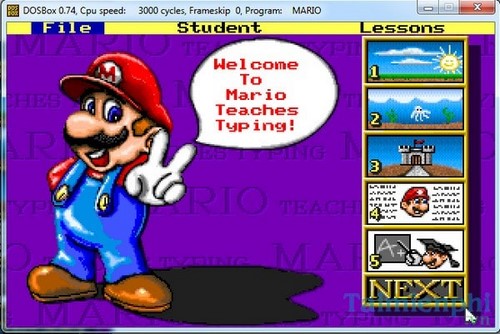
Finally, type Mario and press Enter .
That's it, you can now play Mario and learn to type on the keyboard right away.
By following the steps above correctly, you can successfully install the Mario typing practice software.
After installing Mario on Windows 7, you need to name your character in the Mario typing game. To save time, you should use Mario keyboard shortcuts. Naming your character using keyboard shortcuts eliminates the need to use the mouse. Furthermore, Mario keyboard shortcuts are few in number, so users won't spend much time memorizing and using them.
Each typing software has a different interface and method for practicing 10-finger typing . With 10 Finger BreakOut Free Typing Game, users will find a colorful and fun interface. The learning and scoring methods in 10 Finger BreakOut Free Typing Game are also highly rated. Alternatively, you can find more top 10 10-finger typing games as alternatives to Mario; these top 10 typing games are definitely worth considering.
Was this article helpful?
Your feedback helps us improve.
Related Articles
 How to install Mario, a software for practicing 10-finger typing on a computer or laptop.4 minutes read
 Guide to practicing fast and efficient 10-finger typing for beginners.7 minutes read
 Tux Typing - Free typing practice tool for kids4 minutes read
 Software for practicing 10-finger typing and increasing typing speed.10 minutes read
 Top 5 10-finger typing software that is easy to download and fastest effect3 minutes read
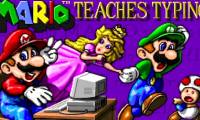 Practice typing with 10 fingers with Mario Teaches Typing online, an extremely attractive typing practice game6 minutes read
Reader Comments 0
Sign in with email or Google to join the discussion.