How to install macOS from USB
If you're having trouble installing macOS or want to downgrade to an older version, using a bootable USB installer may be the best solution..
The article will show you how to do it with the step-by-step instructions below!
Before start
Before you begin, you'll need to have a few things ready. First, you need a flash drive or any other form of removable media with at least 16GB capacity. While any standard flash drive will work, it's recommended to use at least USB 3.0 for better speed.
If you're not sure which one to buy, TipsMake has rounded up some of the best USB sticks available to buy right now. Also, make sure your Mac has at least 14GB of free storage to download the macOS installer.
Format the USB flash drive
Warning : Formatting a drive will completely erase its contents! It is highly recommended to create a backup before proceeding.
After connecting the flash drive to your Mac, open a Finder window , navigate to Applications > Utilities , and open Disk Utility . You will see your flash drive in the External section on the left.
After selecting the external hard drive, click the Erase button at the top. Choose a recognizable name (which you will use later) and make sure to select Mac OS Extended (Journaled) as the format. Finally, click Erase .

Download the macOS installer
The next step is to download the macOS installer. You can get the latest version of each major release, from Mac OS X 10.7 Lion to the latest version, from Apple's support site.
Just scroll down and click on the version you want. For High Sierra and newer versions, you will be redirected to the App Store page where you can click Get to begin the download. Older versions are available as direct downloads from the support site.

Create bootable USB using Terminal
You can use the Terminal app on your Mac to create a bootable macOS installer. Open Terminal, then copy-paste the command below and make a few adjustments. First, replace the MyVolume section with the name you gave your drive in Disk Utility.
For macOS Sonoma, use the rest of the command as is, but for other versions, replace Sonoma with the name of the version of macOS you're trying to install (for example, Ventura or Monterey).
To create the Sonoma installer, use the following command:
sudo /Applications/Install macOS Sonoma.app/Contents/Resources/createinstallmedia --volume /Volumes/MyVolumeAfter entering the password, confirm you want to erase the USB by entering Y then pressing Return . Terminal will now erase the drive and write the macOS installer to it, getting you ready to boot.
Once the process is complete, you can boot your Mac from the flash drive by following the steps below.
Format your Mac's drive
Warning : Formatting the drive will erase all of its contents. Remember to create a Time Machine backup so your data can be restored once the installation is complete.
If you are installing a new version of macOS or similar and want to retain your data, there is no need to format the drive. You can skip this step and go straight to booting your Mac from USB.
If you're trying to downgrade your macOS installation or want to do a fresh install, you'll need to format your drive first. You can do so by booting into macOS Recovery and selecting the Disk Utility option .
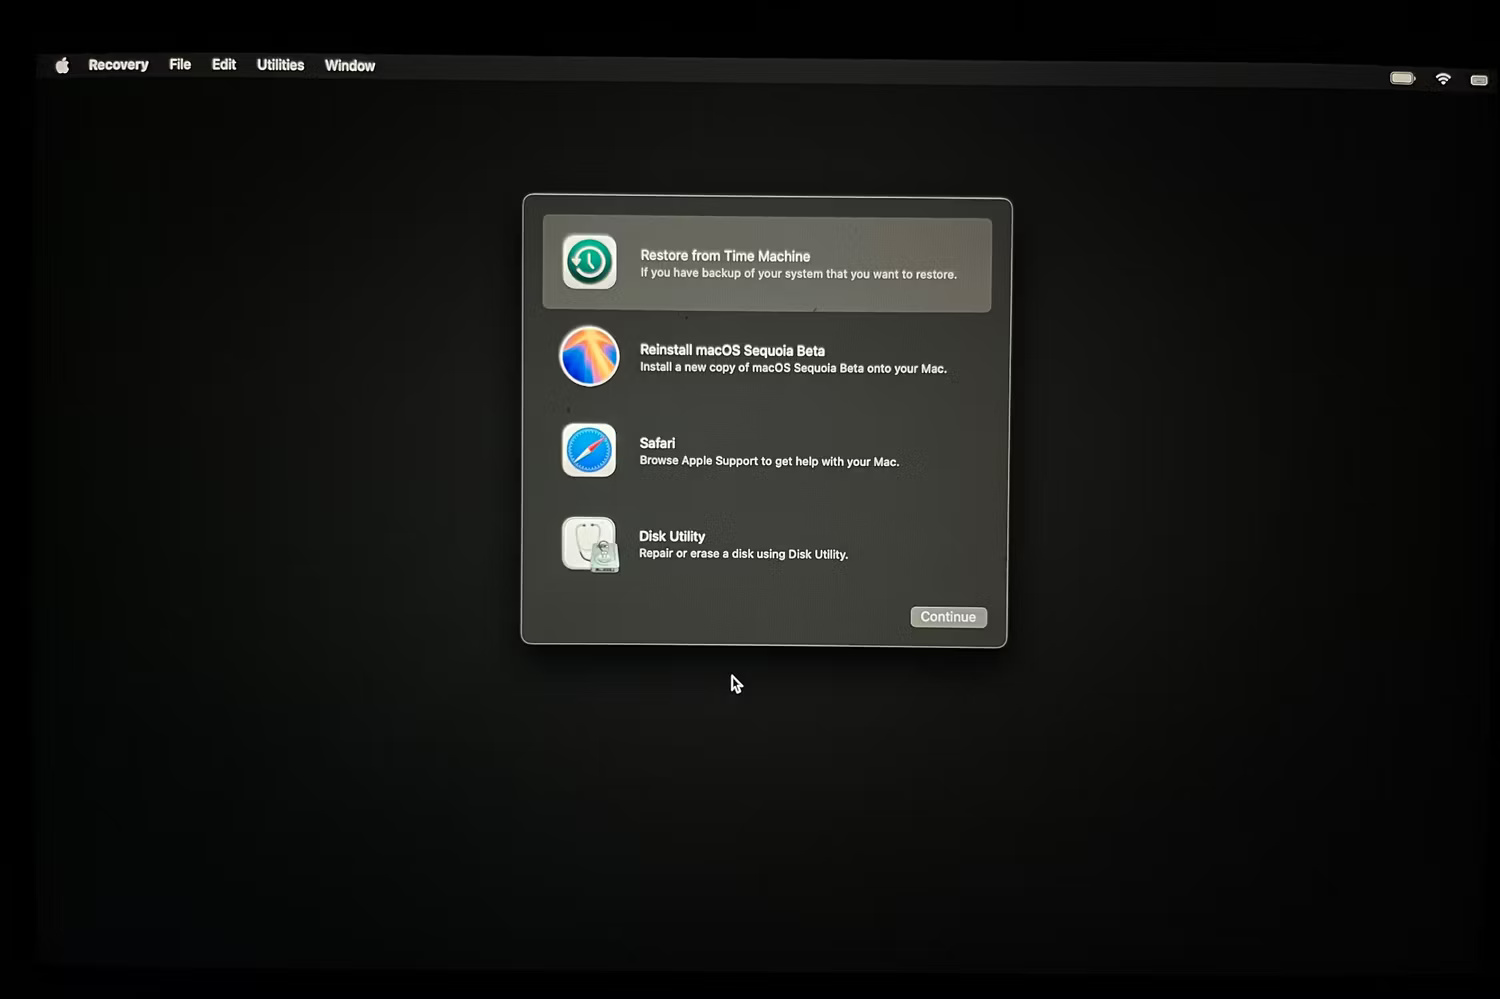
In Disk Utility, select your Mac's internal hard drive just like you selected the USB drive before. Then, click the Erase button at the top and select APFS as the format. Finally, click Erase again to completely format the drive.

Boot your Mac from USB
There are different methods for booting a Mac from USB boot, depending on whether the Mac has an Intel processor or an Apple silicon chip:
Apple Silicon Macs
To boot an Apple silicon Mac using USB boot, power on the system or reboot if the system is already on and hold down the Power button.

You will now see the option to select the macOS installer as your boot drive. After clicking it, the system will boot from the USB and enter the macOS installer.
Intel Macs have the T2 security chip
If you have a Mac equipped with a T2 security chip (Intel Macs released after 2018), that chip may not let you boot the macOS installer from an external hard drive. You will need to boot into macOS Recovery and enable the ability to boot from external media before you can open the installer.
Once you've done that, restart your Mac and hold Command + R to re-enter the boot menu. Then, select the Install macOS option to boot to the external hard drive.
Intel Macs
If you have an Intel Mac without the T2 chip, simply power on the system or reboot if the system is already on, and immediately press and hold the Option key as the system begins to boot and the boot selection menu will appear immediately .
Install macOS on your Mac
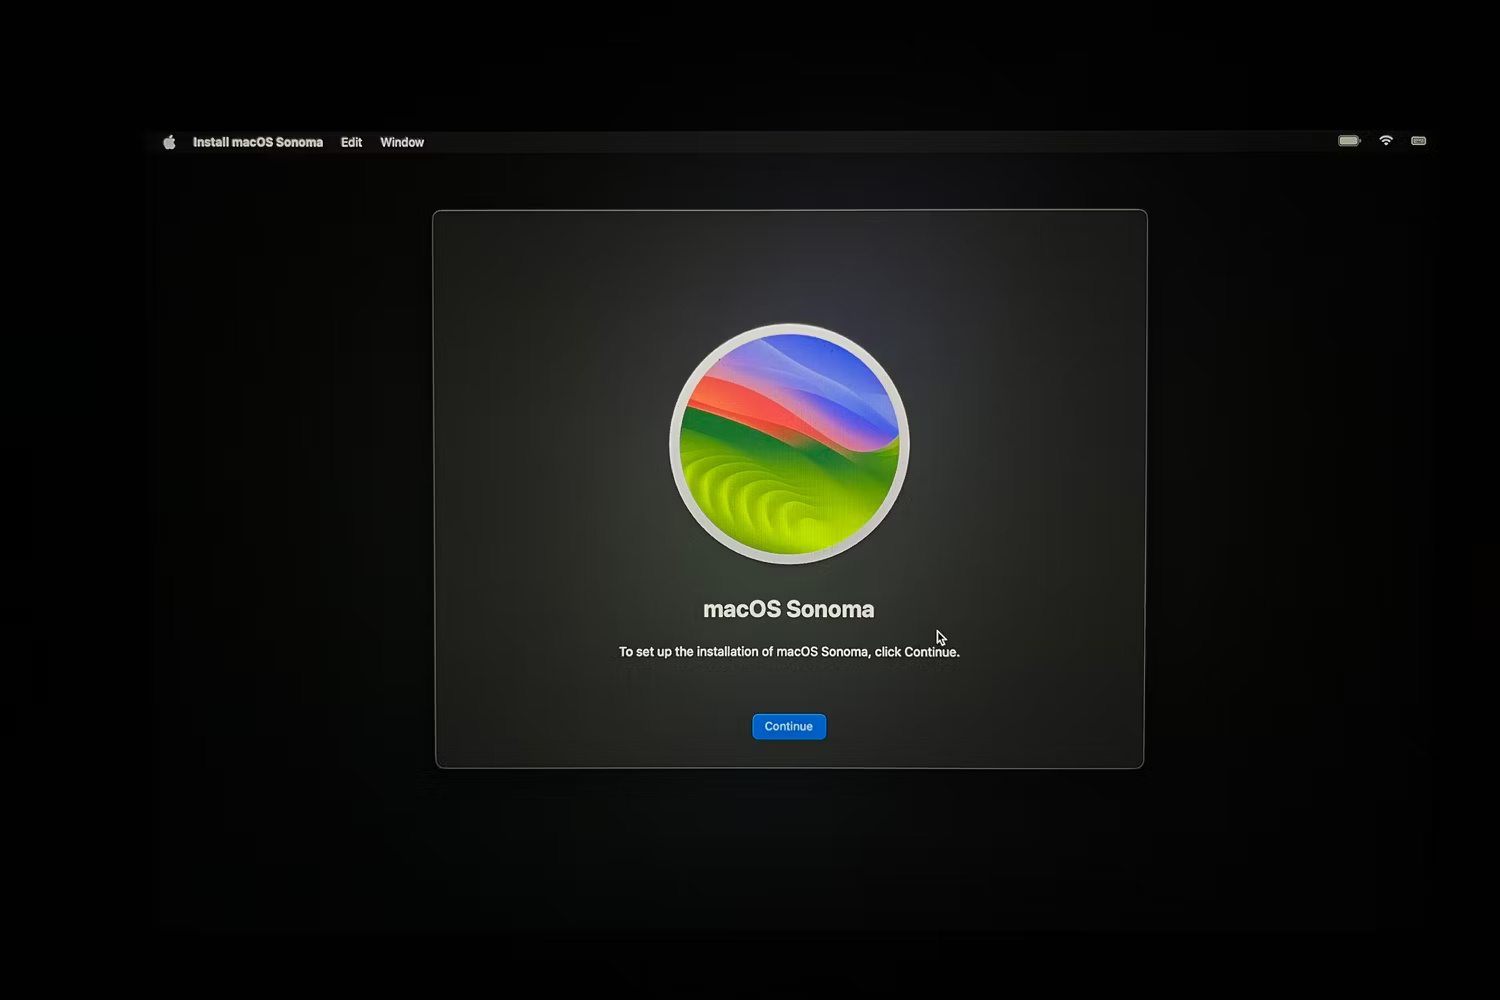
After selecting the Install macOS option from the boot menu, your system will boot from USB and the macOS installer will appear on the screen. Click Continue and agree to the license agreement.
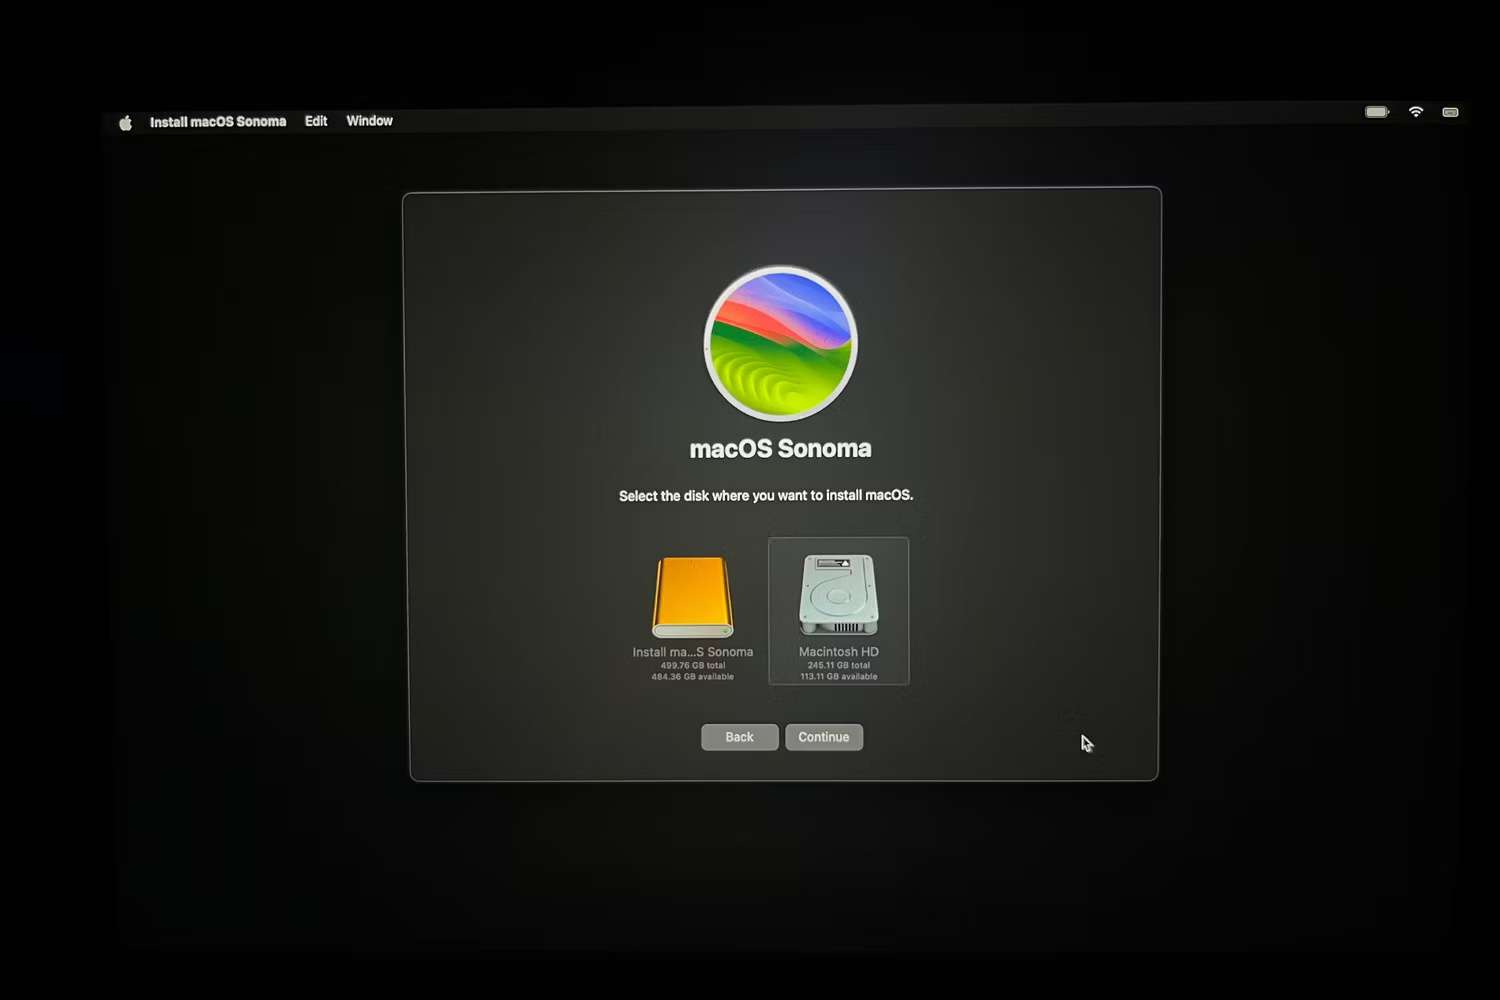
Next, the installer will ask which drive you want to install macOS on. Select your Mac's internal hard drive and click Continue to begin the installation. Once the installation is complete, you'll have a fresh macOS installation waiting.
If you're still having trouble installing macOS from the boot drive, try resetting your Mac's PRAM/NVRAM. If that doesn't work, you should consider making an appointment with an Apple Store or an Apple Authorized Service Provider for expert support.