Table of Contents
This practical guide walks through how to install kodi on a chromebook, explains the main requirements, and highlights common issues that may appear along the way.
So in this article, I'm going to give you some easy ways to be able to install Kodi on a Chromebook, with or without Google Play Store support.
Install Kodi on a Chromebook
This guide will discuss 3 different methods to get Kodi on a Chromebook. The first method requires a Chromebook to support Google Play Store. The next two methods are for users with a Chromebook, the old one that doesn't support the Google Play Store.
Install Kodi on a Chromebook from the Google Play Store
Step 1. Open the Google Play Store on your Chromebook and search for Kodi. Then install it like any other application.
Step 2. Once the installation is complete, open it and grant the necessary permissions.
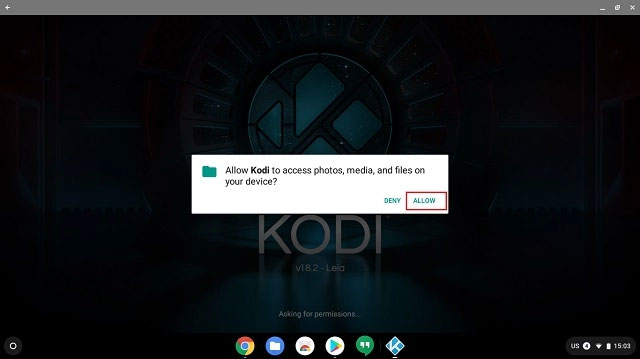
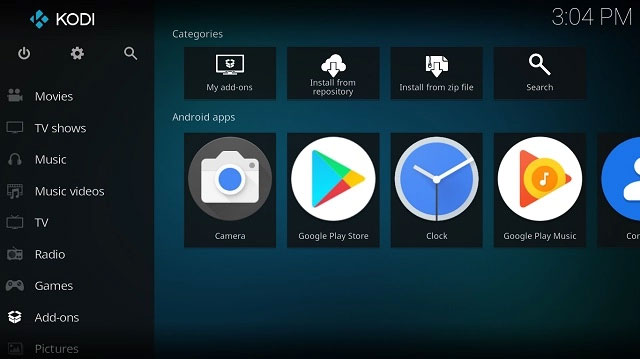
Step 3. Now, you can add your media sources and run them as you would on Windows or other platforms. Plus, you can install add-ons, Kodi repositories, and everything else without any limitations.
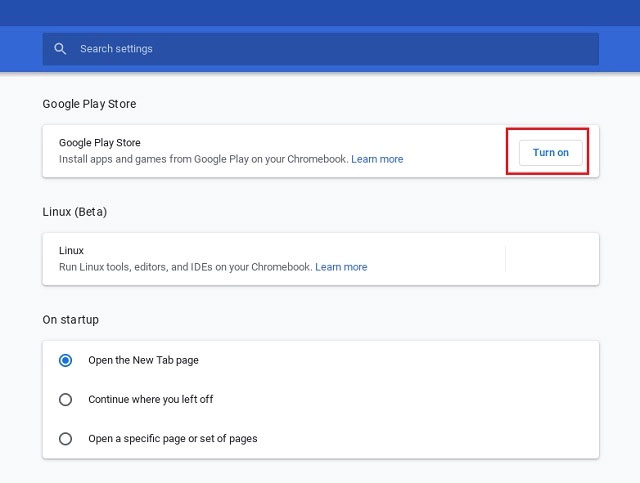
Step 4. In case the Google Play Store isn't available on your Chromebook, open Settings and click on the hamburger menu in the top left corner.
Step 5. In the menu, click Google Play Store .
Step 6. Here, click the Turn on button to activate the Google Play Store on your Chromebook.
Install Kodi on a Chromebook without the Google Play Store
Play Store support on Chromebooks is becoming a standard feature, however, there are older Chromebooks that don't support the Google Play Store.
If your device is one of them then don't worry. There are a few simple ways you can run Kodi on your Chromebook without using the Play Store.
Note : We're using ARC Welder, a development tool for converting Android apps to Chrome OS compatible apps. Since ARC Welder is used for testing purposes, there might be some lag and overall performance issues.
Step 1. Download the Kodi APK file from the official website here. Click Android and select the build Chromebook. If in doubt, install the Cog extension (free) for your Chromebook build.
Step 2. Next, install the ARC Welder extension (free) from the Chrome Web Store here. Unlike other Chrome extensions, the file size is huge, around 200MB, so be patient while the download happens.
Step 3. Once installed, launch ARC Welder and click the Choose button .
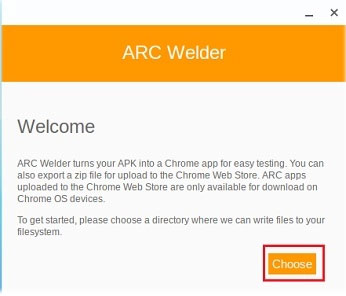
Step 4. Now, select the folder in which the Kodi APK was downloaded and click the Open button .
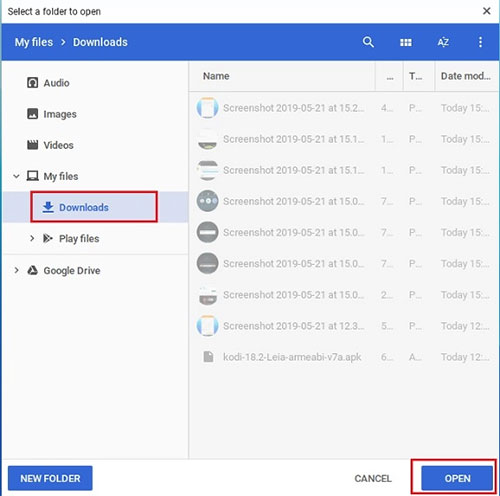
Note : Don't try to select the APK file here.
Step 5. Click Add your APK on ARC Welder.
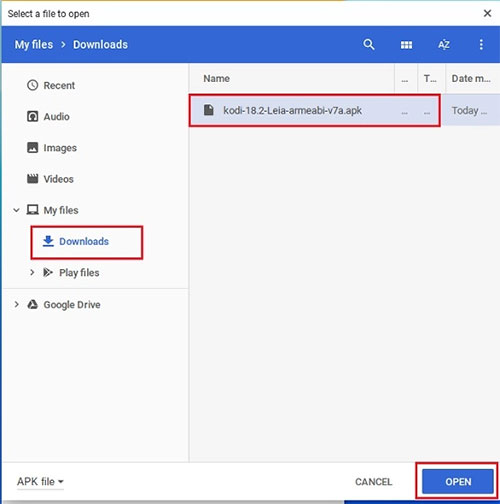
Step 6. Now, select the Kodi APK file and click the Open button . It will take some time to process the APK file.
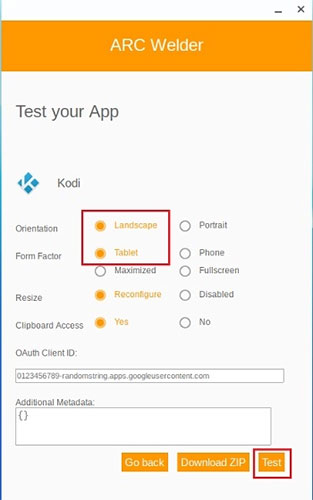
Step 7. Next, you will be given a bunch of options. Make sure 'Landscape' and 'Tablet' are selected. Finally, click the Test button .
Step 8. Kodi will launch automatically, but it may take a while for the application to fully load. After a while, Kodi should work fine on Chromebooks.
Install Kodi on a Chromebook as a Chrome extension
To use Kodi through ARC Welder, you have to manually add an APK each time and then test it. This process is time consuming and inconvenient. So to solve this problem, you can create an extension that will open Kodi through ARC Welder. And users can access the Kodi extension from the app drawer just like any other app.
Note : While testing Kodi APK files on ARC Welder, a single folder with all the files required to create the extension will be established. We'll use a folder exported from ARC Welder to create the Kodi extension. So make sure you go through the above APK testing process before moving on to this section.
Step 1. Open Chrome browser and click the 3 dot menu. Then, click More Tools and open Extensions.
Step 2. Here, turn on Developer mode in the upper right corner. A new submenu will appear at the top, click the Load unpacked button .
Step 3. Now, locate the APK file folder and you will find the exported folder from ARC Welder. Select the folder and click the Open button .
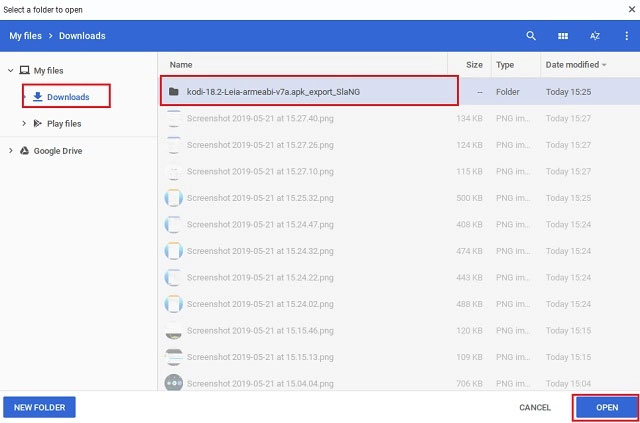
Step 4. Kodi will be added right away to the app drawer. Now you can use it just like a normal application.
Key Takeaways
Use the information above as a practical reference for how to install kodi on a chromebook. Review each step carefully, confirm any requirements, and choose the option that best fits your situation.
FAQ
What does this guide explain about Install Kodi on a Chromebook?
It explains the main concepts, practical considerations, and useful steps related to install kodi on a chromebook without requiring advanced knowledge.
Who can benefit from learning about Install Kodi on a Chromebook?
This information is useful for readers who want a clear overview, practical guidance, and reliable steps related to install kodi on a chromebook.
What should I check before applying this information?
Review the requirements, confirm that your device, software, or situation matches the instructions, and back up important data before making major changes.


Reader Comments 0
Sign in with email or Google to join the discussion.