How to Install and Use Evernote
Method 1 of 5:
Installation
-
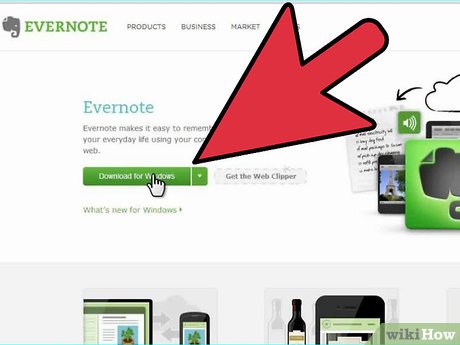
 Download the program. Visit the Evernote webiste and click the green button that reads 'Get Evernote – it's free.'
- For most mobile devices, the Evernote app will install automatically; for computers, the installation program will download automatically.
- If you need to download a different version, select the green text that reads 'Get Evernote for mobile, tablet, and other devices. A list of every version of Evernote available will pop up. Choose the version you need.
- For most mobile devices, the Evernote app will install automatically; for computers, the installation program will download automatically.
-
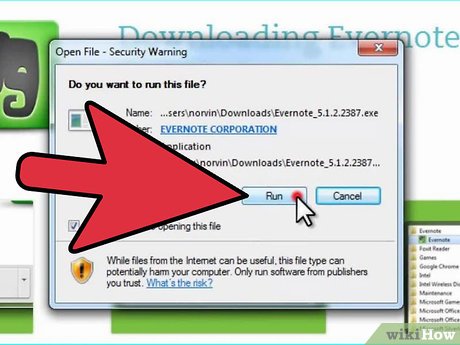
 Install the program. If you downloaded Evernote to your personal computer, you'll need to install it. Navigate to wherever you downloaded it and double-click the green Evernote icon.
- Accept the license agreement. Read over it first if you wish.
- Click the Install button to install the software.
-
 Repeat for all your devices. A major feature of Evernote is its ability to access information stored on any of your devices. To get the most out of it, you'll need to install a copy of Evernote on each device you intend to use it with.
 -
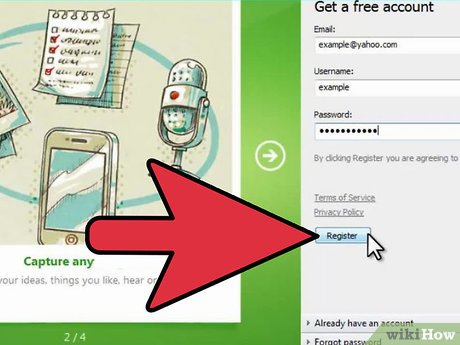
 Register an account. On your primary device or computer, open the installed Evernote program. You'll see a sidebar menu on the right called New to Evernote, prompting you to fill in some basic information to make an account. Fill in the fields and click the button to register.
- If you've already registered, click the words 'Already have an account' in the bottom right corner and enter your information.
Method 2 of 5:
Getting Started
-
 Make a new note. Evernote stores information of all types in a uniform type of container called a 'note.' You can make a new note by clicking the 'New Note' button in the upper right area of the window. Once you make a new note, you'll see that it appears in the center column as an untitled note, above the welcome note that comes prepackaged with Evernote. The content of the note appears in the right column. The note is made up of a few distinct parts:
- At the top there is a field for entering a title; next to that there's a drop-down menu that tells you what notebook the note is currently filed inside. (Notebooks will be covered in another step.)
- Below the title field, there's clickable text that reads 'Click to set source URL....' This is for noting where you copied note information from if you retrieved it from an online source.
- Next to the URL entry text, there's a field for entering tags (searchable keywords).
- Below the URL and tag areas, there is a suite of word processor controls for things like formatting, font, and text size.
- The lowest, and primary, area of your note is the entry field. Right now, it's blank.
-
 Fill in a note. Enter information into the various fields to create a useful piece of information. Evernote will save and update the note automatically as you fill it in.
- Start by clicking in the title field and giving your note a name. This helps you to find it more easily, so it's a good habit to get into before you have hundreds of notes.
- If you can't be bothered to enter a title, Evernote will treat the first part of your note's text as its title.
- Skip to the tags field and give your note a tag. Tags are another way to search for notes. They're usually related to the subject matter of the note.
- Unlike Twitter, you don't necessarily need to start your tags with a # symbol. You can if you want, of course.
- Try to keep tags short and to the point. If you were doing geological research, you might tag all your research notes with the word 'geology,' for example.
- You can add as many tags as you want.
- Click on the entry field and enter some text. This is the content of your note. For now, just type a little bit of whatever you feel like typing.
- Start by clicking in the title field and giving your note a name. This helps you to find it more easily, so it's a good habit to get into before you have hundreds of notes.
Method 3 of 5:
Using Tools and Features
-
 Add a text or PDF document. Drag a plain-text or rich text document onto your note, and it will copy itself into the note.
- If you add a PDF file, the file will appear in its own sub-window with easy viewing controls.
- You can't add MS Word files without paying for an upgrade.
-
 Add copied text. Highlight the text you want to add, then drag it into the note. Simple!
- Adding web addresses this way will automatically format them as clickable hyperlinks.
-
 Add a picture. Drag an image file onto your note. It appears as a picture, scaled to fit inside the note window.
- You can drag pictures around to rearrange them.
- Animated pictures, such as .GIF images, will be animated.
-
 Add a music file. Most common music file formats (such as WMA and MP3) will appear inside a long box in your note.
- You can play music files directly from Evernote by clicking the Play button on the left side of the box.
-
 Add other files. Aside from the common files described above, Evernote will display files you add as large rectangular buttons. Try adding some files of various types, such as saved web pages and WMV video clip files, to see what the buttons look like.
- If you click the button, the file will open, provided the program to open it is installed on the device. However, Evernote can't open the file on its own.
-
 Delete an item. It's useful to know how to get rid of files inside notes that you no longer want or need there. There are two basic ways to do this:
- Right-click (or context-click) on an item such as a picture or button and choose 'Cut' from the menu.
- Items you cut can be pasted back in elsewhere, if you like. Place the cursor and type Control-v to paste.
- Place the cursor just ahead of what you want to delete, and use the delete key to erase it.
- Right-click (or context-click) on an item such as a picture or button and choose 'Cut' from the menu.
Method 4 of 5:
Organize and Control Your Notes
-
 List your notes. Between your new note and the welcome note that came with the program, you should have two notes displayed in the center column of the program. At the top of this column there's a drop-down menu and a text box.
- To organize your notes by various parameters, use the drop-down menu. You can organize by tags, title, and more. Experiment with the options a little.
- To search for notes, type some text into the text box. Evernote will quickly scan all of your notes and display any that contain the text you typed.
- Evernote can even detect text printed on images, although this doesn't work reliably yet.
-
 Put your note in a new notebook. Notebooks are collections of notes, organized by whatever criteria you want. Notebooks are listed in the left column.
- Create a new notebook. Name your new notebook whatever you want, and decide whether it will be accessible from all your devices, or local to this device only. The new notebook will appear in the list. You can't change these parameters once the notebook is created. There are two ways to do this:
- Right-click the top-level 'Notebooks' entry and choose 'Create notebook...' from the menu.
- Push the Insert key on your keyboard.
- Drag your note into your new notebook. To display it, click 'All notebooks' or your original notebook in the left column. Drag the note from the center column on top of your new notebook in the left column.
- Create a new notebook. Name your new notebook whatever you want, and decide whether it will be accessible from all your devices, or local to this device only. The new notebook will appear in the list. You can't change these parameters once the notebook is created. There are two ways to do this:
-
 Search your tags. In the left column, below your notebooks, there's a collapsible menu called 'Tags.' Click it to see all the tags you've added to all your notes so far.
- Click on a tag to display all the notes with that tag in the center column.
-
 Clean up your notes. At the bottom of the left column there's a trash bin. Click on it to see any notes you've deleted.
- To bring back a note that was deleted by accident, click the note in the center column, and then click 'Restore' at the top of the right column.
- To permanently delete a note, click the note in the center column, and then click 'Erase' at the top of the right column. You will be asked to confirm your decision before Evernote erases the note.
Method 5 of 5:
Using Other Notes
-
 Try other notes. Evernote actually offers four different ways to take notes. Depending on your current device and situation, some may be more useful than others at different times.
 -
 Scribble an ink note. Click the black triangle next to the 'New note' button at the top right of the window and choose 'New ink note.' You'll see a pale yellow blank note with blue pen guide lines printed on it.
- Click and drag the cursor across the note to write on it. This is useful for devices with tablet pens or touchscreens.
-
 Dictate an audio note. Click the black triangle next to the 'New note' button at the top right of the window and choose 'New audio note.' You'll see a sound level meter and a blue 'Record' button.
- Click the button and speak to record an audio note that can be played back later.
- Be sure the sound meter is moving a little before you record. If it isn't, your device's microphone may not be working properly.
-
 Capture a video note. Click the black triangle next to the 'New note' button at the top right of the window and choose 'New video note.' You'll see a square window showing video input.
- Click 'Record' to record a webcam or phone cam note.
- Click 'Take a snapshot' to record a still image as a note.
-
 Sync your notes. Once you have Evernote installed on two or more devices, you can easily synchronize your notes across all of them.
- Click the 'Sync' button in the top middle part of the window.
-
 Log into Evernote on any other device. Your notes from the first device will be displayed.
- Once you've logged into Evernote on a device, it won't normally log you out again, even if you quit the program. If you need to log out for some reason (for example, if you're using a shared computer with Evernote), click File and choose the 'Sign out' option before you close the program.
-
 Keep learning. With the information above, you can use all the basic abilities of Evernote; however, there are many more features and shortcuts you can learn about if you want to. Visit the official site to read tutorials and blogs, or search the Internet for other guides.
Share by
Samuel Daniel
Update 05 March 2020


