Table of Contents
This updated guide examines Click: How to Hack into a School Computer and organizes the essential facts, background, and practical takeaways in clear American English.
Responsible-use note: Apply security techniques only to systems you own or are explicitly authorized to test.
Part 1of 3:
Enabling Command Prompt on Windows 10
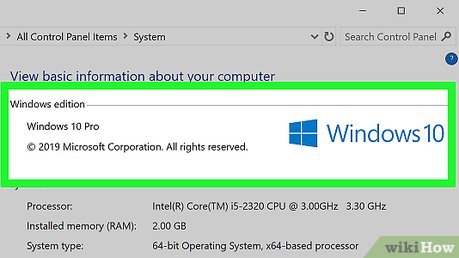 Determine the version of Windows. While the current version of Windows is Windows 10, many school computers still use Windows 7. If your school computers use Windows 7, you won't be able to hack them using this method; instead, try using the Windows 7 method instead.
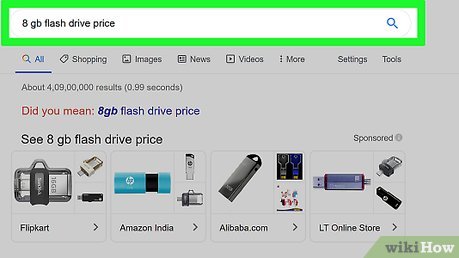 Buy a flash drive. You'll need an 8 GB flash drive (or larger, if you prefer) for this process.
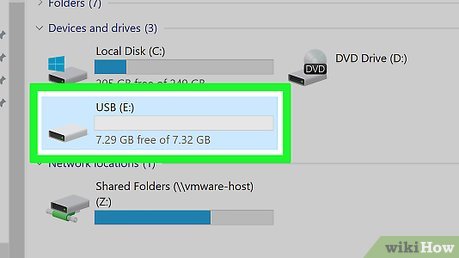 Plug the flash drive into a home computer. Due to the restrictions on many school computers, you'll most likely need to set up the flash drive on a home (or otherwise unrestricted) computer.
 Download the installation file. Go to the Windows 10 download page, then click Download tool now to download the file.
 Double-click the installation file. Once the setup file finishes downloading, double-click it to initiate the installation process.
- Don't worry—you aren't actually installing Windows 10. You're simply creating an installation drive out of the flash drive by using the Windows 10 installation tool.
 Follow the on-screen prompts. You'll be asked to specify the type of Windows, the setup language, and so on, after which point you'll have to select an installation location; make sure you choose your flash drive as the installation location, then wait for the installation to complete.
- It can take as many as 30 minutes to set up the flash drive for an installation, so just leave your flash drive plugged in.
 Plug the flash drive into your school computer. The flash drive should plug into one of the USB slots on the front, back, or side of the desktop unit.
- If you're using a school laptop, you'll usually find the USB slots on the sides of the housing.
 Restart or boot up your school computer. Once your computer is in the process of starting up, you can proceed.
 Enter the BIOS. As soon as you see the screen light up after the computer turns on from restarting (or powering on), immediately begin pressing the BIOS key.
- The BIOS key varies from computer to computer, but you'll usually see it flash across the bottom of the screen (e.g., "Press F12 to enter startup").
- If you don't know the BIOS key, try all of the function (e.g., F12) keys,Esc, andDel.
 Change the boot order to prioritize USB drives. On the BIOS screen, do the following:
- Find the "Boot Order" (or similar) section.
- Select your flash drive's name (or "USB Drives", etc.) by using the arrow keys.
- Press+to move the flash drive up to the top of the list.
- Press the "Save and Exit" button as indicated by the legend on the right side (or bottom) of the screen.
- Restart the computer if it continues to the login screen.
 Open Command Prompt. When you arrive at the setup screen, press⇧Shift+F10to bring up a Control Panel window.
 Replace Utility Manager with Command Prompt. This will allow you to access Command Prompt from the lock screen instead of being blocked from doing so via the Start menu:
- Typemove c:windowssystem32utilman.exe c:windowssystem32utilman.exe.bakinto Command Prompt.
- Press↵Enter
- Typecopy c:windowssystem32cmd.exe c:windowssystem32utilman.exeinto Command Prompt.
- Press↵Enter
- Restart your computer without the flash drive. To do this, press and hold the Power button until your computer shuts down, then remove the flash drive before pressing the Power button again to start up the computer. At this point, you can proceed with creating a new Administrator account.
Part 2of 3:
Enabling Command Prompt on Windows 7
- Restart your computer via the Power button. Press and hold the Power button on the school computer until your computer turns off, then press the Power button again to turn it back on.
 Wait for the startup screen to appear. In most cases, your computer will alert you that Windows didn't shut down properly, and you'll have a few startup options which you can select with the arrow keys.
 SelectStart Windows Normally. It's in the middle of the screen. To confirm your selection, you'll press↵Enter.
- Restart again via the Power button. Your computer will reboot like it did before, and you should arrive at a startup screen again.
 Look for the "Startup Repair" screen. If the startup screen has repair options (e.g., Launch Startup Repair ) listed, proceed to the next step.
- If the startup screen has the standard startup options listed, select Start Windows Normally again, then restart it again via the Power button. You'll need to keep doing this until you arrive at the "Startup Repair" screen.
 SelectLaunch Startup Repair (recommended). It's in the middle of the screen. Doing so will prompt the startup repair sequence to begin running.
 ClickCancelwhen prompted. You'll need to wait for about 10 minutes after doing this before you can proceed.
 Click the "View problem details" drop-down box. It's in the bottom-left corner of the error message. A drop-down list of notes will appear.
 Open Notepad. Scroll down to the "If the online privacy statement is not available..." heading, then click the link below it.
 Open your computer's system files. Once Notepad opens, use it to do the following:
- Click File in the top-left corner of Notepad.
- Click Open... in the drop-down menu.
- Double-click Computer in the window which opens.
- Double-click your computer's hard drive (usually C: ).
- Double-click the Windows folder.
- Scroll down and double-click the System32 folder.
 Change the file type you can see. Click the "File type" drop-down box, then click All Files in the resulting drop-down menu.
 Replace Utility Manager with Command Prompt. This will allow you to access Command Prompt even if it's blocked on your computer:
- Find the "Utilman" shortcut in the "U" section of files (not folders).
- Right-click "Utilman", then click Rename
- Type inUtilman1, then press↵Enter.
- Find the "cmd" file.
- Right-click the "cmd" file, then click Copy
- PressCtrl+Vto paste in the copied file.
- Right-click the copied file, then click Rename , type inUtilman, and press↵Enter.
 Close the "Open" window and Notepad. Click Cancel in the lower-right side of the "Open" window, then click the X in the top-right corner of the Notepad window.
 Exit the remaining windows. Click the X in the top-right corner of the error report window, then click Cancel in the lower-right corner of the Startup Repair window and click Yes when prompted. At this point, you can proceed with creating a new Administrator account.
Part 3of 3:
Creating a New Administrator Account
 Wait for the login screen to load. Once your computer finishes restarting, you should be back at the login screen.
 Click the "Utility Manager" icon. It's a dial-shaped icon and arrow in the bottom-left corner of the screen. Since you replaced the Utility Manager app with Command Prompt, clicking this icon will open the Command Prompt window.
 Create a new user. Once Command Prompt opens, do the following:
- Type innet username /addmaking sure to replace "name" with a username of your choice.
- Press↵Enter.
- Type innet localgroup administrators name /addagain replacing "name" with the name of the user you just created.
- Press↵Enter
 Restart your computer one more time. Click the
 Power icon, then click the Restart option. This will prompt your computer to restart.
 Select your new user. Click your new user's name, then click the Sign in button. Since you didn't create a password to go with your account, you won't need to enter one.
 Allow Windows to set up your account. Your account is new, so Windows 10 will need a few minutes to finish setting up your files and folders.
- Skip this step on Windows 7.
 Browse with Administrator privileges. Now that you're on an account which has admin privileges, you can use your computer's system services and programs without restrictions.
FAQ
What is Click: How to Hack into a School Computer about?
It provides a structured overview of click, explains the main context, and highlights practical takeaways for readers.
Why does this topic matter?
Understanding the main concepts helps readers evaluate the issue, avoid common mistakes, and make better-informed decisions.
How should readers use this information?
Use the guidance as a practical starting point, confirm details that may have changed, and follow current product, safety, or security recommendations.
Related Articles
 So Frustrated with the Learning Situation4 minutes read
 Two 9th Graders Attacked the School's Wi-Fi Network So They Wouldn't Have to Take a Test3 minutes read
 The 13-Year-Old 'Hacker' Enters the School's Computer System to Create a 'List of7 minutes read
 What Does the F5 Hack Mean? What to Do Now: Explained7 minutes read
 Students Are Expelled for Using Keyloggers to Correct Scores3 minutes read
 Children Also Like to Be Hackers!: A Practical Guide3 minutes read
Reader Comments 0
Sign in with email or Google to join the discussion.