How to Get Rid of Java Update Notifications
This wikiHow teaches you how to prevent Java from sending update notifications every time you log into your computer. Open the Java Control Panel. To do so:
Table of Contents
Method 1 of 3:
Using the Java Control Panel
-
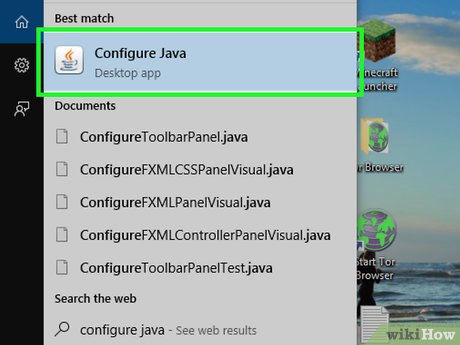 Open the Java Control Panel. To do so:
- Windows - Open Start, type in "Configure Java", and click the Java icon.
- Mac - Click the Apple icon, click System Preferences, and click the Java icon.
-
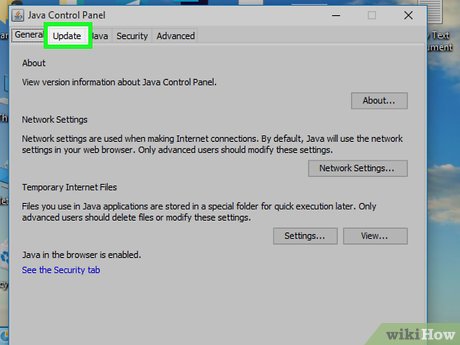 Click the Update tab. It's at the top of the Java Control Panel window.
 -
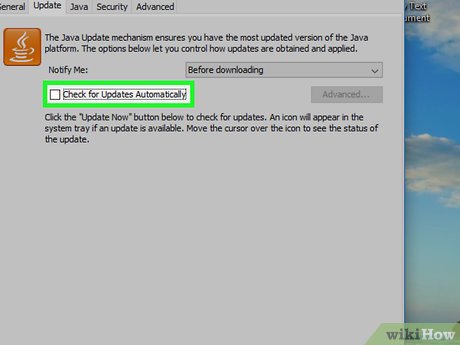 Uncheck the "Check for Updates Automatically" box. It's in the middle of the window.
 -
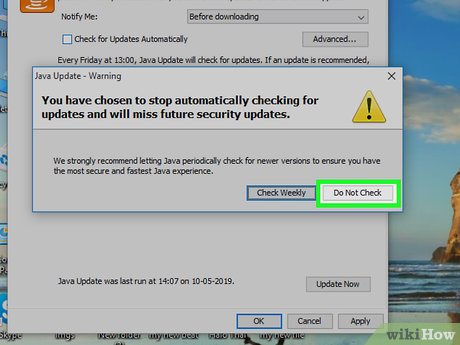 Click Do Not Check when prompted. Doing so will prevent Java from checking for updates.
 -
 Click OK. It's at the bottom of the window. Your preferences should be saved.
Method 2 of 3:
Editing the Registry on Windows
-
 Determine whether your system is 32- or 64-bit. To do so:
- Right-click the This PC (or My Computer) icon.
- Click Properties.
- Look for the number to the right of the "System type" heading.
-
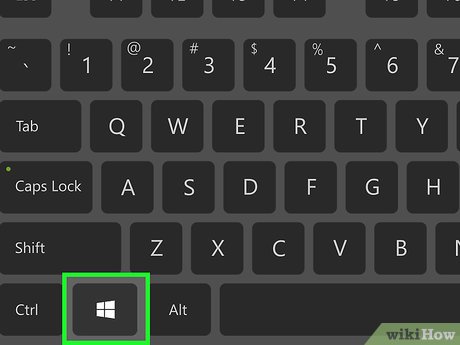 Open the Start menu. Either press the ⊞ Win key or click the Windows logo in the bottom-left corner of the screen.
 -
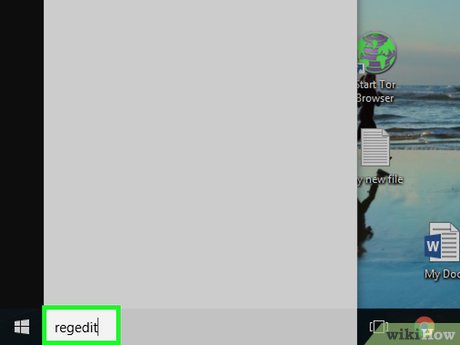 Type regedit into Start. Doing so will bring up the Registry Editor icon, which resembles a cluster of blue blocks, in the Start window.
 -
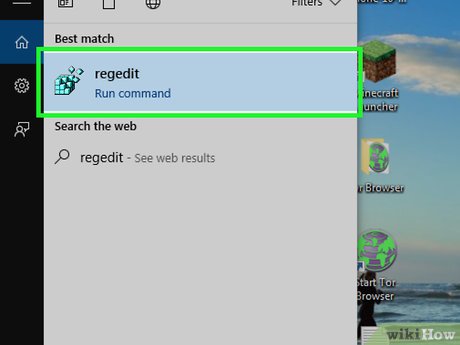 Click the Regedit icon. This will open the Windows Registry Editor.
 -
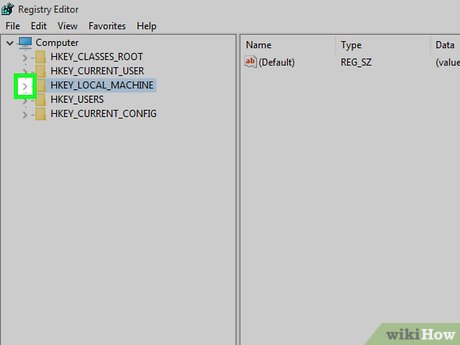 Clickleft of the "HKEY_LOCAL_MACHINE" folder. It's in the top-left corner of the Registry Editor window. Doing so will display any folders that are in the "HKEY_LOCAL_MACHINE" folder below it.
-
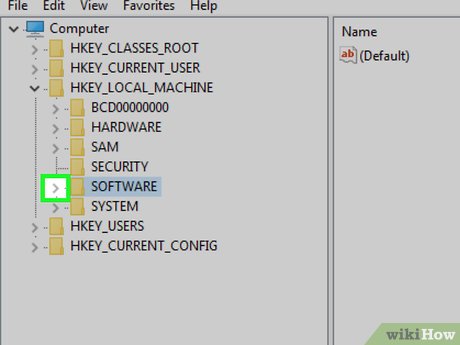 Clickleft of the "SOFTWARE" folder. This option is below the "HKEY_LOCAL_MACHINE" folder.
-
 Clickleft of the "Wow6432Node" folder. Skip this step if you're on a 32-bit bit system.
-
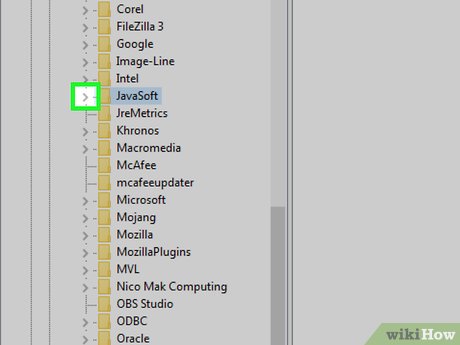 Clickleft of the "Java Soft" folder.
-
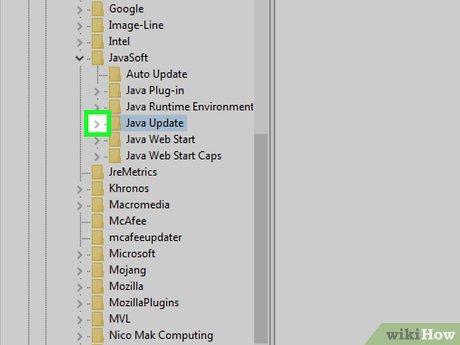 Clickleft of the "Java Update" folder.
-
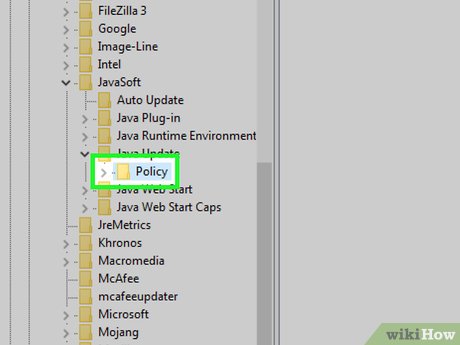 Click the "Policy" folder. Doing so will display its contents in the pane on the right side of the window.
 -
 Double-click the "Enable Java Update" file. It should be on the right side of the window.
 -
 Type "0" into the file. This will change the file's value of "1", which allows updates, to "0", which blocks updates.
 -
 Click OK. This will disable the Java update prompt that occurs while your computer is already running.
 -
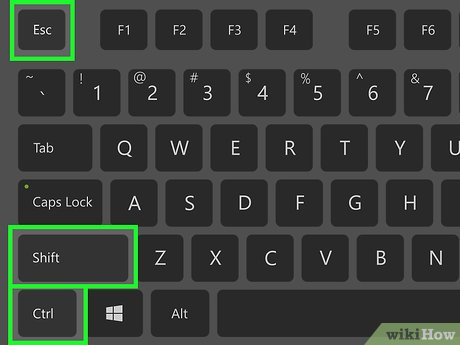 Press Ctrl+⇧ Shift+Esc. You'll find all three of these keys on the left side of the keyboard. Pressing them opens the Windows Task Manager.
 -
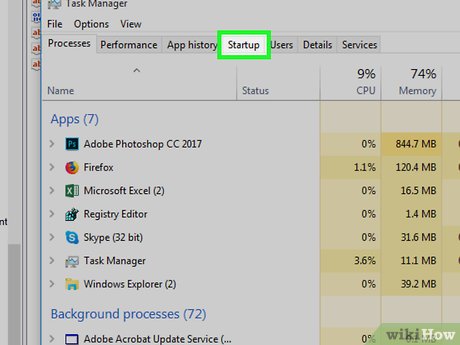 Click the Startup tab. It's near the top of the Task Manager window.
 -
 Locate and click jucheck. This file is the Java update prompt that runs whenever you turn on your PC.
 -
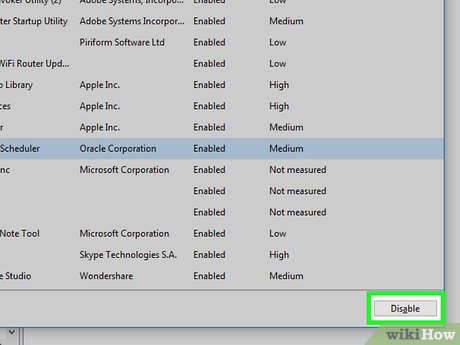 Click Disable. It's in the bottom-right corner of the Task Manager window. This will prevent the Java update from running at startup regardless of your settings.
Method 3 of 3:
Using the Terminal on Mac
-
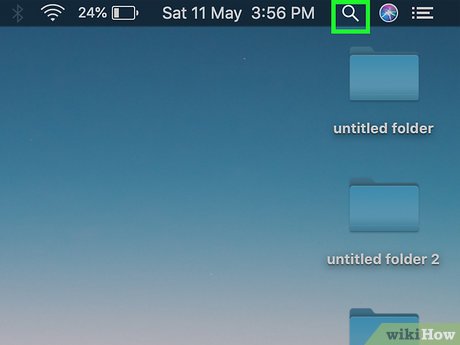 Open Spotlight. To do so, click the magnifying glass icon in the top-right section of your Mac's menu bar.
- If you aren't using an account with administrator privileges, you might not be able to disable the Java update.
-
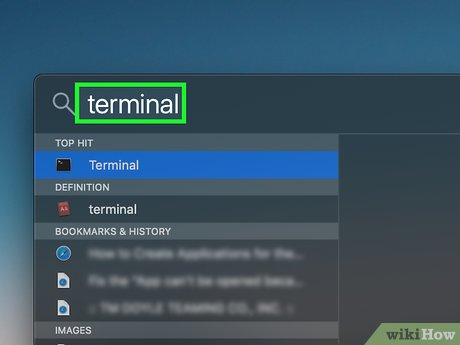 Type in Terminal. Typing "Terminal" into the Spotlight text field will bring up a black box; this is the Terminal icon.
 -
 Click the Terminal icon. Doing so will open Terminal.
 -
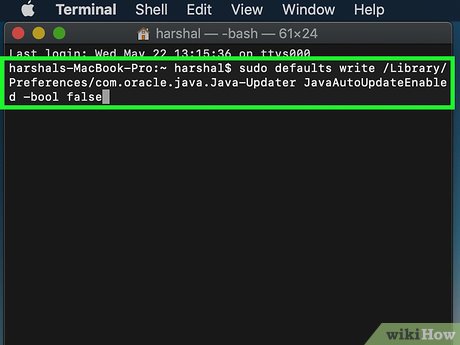 Enter the Java Update disable command. The command is as follows:
sudo defaults write /Library/Preferences/com.oracle.java.Java-Updater JavaAutoUpdateEnabled -bool false. -
 Press ⏎ Return. This will run the command. The Java update should no longer appear when you start your Mac.
Was this article helpful?
Your feedback helps us improve.
Related Articles
 How to Update Java3 minutes read
 Apple is about to update Java for Mac computers2 minutes read
 Download Java Development Kit 8-update-2813 minutes read
 What is Java? Why choose Java?7 minutes read
 Basic Java syntax10 minutes read
 How to set up or disable Linux Mint update notifications4 minutes read
Reader Comments 0
Sign in with email or Google to join the discussion.