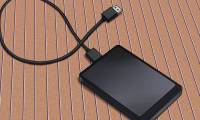
How to fix Read-only of external hard drive on Mac
Sometimes when connecting an external hard drive to a Mac, users will find that it is read-only. This happens because the drive is formatted (formatted) with Microsoft's NTFS file system that macOS does not support by default.
Table of Contents
Sometimes when connecting an external hard drive to a Mac, users will find that it is read-only. This happens because the drive is formatted (formatted) with Microsoft's NTFS file system that macOS does not support by default. Fortunately, this problem is very easy to overcome.
There are several ways to make an external hard drive on a Mac ready to use, from reformatting the drive to installing software (allowing users to write to an NTFS drive). For more advanced users, there are other testing solutions but more risky. Let's find out through the following article!
1. If the drive is empty
It will be lucky if the drive is empty. You just need to reformat the drive in a format that is suitable for macOS.
To get started, mount the drive to your Mac, then open Disk Utility. Now select the drive in the sidebar and click Erase.
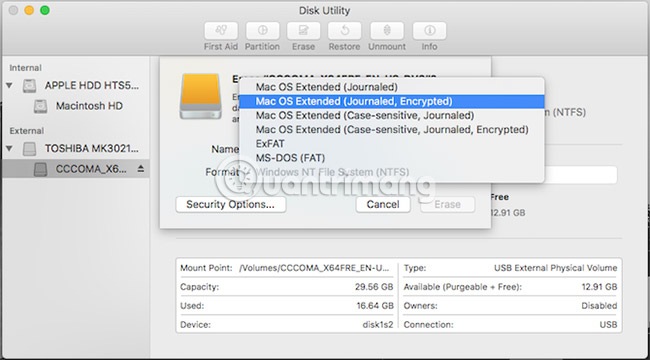
Which format option to choose depends on how the user intends to use the drive:
- Backup Time Machine : If you plan to use the drive to back up your Mac using Time Machine, you need to format the drive to HFS +. In Disk Utility, this option is displayed under the name Mac OS Extended .
- Portable drive : If you want to create a removable disk for use with Macs and other operating systems like Windows, choose exFAT. If only working with Macs, you can format the drive to HFS with Mac OS Extended option or with newer APFS file system.
- Working with older devices: This option is rarely used, but if you use the drive with an old device that does not support exFAT, you may have to choose the old FAT option. In most cases, you should not use this option because it limits the drive size to less than 32GB.
2. If you only need to fix the error once
Warning!
The following section describes how to enable test NTFS support in macOS. Chances are that something will work incorrectly, resulting in data loss on the destination drive. The article advises readers not to rely on this method to write to important drives or to use as a long-term solution.
Sometimes, you can just write some files to the locked drive and can do this with the built-in Mac tools. Although macOS can read NTFS drives by default, the ability to write to these drives requires a trick with Terminal. Follow these instructions for each drive you want to burn.
Open Terminal and type:
nano etc/fstab
Then copy this line to the file, replacing DRIVENAME with the actual name of the drive you want to access:
LABEL=DRIVENAME none ntfs rw,auto,nobrowse
Press Ctrl + O to save the file, then press Ctrl + X to exit the Nano. Now disconnect, and then reconnect the drive. Once it is re-attached, it will be available in / Volumes.
Click Go in the menu bar and select Go to Folder to go there. Enter / Volumes and click Go. Users will see their drives listed here and now users can copy files to it.

3. Free open source solution
Even if it's okay to use Terminal, no one wants to edit the file every time a new drive is processed. If you have a bit of technology knowledge and often handle Windows drives, you may need a better solution. One of the most popular solutions is an open source product called FUSE for macOS.
First, download FUSE. This program does not contain anything to mount and read files. You will need some additional tools to complete the job, available in the Homebrew package with the name NTFS-3G.
First, install Homebrew by pasting this line into Terminal:
/usr/bin/ruby -e "$(curl -fsSL https://raw.githubusercontent.com/Homebrew/install/master/install)"
When running commands to install Homebrew and receive confirmation in Terminal, you need to install the NTFS-3G package. Enter the following command:
brew install ntfs-3g
Sometimes, Terminal does not realize that the FUSE package has been installed. If that happens, run this command:
brew cask install osxfuse
After that, you will be prompted to restart the Mac. After doing that, try running the NTFS-3G command again.
Write to NTFS drive with NTFS-3G
NTFS-3G allows the Mac to write to an NTFS drive, but things don't happen automatically. Users need to run a few more commands to make it work.
First, find the address of the read-only drive. This information can be obtained in Terminal by the command:
diskutil list
You need to run the commands after each attempt to mount the writable drive. Replace / dev / disk1s1 with the drive address found above:
sudo mkdir /Volumes/NTFS sudo /usr/local/bin/ntfs-3g /dev/disk1s1 /Volumes/NTFS -olocal -oallow_other
If you do not want to run these commands each time you mount a new drive, there is a fix. You can boot your Mac into single-user mode and replace the Mac's existing NTFS tool with NTFS-3G.
4. A simple, paid option
The solutions that the article described above seem a bit technical. If you want everything to work with just a few clicks, you can use third-party apps (and pay) to simplify the entire process.
There are a number of different options, but Paragon Software's NTFS for Mac is the most popular tool. It costs $ 19.95 (about 463,000 VND) per license (discounted when buying 3 or 5 licenses at the same time. You can also use the 10-day trial version of the software.
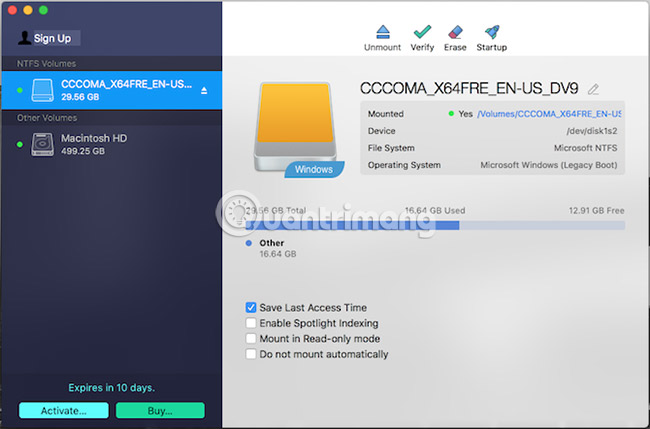
The installation is very simple, then the software will provide a menu bar showing NTFS drives. NTFS drives still display in the normal Finder and users can view them as any other drive.
Tuxera NTFS for Mac is another option. It is built based on open standards that we have used above, NTFS-3G. Just pay $ 25 (580,000 VND) to use it on all Macs. The software also has a 15-day free trial. Instead of a menu bar, Tuxera installs an optional control window. Users can format the drive from here. Like Paragon, users can use the Finder to work with the drive.

Both paid options make it easy to mount a read-only drive on a Mac and make it writable. You can also write as much data as you want to the drive while using the trial version.
But a read-only drive is not the only problem that users may encounter with an external drive on a Mac. Sometimes you attach an external drive to which the Mac doesn't recognize it.
Wish you quickly fix the problem!
Was this article helpful?
Your feedback helps us improve.
Related Articles
 Pros and cons of using an external hard drive for PS48 minutes read
 How to fix an external hard drive error is not displayed on the Mac10 minutes read
 7 best external hard drives9 minutes read
 5 best external hard drives of 20265 minutes read
 6 Tips for Using External Hard Drives on Mac9 minutes read
 How to Connect an External Hard Drive to a Macbook Pro8 minutes read
Reader Comments 0
Sign in with email or Google to join the discussion.