Table of Contents
This step-by-step guide explains how to fix an external hard drive error is not displayed on the mac. It covers the required setup, the main actions, and the checks that help prevent common problems.
It is frustrating when an external hard drive does not display (or works incorrectly) on a Mac. Fortunately, there is a long list of ways to fix these errors and hopefully they will quickly fix this problem.
In some cases, you cannot restore your drive. Refer to the article: 7 data backup strategies to know how to prevent similar cases.
If an external hard drive is displayed but you cannot write data, it is possible that a Mac file system that the computer cannot write to is already in use. Many external Windows drives are formatted as NTFS by default and macOS does not include NTFS drivers. To write to these drives, you need to install drivers that support the file system.
Refer to the article: How to fix Read-only of external hard drive on Mac for more details. In addition, premium options like Paragon NTFS ($ 20 / 460, 000VND per Mac) or TuxeraNTFS ($ 31 / 719, 000VND for all home computers) will quickly restore access to the NTFS drive.
If you find an external drive here, try accessing it. If you find your drive appears on the desktop, launch the Finder and in the menu bar, go to Finder> Preferences> General . Check the boxes to determine which drives are displayed on the desktop.
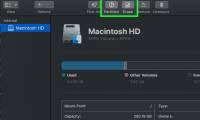
Visit Apps> Utilities> Disk Utility (or search on Spotlight). This system utility lists all connected drives, lists mounted or unmounted partitions below. If the drive is displayed but the partition is not mounted (shown in gray), try right-clicking on the partition and selecting Mount.
If the drive appears in Disk Utility but cannot mount any partitions, users can still recover data from that drive. There are many useful data recovery tools for Mac. You can use Time Machine or Easeus Data Recovery Wizard.
If you don't care about the data and just want to reuse the drive, use the Erase Tool in Disk Utility to create a new partition.
Some users have reported success in overcoming problems that were not previously displayed by rebuilding the Launch Services database on macOS. Apple describes this as an API that allows a running app to open other apps or their document files in the same way as the Finder or Dock.
You can rebuild this database by downloading and installing the free maintenance app OnyX. Launch it and enter the admin password for OnyX to work. The app may require verification of the desktop structure. Select Continue And wait if this request appears. OnyX will not respond until the process is complete.
When the process is complete, restart the Mac. Try reconnecting the drive after the computer has finished booting.
Ports and cables are physical connections, so they are easy to wear and can be completely broken. If the external hard drive is not displayed, try using another USB port to see if it fixes this situation. If the drive appears, it means that the original USB port has a problem (this can be fixed in section 7 below).
But if changing the USB port doesn't work, pay attention to the cable. If the drive is not used for a long time, check if the cable is available. Some older drives require a separate USB connector. Even older drives require dedicated DC adapters.
You can also try changing another cable to see if it works. If you are using a USB flash drive, check the connector for signs of damage.
You can confirm whether the drive is faulty by trying to connect it to another computer. Ideally, try with another Mac, otherwise Windows PC will work. After trying on both Windows Mac and PC, if the drive just doesn't show up on the Mac, chances are the drive is not compatible with the Mac.
Although it rarely happens with modern hardware, there are cases where some USB devices need to install drivers before they work on certain operating systems. This is especially true for many 'secure' USB drives, using some kind of software encryption to prevent unwanted access.
A potential solution is to search on Google with specific brands and models. Manufacturers may have included Mac drivers for users to download.
Backing up your Mac with Time Machine before installing major updates or upgrading macOS to the next major version is always recommended.
If the signs indicate the Mac is the source of the problem (or you don't know why at all), try resetting SMC (System Management Controller) and PRAM (Parameter Random Access Memory).
For problems related to USB devices, resetting SMC will provide the opportunity to overcome the best problem. If that doesn't help, try resetting PRAM because it can't really cause any long-term problems.
You can take consumer-friendly Apple hardware tests at home, but they may not 'reveal' much information. If you really want to learn more about this issue, you need to use Apple Service Diagnostic for your device.
Apple Service Diagnostic is a set of diagnostic tools used to find errors by technicians. Starting with related drive images is usually not too complicated, then users can create a bootable Apple Service Diagnostic drive for testing purposes.
This tool will not fix errors, but it confirms your doubts are correct. If you have a problem with a specific USB port, you may consider purchasing a hub device to make the most of your remaining connection. This may also be a good time to think about upgrading to another machine, as this may be a sign of bigger problems.
Not everyone disconnects your drive safely, especially small USB drives that are mainly used for data transfer. However, external hard drives with larger capacities store more valuable data so that users can spend some time with patience. Users can take the drive in many ways:
- Right select it and select Eject.
- Use the Eject Icon under the Devices Section of the Finder sidebar.
- Select and drag the drive from the desktop or Finder to the Trash In the Dock.
- Use a free menu bar app like Ejector (download link: HTTP: //www. Jeb. Com. Fr/en/ejector. Shtml).
FAQ
What should I check before following these steps?
Confirm device and software compatibility, save important data, and make sure you have the required permissions, files, and account access.
Why might the process not work?
Common causes include outdated software, missing permissions, incompatible hardware, an unstable connection, or completing a step in the wrong order.
Can I undo the changes if necessary?
That depends on the tool or setting. Use built-in restore options when available, keep a backup, and record the original configuration first.
Related Articles
 Pros and Cons of Using an External Hard Drive for PS49 minutes read
 7 Best External Hard Drives9 minutes read
 How to Fix an 'External Hard Drive Not Detected' Error on PC or13 minutes read
 5 Best External Hard Drives of 20267 minutes read
 6 Tips for Using External Hard Drives on Mac10 minutes read
 Know About Bad Sectors on Your Hard Drive8 minutes read
Reader Comments 0
Sign in with email or Google to join the discussion.