Table of Contents
Utilize Markup on iOS 10 to quickly edit and add markings to photos. This detailed guide will help you easily perform these actions on your iPhone and iPad.
How to edit photos on iOS 10
Step 1
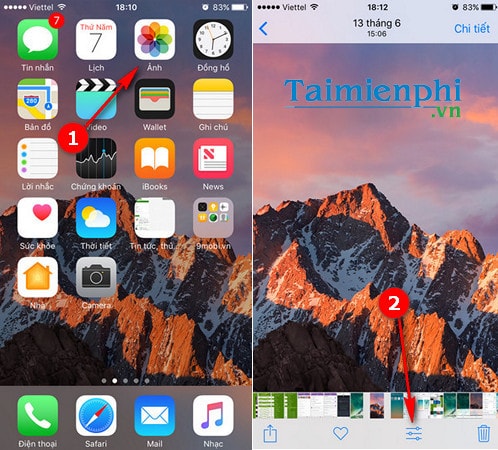
Access the Photos app.
Step 2
Choose any image and select the Settings icon below the image.
Step 3
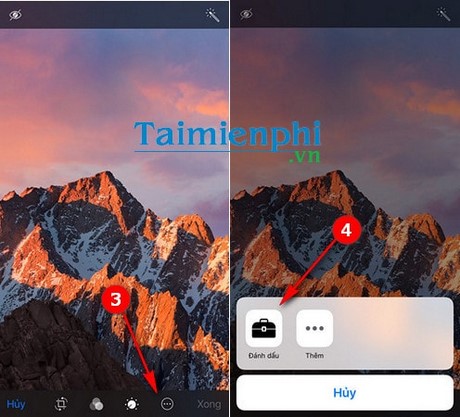
Tap the three-dot icon to access additional settings. A pop-up will appear; tap the "Markup" option to start marking and annotating directly on the image.
Step 4
There will be three options allowing you to draw, create text, and scan text.
In the text options, the application allows users to delete, edit, or duplicate text with just one button press. When editing text, users can customize the text color, font, and size.
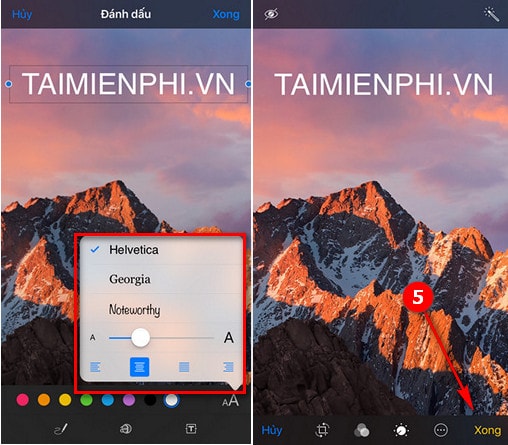
Users simply click and drag to move the object. To deselect an object, simply select 'Cancel'.
Step 5
After creating the image caption, press Done twice to complete the process.
How to restore the original image
After marking an image, you may want to restore it to its original state without having to delete the markings. Follow these steps to undo the action.
Step 1
Select the image you just marked and continue following the instructions from step 1 to step 2 of the image marking technique.
Step 2
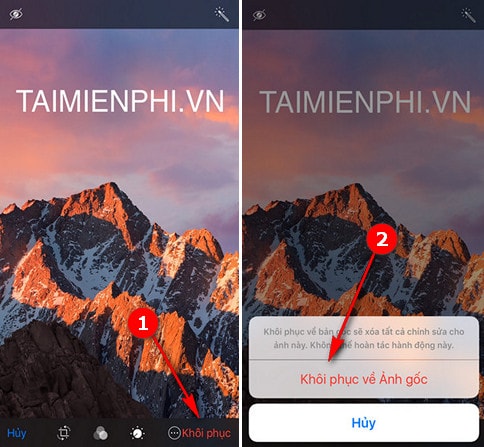
At this step, you will see a red Restore icon appear next to the three dots.
Simply click here to restore the image to its original state.
Step 3
The application will ask if you want to restore the original image. Press Restore to Original Image to undo all previous edits.
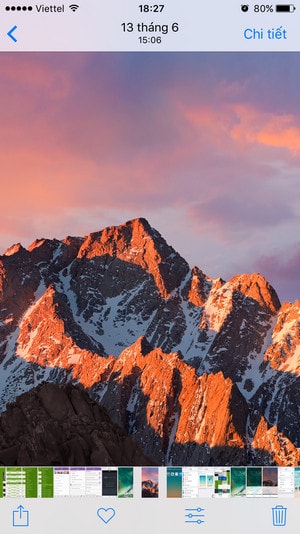
Markup on iOS 10 makes editing and marking up photos on your iPhone easy without needing a third-party app. If you want to add notes to photos or draw on screenshots, take advantage of this useful tool.
Related Articles
 How to Remove Watermarks from Photos5 minutes read
 How to Create Watermark on PowerPoint5 minutes read
 Top Free Video Editing Apps Without Watermarks15 minutes read
 Photo Editing on Mac: a Complete Guide for All Your Needs7 minutes read
 How to Use AI Image Editor to Edit Photos with AI: Clear Instructions5 minutes read
 Learn How to Use Paint to Edit Photos on Windows23 minutes read
Reader Comments 0
Sign in with email or Google to join the discussion.