How to customize Facebook and Google interface with Stylish utility
Stylish is a utility on Google Chrome, Firefox, Opera and Safari browsers that can customize the look of any website with simple operation..
If you want to change the interface of Facebook, Google, Twitter, the Stylish utility installed on the browser will bring a lot of new interface templates.
Most social networks or websites set the most basic white background interface to be suitable for all users. Later, some services also provided additional options to change the look of the website, but also stopped with a simple black background interface.
The Stylish utility will bring more options to change the look and feel of the website, because of the rich collection of wallpaper themes. We will not need to spend time customizing the interface, but just using pre-designed templates. Stylish utility can be installed on Google Chrome, Firefox, Opera and Safari browsers. The following article will guide how to use Stylish on Google Chrome browser to customize the website interface.
- Change Facebook interface with 5 widgets on Chrome
- How to set wallpaper, change fonts, colors on Facebook
- Change the Windows 10 interface with beautiful glitter Christmas theme
How to adjust the interface of Google and Facebook with Stylish
- https://userstyles.org/
Step 1:
When accessing the above link, the website will automatically transfer the Stylish settings link to the browser you are using. Click Install Stylish for Chrome .

Step 2:
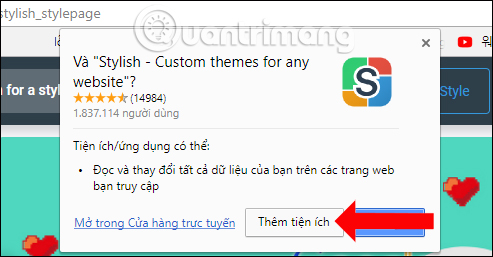
Click on the Add add button to agree to install the utility on the browser.
Step 3:
When installing Stylish successfully, the utility icon will appear at the end of the access bar, with the notice shown below. Restart the browser so the Stylish utility can work.

Step 4:
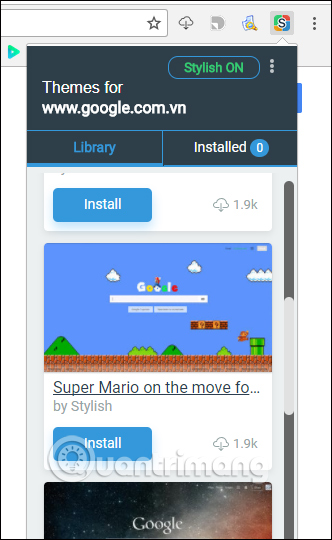
You try to access the Facebook page of Facebook, when clicking on the Stylish icon on the browser , the ON mode will automatically turn on, along with the utility will automatically identify the website we are accessing.
Now the Stylish interface will have 2 tabs for you to manage as a Library with a list of available interfaces to match the website you are visiting to choose, the Installed tab is a list of the interfaces you have installed for webpage.
Step 5:
If you want to install the available interface, click the Install button below immediately, the website interface will change as shown below.

Step 6:
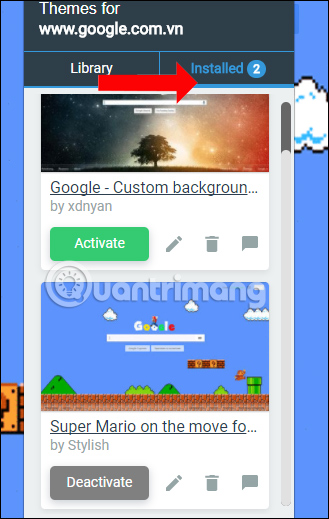
Once the interface is downloaded to the browser will be listed as a list in the Installed section . Here, if you want to return to the default interface, you will need to disable the currently used interface by clicking the Deactivate.
To use the new interface next click on the Activate button.
Step 7:
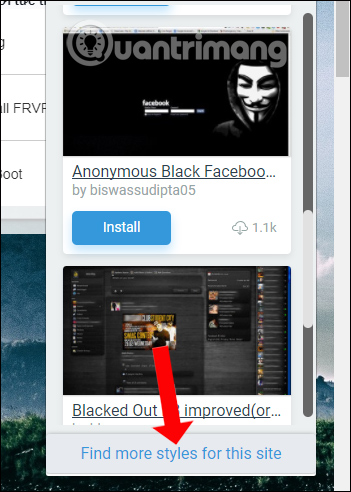
To download more themes for the site, click on the line Finds more styles for this site below.
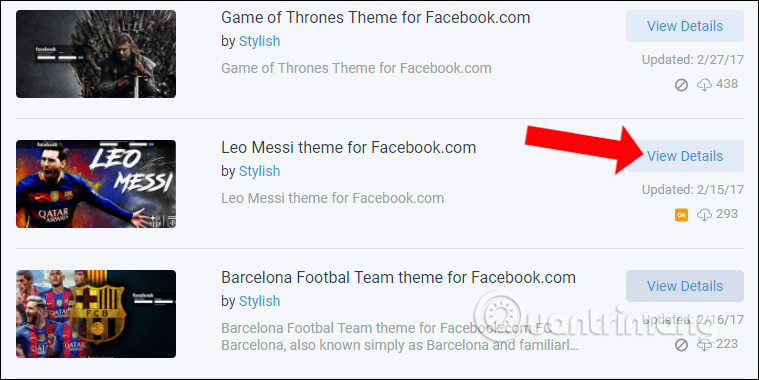
Step 8:
Appears a list of interfaces that Stylish provides to the user to apply to the web interface on the browser. Click the View Details button at the topic you want to use.
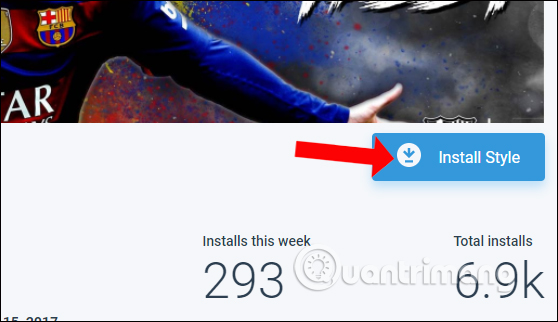
In this new interface, you will preview how the interface applies to the website. Below will be the information of the designer, the date of creating this interface, the total number of interface downloads. If you want to apply this interface to the website, click the Install Style button.
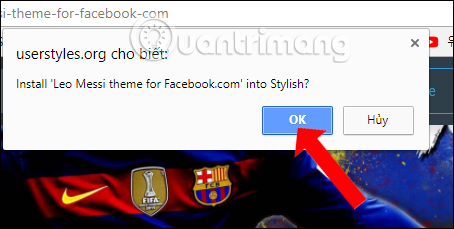
Click OK to agree to install this interface.
Step 9:
In case you have knowledge of code, you can design the interface for the website to use. Click the 3 dots icon next to Stylish ON and select Create New Style .

Step 10:
In this design interface we will write code with those who have knowledge of this field.
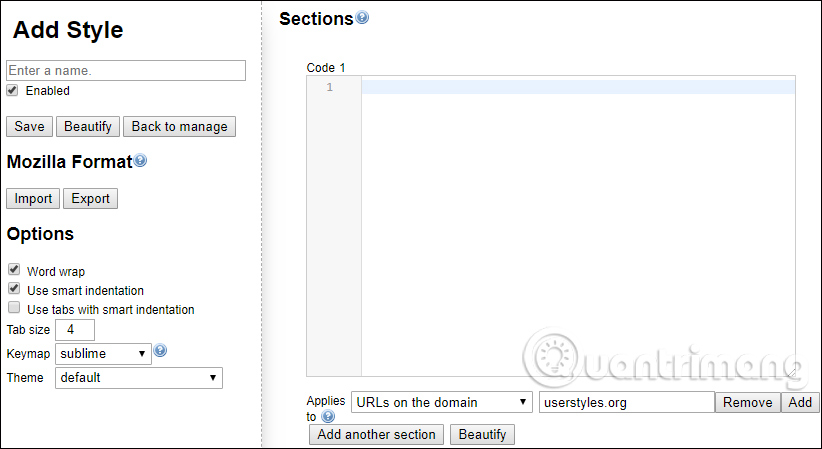
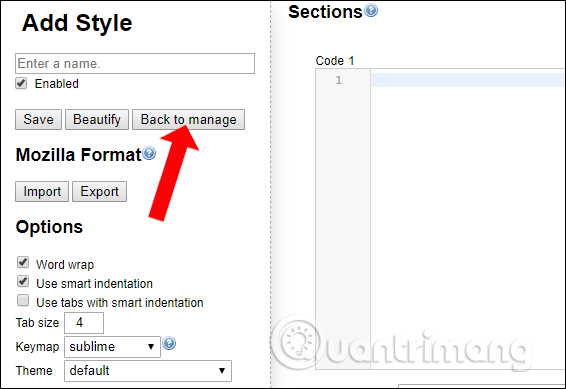
However, the utility will also support us to customize the previous set of interfaces, if you don't want to create a new set of interfaces. Click Back to manage .
Step 11:
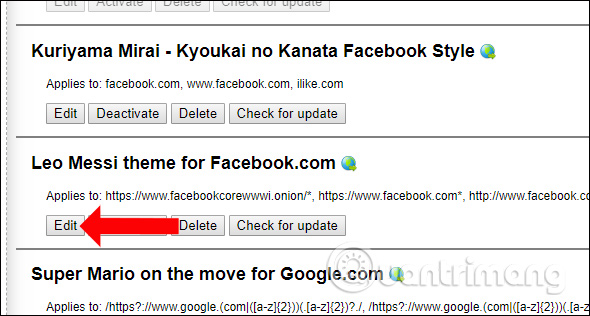
Go to the website interface that the user wants to change and click the Edit button to edit.
Editing is as simple as changing the image path with the image path you want. Finally click Save to save. You should find images with large capacity and quality, when applying will not blur the interface.
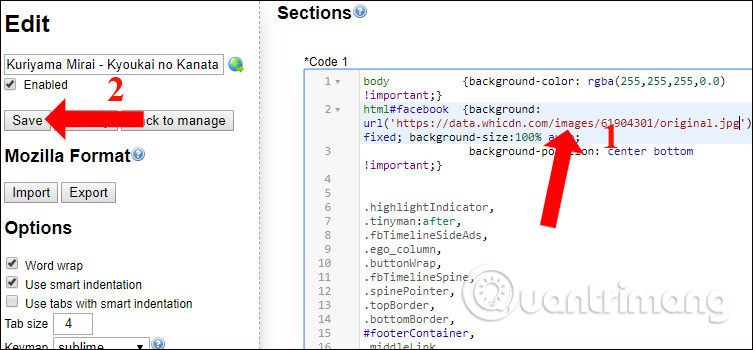
For example, I will change the interface for Facebook with my image and be as shown below.

Step 12:
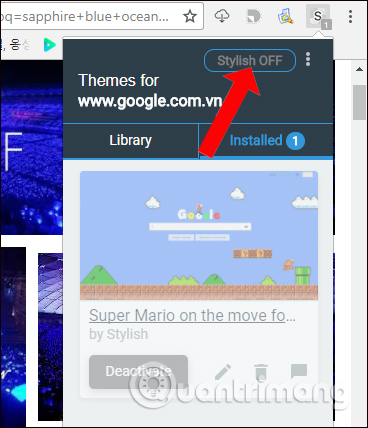
If you want to disable the interface , you just need to switch the Stylish utility to Off mode .
So you have the utility to change the interface of websites such as Google, Youtube, Twiiter, Yahoo, . right on the popular web browsers today. It's not simply colors, but Stylish utility also provides a lot of different themes. Changing the interface of the website is simple, we just need to replace it with the interface image we want to use. With this method anyone can do it, without the knowledge of code like when designing the interface itself.
See also: How to change Coc Coc browser wallpaper.
I wish you all success!