How to Create and Apply Master Page in an Adobe FrameMaker Document
All FrameMaker documents consist of body pages, reference pages, and master pages. These pages are automatically created whenever you create a new FrameMaker document. Body pages contain the contents that you type in a FrameMaker document....
Method 1 of 1:
FrameMaker 7.0
-
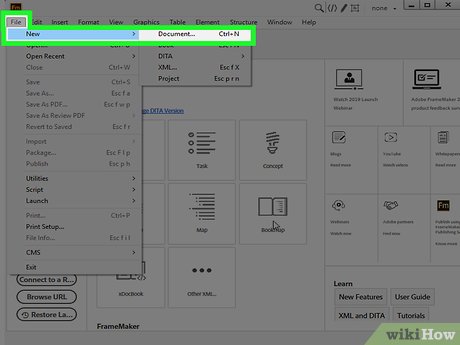 Create a new FrameMaker document. Start FrameMaker, point to New on the File menu, and then click Document. This displays the New dialog box.
 -
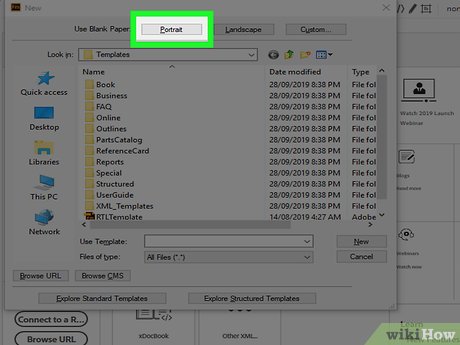 Click Portrait on the New dialog box. A new FrameMaker document is displayed.
 -
 Enter some text. Type some text in your FrameMaker document or just copy some text from the Lorem Ispsum site.
 -
 View default master page. On the View menu, click Master Pages. This displays the default master page for your newly created FrameMaker document. Note that a default master page is the master page for the right page and contains a header frame, a text frame, and a footer frame.
 -
 Create a new master page. On the Format menu, point to Page Layout, and then click New Master Page. The Add Master Page dialog box appears.
 -
 Enter an appropriate name for the master page. In the Name box, specify a name for the master page and then click the Add button. This adds a master page to your FrameMaker document.
 -
 Select the header frame. Place the insertion point in the header frame and then press and hold the Ctrl key to select the header frame.
 -
 Display the Scale dialog box. On the Graphics menu, click Scale. The Scale dialog box appears.
 -
 Specify a new height. In the Height box, enter 0.65" and then click Scale. This increases the height of the header frame.
 -
 Display the Tools palette. On the Graphics menu, click Tools.
 -
 Draw a graphic frame. Click the Place a Graphic Frame Button and draw a small graphic frame inside the header frame.
 -
 Import a file. On the File menu, point to Import, and then select File. The Import dialog box appears.
 -
 Browse and locate an image on your computer and then click Import. The Imported Graphic Scaling dialog box appears.
 -
 Select Custom dpi and type 96.
 -
 Place an image inside the graphic frame. Click Set. This places the image inside the graphic frame.
 -
 Select the text frame. Place the insertion point inside the text frame and then press and hold the Ctrl key to select the text frame.
 -
 Display the Customize Text Frame dialog box. On the Format menu, point to Customize Layout, and then click Customize Text Frame. The Customize Text Frame dialog box appears.
 -
 Specify a new height. In the Height box, enter 8.00" and then click Set. This decreases the height of the text frame.
 -
 Reposition the text frame. With the text frame still selected, drag it downwards using the mouse; so that the text frame is equidistant from the header and footer frames.
 -
 Enter variables in the footer frame. Now place the insertion point inside the footer frame and enter the text, Page.
 -
 Display the Variable dialog box. On the Special menu, click Variable. The Variable dialog box appears.
 -
 Select Current Page # and then click the Insert button. This inserts the current page number into the footer frame.
 -
 Again place the insertion point inside the footer frame and enter the text, of.
 -
 On the Special menu, click Variable. The Variable dialog box appears.
 -
 Select Page Count and then click the Insert button. This inserts the count of total number of pages in the footer frame.
 -
 Apply master page to body page. To apply the master page, to your body pages, on the View menu, click Body Pages.
 -
 Display the Master Page Usage dialog box. On the Format menu, point to Page Layout, and then click Master Page Usage. The Master Page Usage dialog box appears.
 -
 Select the master page to apply. In the Use Master Page section, from the Custom list, select MyMasterPage.
 -
 Specify the pages to apply master page. In the Apply To section, specify the page numbers to which you want to apply the master page and then click the Apply button.