Table of Contents
This updated guide examines Click: How to Create an Icon in Paint and organizes the essential facts, background, and practical takeaways in clear American English.
Method 1of 2:
Using Classic Paint
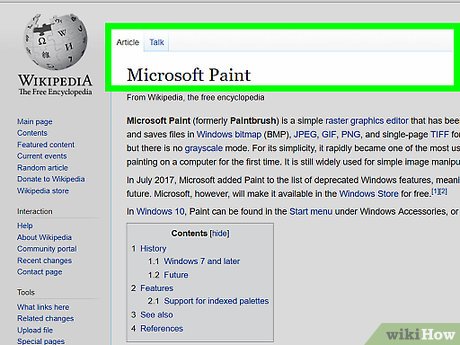 Understand Microsoft Paint's limitations. Unfortunately, you can't use Paint to create a transparent image; since icons are usually partially transparent to allow for the desktop to display behind them, this means that your image will both be square and use different colors in the final product than you used to create the icon.
- When using Microsoft Paint to create an icon, it's best to stick to black and white as other colors can appear distorted in the final product.
- One solution to the transparency issue is to save your Paint project as an image (rather than as an icon) and then use an online converter to turn the image into an icon.
 Open Start
 . Click the Windows logo in the bottom-left corner of the screen.
 Open Paint. Type inpaint, then click Paint at the top of the Start window. This will open the Microsoft Paint program in a new window.
 Enable gridlines. This will make it easier to draw your icon:
- Click the View tab at the top of the window.
- Check the "Gridlines" box in the "Show or hide" section of the toolbar.
- Click the Home tab to return to the main Paint screen.
 ClickResize. It's in the toolbar at the top of the Paint window. Doing so prompts a pop-up window to appear.
 Check the "Pixels" box. This is near the top of the pop-up window.
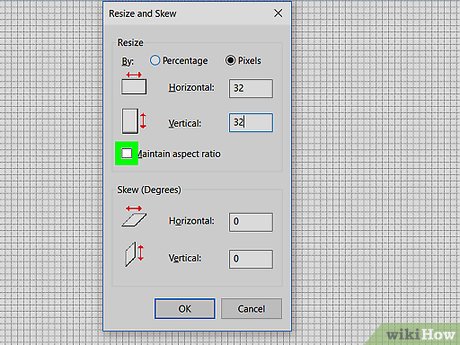 Uncheck the "Maintain aspect ratio" box. It's near the middle of the window. If your previous canvas size was not square, unchecking this will allow you to create a new canvas size that is the same length on all sides.
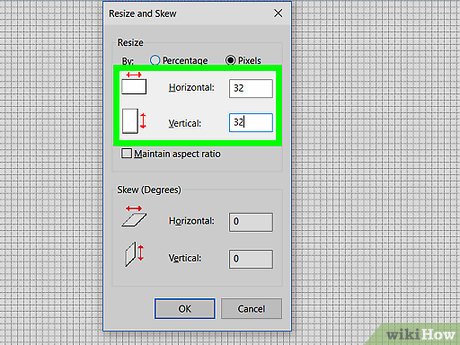 Set the canvas size to 32-by-32. Type32into the "Horizontal" text box. Then type32into the "Vertical" text box and click OK at the bottom of the window.
 Zoom all the way in. Since the 32-by-32 canvas is too small to work on, click seven times the + icon in the lower-right side of the Paint window. This will zoom all the way in on your canvas.
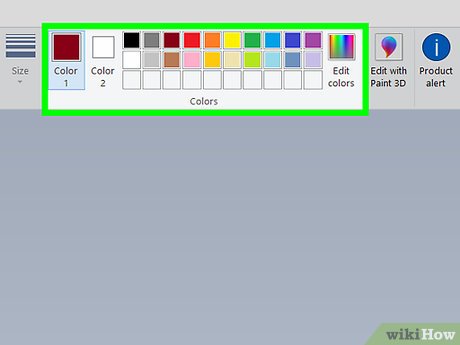 Draw your icon. Select a color from the top-right side of the window, then click and drag across your canvas to create your icon.
- If necessary, you can change your brush size by clicking the Size option in the toolbar and then clicking the correct thickness in the drop-down menu.
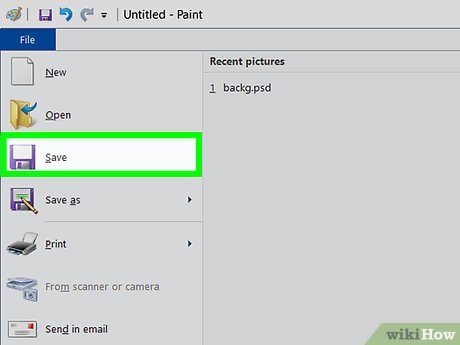 Save your icon. If you want to convert the icon later, just click File , click Save , select a save location, and click Save ; otherwise, to save the image as an icon file, do the following:
- Click File .
- Select Save as , then click Other formats in the pop-out menu.
- Type in whatever you want to name your icon followed by.ico(e.g., a Word icon which is named "Word alternate" would be "Word alternate.ico").
- Click the "Save as type" drop-down box, then click 256 Color Bitmap in the drop-down box.
- Select a save location on the left side of the window.
- Click Save , then click OK when prompted.
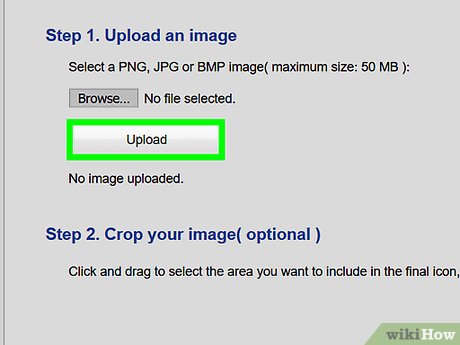 Convert an image file into an icon. If you saved your Paint image as an image file (e.g., a PNG or a JPEG), you can convert it into an icon by using the free ICO Convert website:
- Go to http://icoconvert.com/ in your computer's web browser.
- Click Choose file .
- Select your Paint JPEG, then click Open .
- Click Upload .
- Crop your image as needed, then scroll down and click Select None .
- Scroll all the way down and click Convert ICO .
- Click the Download your icon(s) link when it appears.
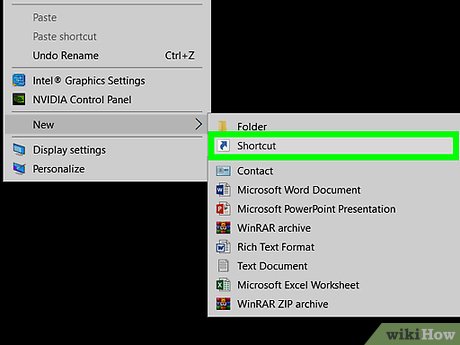 Use your icon as a shortcut. Once you've saved the icon, you're free to assign it to a shortcut on your computer.
Method 2of 2:
Using Paint 3D
 Understand Paint 3D's limitations. Unlike classic Microsoft Paint, Paint 3D allows you to create your image on a transparent background; however, you cannot create an icon file from directly within Paint 3D.
- Fortunately, you can use ICO Convert to turn your image with a transparent background into a more satisfactory icon file.
 Open Start
 . Click the Windows logo in the bottom-left corner of the screen.
 Open Paint 3D. Type inpaint 3d, then click Paint 3D at the top of the Start window.
- Unlike Microsoft Paint, Paint 3D is only available on Windows 10 computers.
- Paint 3D was first introduced with the Windows 10 Creator's Update in spring of 2017. If you don't have Paint 3D, update Windows 10 before proceeding.
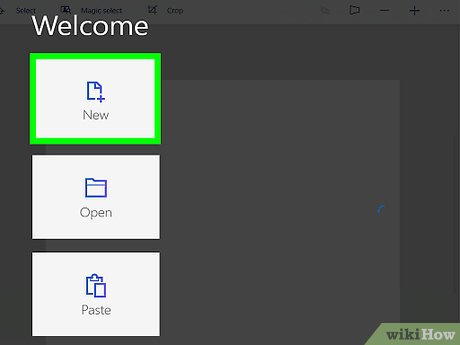 ClickNew. It's at the top of the window.
 Click the "Canvas" button. This box-shaped icon is in the upper-right side of the window. Doing so opens a sidebar on the right side of the window.
 Click the white "Transparent canvas" switch
 . The switch will turn blue
 , indicating that your canvas is now transparent.
- If this switch is blue, your canvas is already transparent.
 Resize the canvas. On the right side of the window, do the following:
- Click the "Percent" drop-down box, then click Pixels in the resulting menu.
- Replace the value in the "Width" box with32.
- Replace the value in the "Height" box with32.
 Zoom in. Click and drag the slider in the upper-right side of the page until your canvas is large enough to work on.
 Draw your icon. Click the brush-shaped "Brushes" tab at the top of the window, then select a brush, select a color, lower the brush's size if necessary, and click and drag to draw on the canvas.
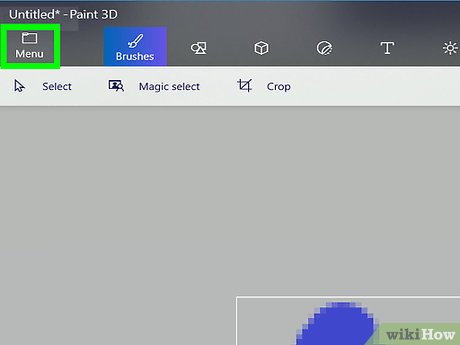 Click the "Menu" icon. This folder-shaped icon is in the top-left corner of the window.
 ClickImage. It's in the main window. Doing so opens a "Save As" window.
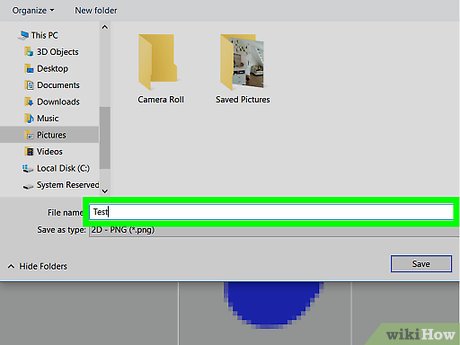 Enter a name for your icon. Type whatever you want to name your icon into the "File name" text box.
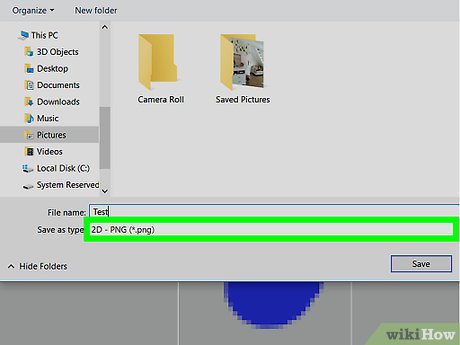 Make sure the file format is correct. In the "Save as type" box, you should see "2D - PNG (*.png)" listed; if not, click the "Save as type" box and then click 2D - PNG (*.png) in the drop-down menu.
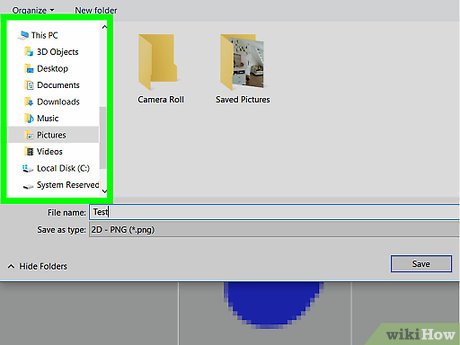 Select a save location. Click a folder (e.g., Desktop ) on the left side of the window.
 ClickSave. It's in the bottom-right corner of the window. Doing so will save your project as a PNG with a transparent background.
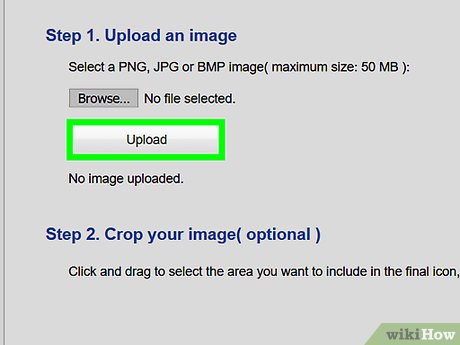 Convert an image file into an icon. Since your saved PNG file can't be used as an icon, you'll have to turn it into an icon file with a free website:
- Go to http://icoconvert.com/ in your computer's web browser.
- Click Choose file .
- Select your PNG, then click Open .
- Click Upload .
- Crop your image as needed, then scroll down and click Select None .
- Scroll all the way down and click Convert ICO .
- Click the Download your icon(s) link when it appears.
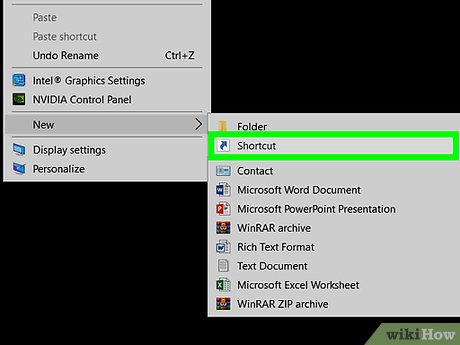 Use your icon as a shortcut. Once you've saved the icon, you're free to assign it to a shortcut on your computer.
FAQ
What is Click: How to Create an Icon in Paint about?
It provides a structured overview of click, explains the main context, and highlights practical takeaways for readers.
Why does this topic matter?
Understanding the main concepts helps readers evaluate the issue, avoid common mistakes, and make better-informed decisions.
How should readers use this information?
Use the guidance as a practical starting point, confirm details that may have changed, and follow current product, safety, or security recommendations.
Related Articles
 Microsoft Copilot Has a Copilot Button and Here's How to Use It4 minutes read
 How to Create a 3x4 Photo in Paint: Step-by-Step Guide3 minutes read
 Paint.net 4.3.4 - Paint.net 4.3.4 Download and Installation6 minutes read
 Microsoft Paint - Download the Latest Microsoft Paint Here6 minutes read
 Replace the Paint 3D Application with Paint Classic on Windows 103 minutes read
 How to Use Paint 3D on Windows 10 for Beginners4 minutes read
Reader Comments 0
Sign in with email or Google to join the discussion.