Table of Contents
Windows 10 includes a legacy System Image Backup feature that can capture the partitions required to restore Windows, installed applications, settings, and files to an earlier state. The result is a backup folder, not an ISO file, and it is different from a System Restore point.
A restored system image replaces the selected disk’s current contents with the state captured in the backup. Copy any newer files elsewhere before restoring.
Before creating the image
- Connect an external hard drive with enough free space. Do not rely on a backup stored only on the same physical disk as Windows.
- Check the PC for storage errors and malware before capturing it.
- Keep personal-file backups as well; a system image is not a substitute for versioned, regularly updated file backup.
- Create Windows recovery or installation media so the image can be restored when the PC does not boot.
For other backup and recovery options, see the Windows installation and recovery guides.
Create a Windows 10 system image
Step 1: Open the Start menu, type Control Panel, and open it.
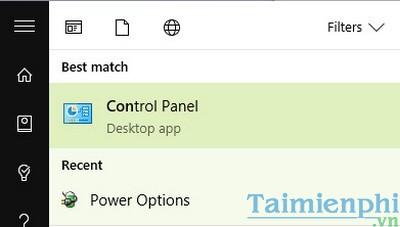
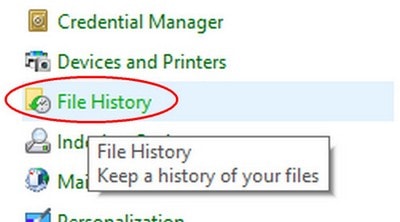
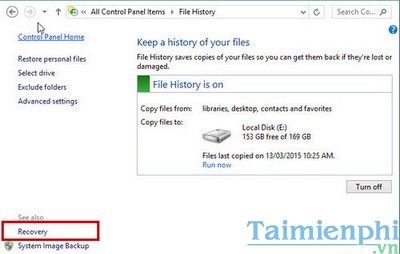
Step 2: Set View by to icons if needed. On the interface shown in the original screenshots, open File History. On other Windows 10 builds, open Backup and Restore (Windows 7) directly.
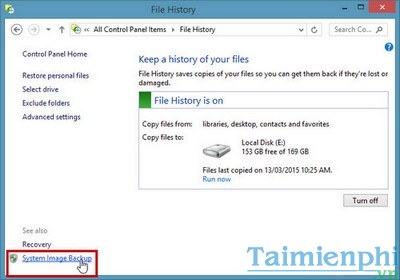
Step 3: Select System Image Backup, or use the Create a system image link in Backup and Restore.
Step 4: Choose the external drive where the image will be saved, then select Next. A network location may be available on some editions, but it must remain accessible during recovery.
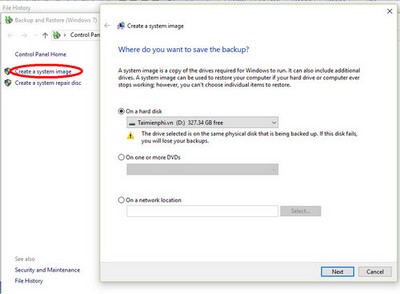
Step 5: Windows automatically includes partitions required to start and run the system. Add other volumes only if you understand the extra storage and restore implications. The destination drive cannot be included in its own image.
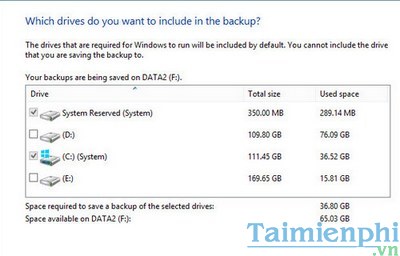
Step 6: Review the source partitions and destination carefully, then select Start backup.
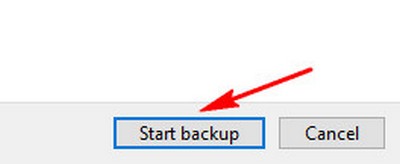
The time required depends on the amount of used space, destination speed, and connection. Do not disconnect the backup drive or shut down the computer while the image is being written.
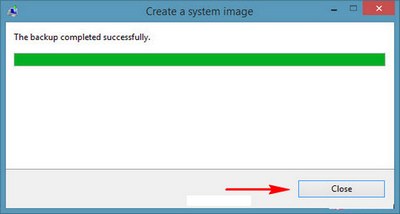
Step 7: When Windows reports completion, close the wizard and safely eject the external drive. Label it with the computer name and backup date, then store it separately.
Do not confuse System Restore with System Image Recovery
The original instructions opened Recovery from Control Panel and then System Restore. The screens below manage restore points, which roll back selected system settings and files. They do not restore a full system image.
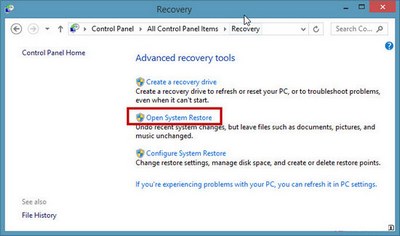
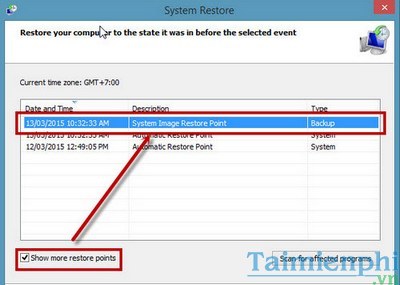
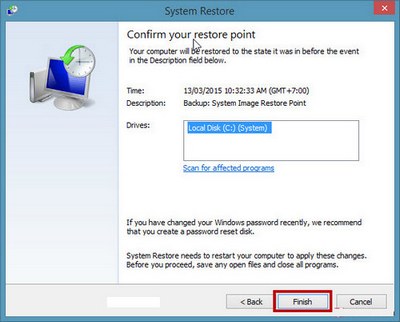
Use System Restore for a driver, registry, or application change when Windows still runs. Use System Image Recovery when you intend to replace the system with the complete disk image you created.
Restore an image when Windows still starts
- Connect the drive containing the system image.
- Open Settings > Update & Security > Recovery.
- Under Advanced startup, select Restart now.
- Choose Troubleshoot > Advanced options > System Image Recovery.
- Select the target Windows installation and the appropriate image.
Read the final disk and partition summary before confirming. The restore overwrites newer system data.
Restore an image when Windows does not start
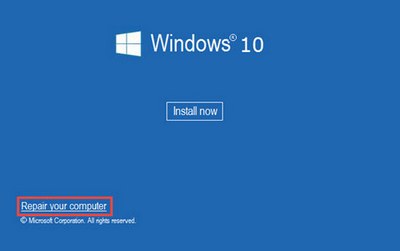
Step 1: Boot from Windows recovery or installation media. On the first Setup screen, select Repair your computer rather than Install now.
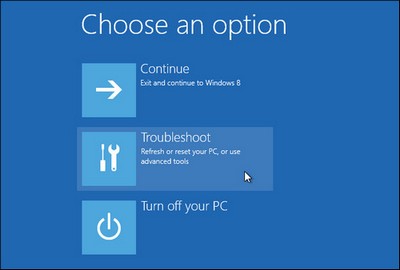
Step 2: Select Troubleshoot.
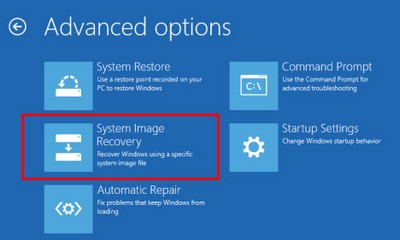
Step 3: Open Advanced options.
Step 4: Select System Image Recovery.
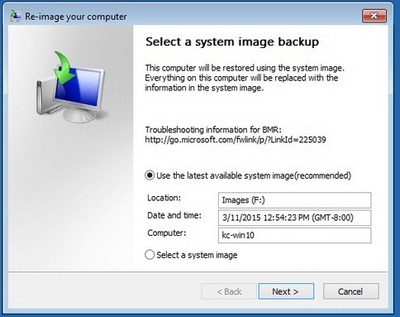
Step 5: The wizard normally proposes the newest compatible image. Confirm its date, computer, and source drive. Choose another image when necessary, then review format and partition options before proceeding.
Important restore checks
- The replacement disk must have enough capacity for the restored partitions.
- Keep the backup drive connected until recovery finishes.
- Do not format or repartition unrelated disks.
- If BitLocker is involved, have the recovery key available.
- After the restore, copy back newer personal files from their separate backup.
If the built-in tool does not meet your needs, compare it with a maintained imaging product and create its recovery media in advance. TipsMake also has a guide to system image backup with Macrium Reflect.
Related Articles
 How Ghost Windows 7/8, Windows 10 with Onekey Ghost5 minutes read
 Reinstall Windows With Onekey Ghost5 minutes read
 Instructions on How to Ghost Windows 7 Using USB6 minutes read
 Backup and Ghost Reinstall Win with Norton Ghost from HDD10 minutes read
 Instructions to Create Ghost Files with Boot Disk3 minutes read
 How to Create Ghost Files on Your Computer Using Norton4 minutes read
Reader Comments 0
Sign in with email or Google to join the discussion.