Table of Contents
One of the most popular effects to create in Photoshop is Color Halftone, based on how printers use cyan, magenta, yellow, and black ink dots of varying sizes and patterns to create the illusion of a continuous color tone.
The Color Halftone effect can give images a vintage or nostalgic look by mimicking printing techniques used in newspapers, magazines, comics, and pop art.
Photoshop even includes the Color Halftone filter, a perfect option for creating halftone effects. But if you've ever used the Color Halftone filter, the results might not be as good as expected.
Let's quickly look at the problem with the Color Halftone filter, then this article will show you how to get much better results from this filter with a simple trick.
Where can I find the Color Halftone filter in Photoshop?
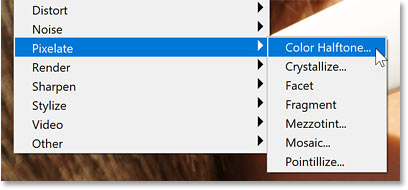
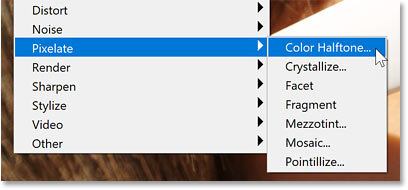
The Color Halftone filter can be found by going to the Filter menu in the menu bar, selecting Pixelate , and then Color Halftone .
How does the Color Halftone filter work?
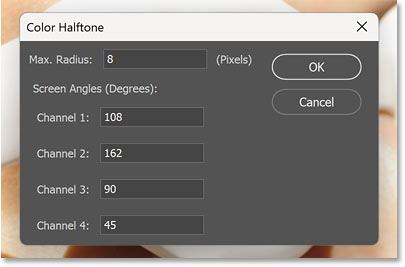
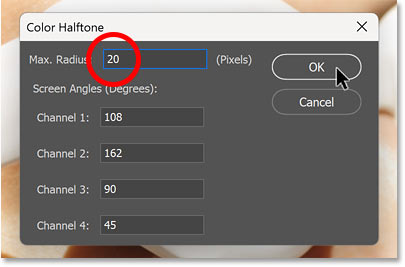
In the Color Halftone dialog box , the Max Radius value at the top sets the maximum size of the dots, in pixels.
Each Channel option sets the angle for the dot pattern of a specific color (1 is cyan, 2 is magenta, 3 is yellow, and 4 is black). As the dots overlap, the colors blend together to create new colors.
Channel options are usually left at their default settings, and the only value that changes is the dot size ( Max Radius ).
Standard Color Halftone filter results
The default Max Radius value is 8 pixels.
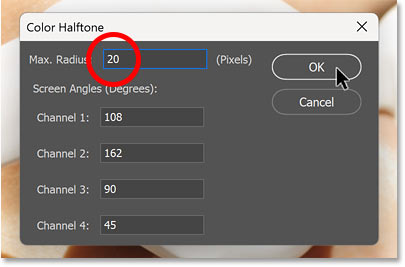
Because the example is working with a large image (5000 px x 3333 px) and needs to display effects in the screenshot, the author will increase the radius to 20.
Then, click OK to apply the filter.
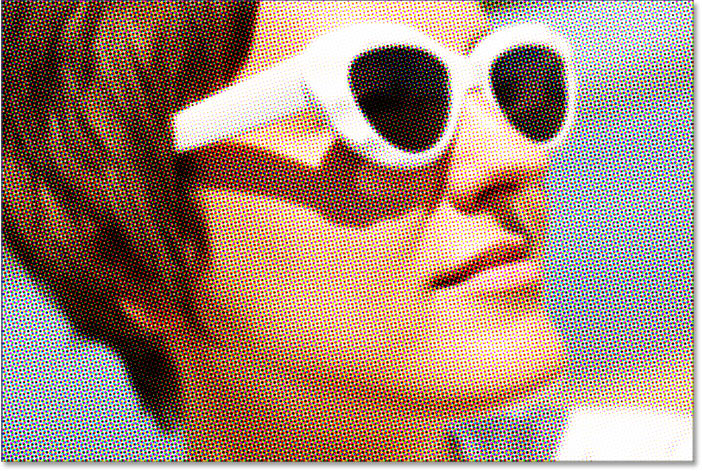
But the results weren't what you'd expect from a halftone sample.
Instead of cyan, magenta, yellow, and black dots blending together to create the original colors of the image, they just look like they were added to the foreground of the photo.
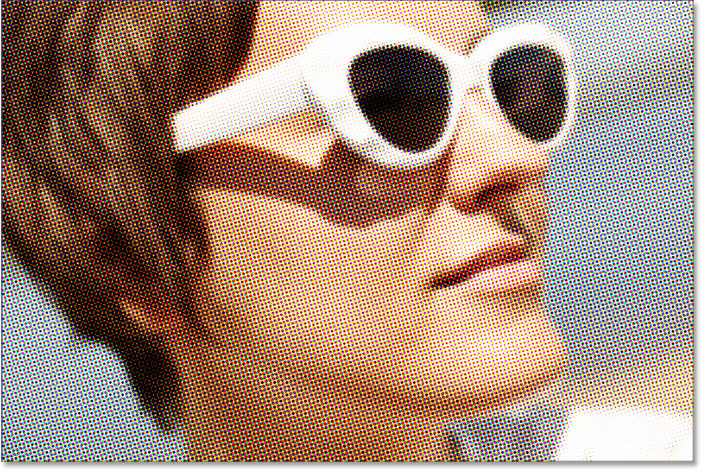
If you zoom in to 100% for a closer look, the problem becomes clearer. The dots don't blend with the original color at all.
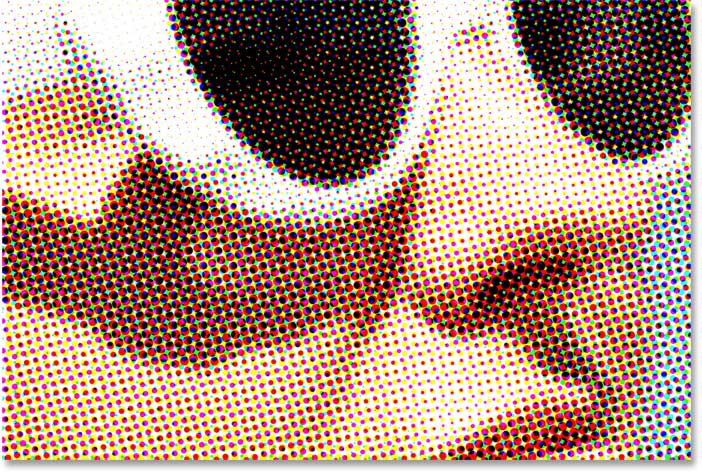
Problems with Photoshop's Color Halftone filter
So why is the Color Halftone filter so bad at creating a halftone effect? The filter itself isn't the problem. The real issue is that our images are in the wrong color mode.
If you go to the Image menu and select Mode (short for Color Mode), you'll see that your image is most likely in RGB color mode. And in RGB (Red, Green, and Blue) color mode, all the colors in the image are made up of different combinations of red, green, and blue.
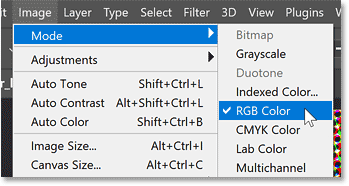
The problem is that the Color Halftone filter wants to be in CMYK color mode .
CYMK stands for Cyan, Magenta, Yellow, and Black, which are the colors that match halftone dots (the same colors as the printer). Therefore, to get better results from the Color Halftone filter, you need to switch the color mode first.
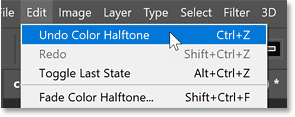
Since the first attempt with the Color Halftone filter didn't work, undo it by going to the Edit menu and selecting Undo Color Halftone .
And now, let's go back to the original image.
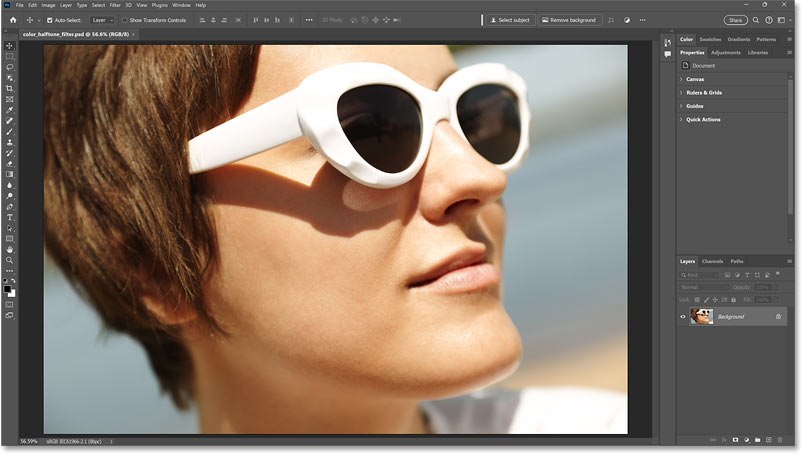
How to get better Color Halftone filter results
To get the best results from the Color Halftone filter, you first need to convert the image from RGB to CMYK.
But to be safe and avoid making any permanent changes to the image, we'll copy the image and work with it in a separate document. Then, transfer the halftone effect back to the original document when finished.
Step 1: Duplicate the image
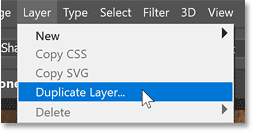
With the Background layer selected in the Layers panel, go to the Layer menu and select Duplicate Layer.
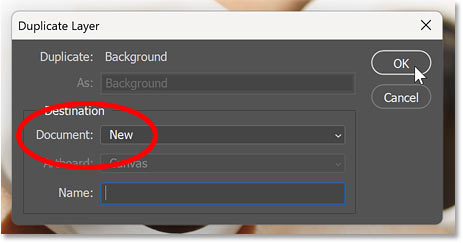
In the Duplicate Layer dialog box, set Document to New and click OK.
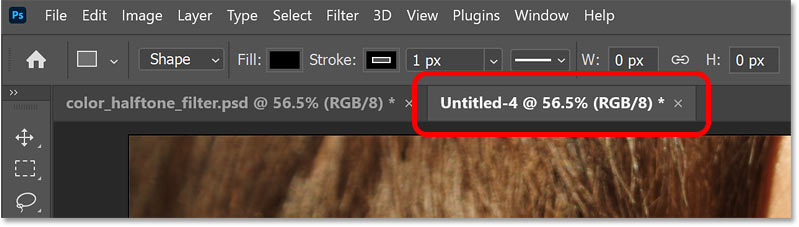
A copy of the image will open in a separate document, which can be seen from the new tab at the top.
Step 2: Convert the image to CMYK color.
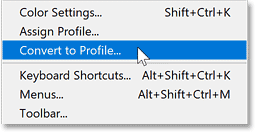
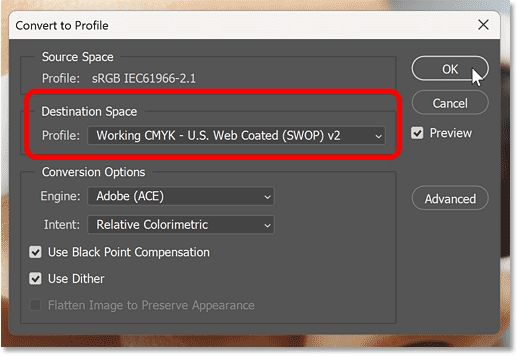
With the new document active, go to the Edit menu and select Convert to Profile .
In the Convert to Profile dialog box , make sure that Destination Space is set to Working CMYK .
The information you see next to it may vary depending on your location in the world. But the important part is Working CMYK.
Click OK to close the dialog box.
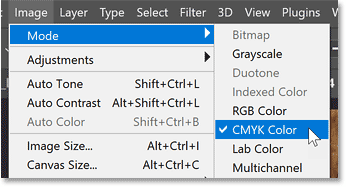
Then, if you go back to the Image menu and select Mode , you will see that the image is now in CMYK color mode.
We are now ready to apply the Color Halftone filter.
Step 3: Apply the Color Halftone filter
Go to the Filter menu , select Pixelate , then Color Halftone , just like you did before.
In the Color Halftone dialog box , enter a Max Radius value to set the maximum size of the halftone dots, in pixels. The example will use the same value of 20 to start with, but you can go back and change it if needed.
Keep the four Channel options at their default values.
Then, click OK to apply the filter.
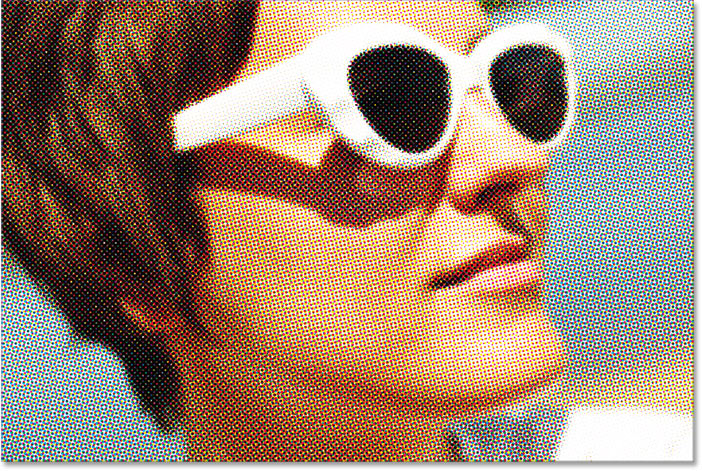
This time, because the image is in CMYK color mode, the Color Halftone filter produces a much better effect.
The cyan, magenta, yellow, and black Color Halftone dots don't just appear in front of the image as they do in RGB mode. Instead, the dots blend with the image's original colors, giving the image a beautiful, vintage look.
For comparison, this is again the original Color Halftone effect using RGB colors.
Step 4: Change the size of the halftone dot.
If you want to try a different dot size:
- Press Ctrl+Z on a Windows PC or Command+Z on a Mac to undo the Color Halftone filter.
- Next, go back to the Filter menu , select Pixelate , and then click on Color Halftone.
Enter a different Max Radius value . The value you need will depend on the image size and the look you want to achieve. The default size is 8, and the smallest size you can choose is 4.
For example, I would lower my settings from 20 to 12 pixels.
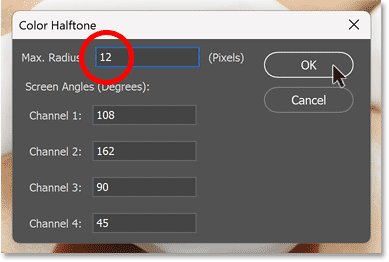
Click OK to apply the filter, and these smaller halftone dots will look better.
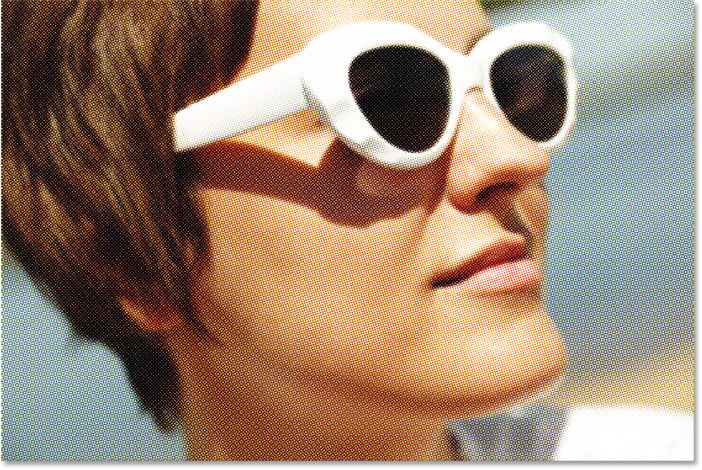
Step 5: Copy and paste the halftone effect into the original document.
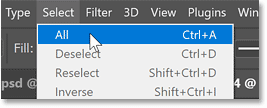
To move the halftone effect to the original document, go to the Select menu and choose All .
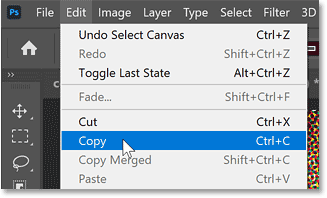
Then go to the Edit menu and select Copy .
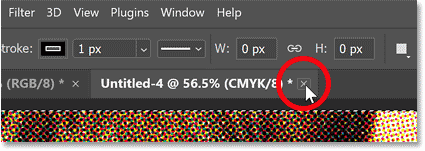
Close the halftone template document by clicking the small x in the document's tab. Leave the original document open.
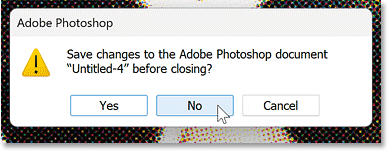
Select No (or Don't Save on a Mac) when Photoshop asks if you want to save your changes.
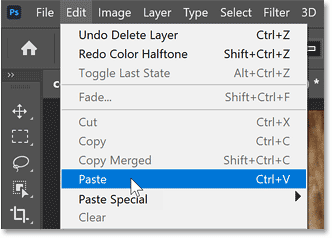
Then, go back to the original document, go to the Edit menu , and select Paste .
Photoshop applies the Color Halftone effect to the document.
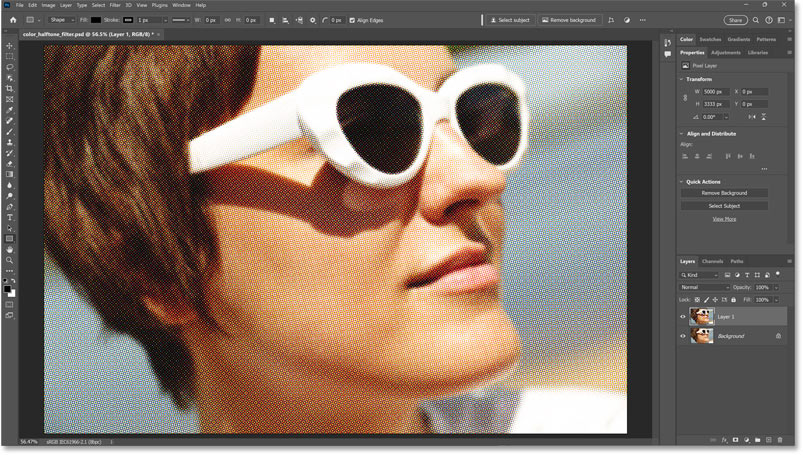
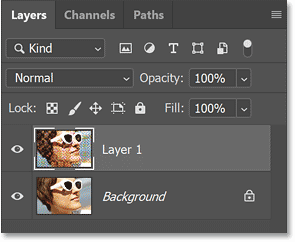
And in the Layers panel , the halftone effect appears on its own layer above the original image on the Background layer.
That's a tip for creating a better halftone pattern effect using Photoshop's Color Halftone filter.
Related Articles
 minutes read
 How to Create a Monochrome Color Effect in Photoshop7 minutes read
 How to Use Photoshop CS5 - Part 14: Create Motion Effects6 minutes read
 How to Create Whirlpool Effect on Photoshop: Photoshop Effects4 minutes read
 How to Create a 7-color Text Effect in Photoshop3 minutes read
 Learn How to Create a Fade Effect With Photoshop CS610 minutes read
Reader Comments 0
Sign in with email or Google to join the discussion.