Table of Contents
Let's learn how to transform your photos into halftone dot patterns in Photoshop with this step-by-step guide, including how to create black and white halftone patterns and add color!
Note : This guide is for Photoshop 2024 or earlier versions.
Step 1: Convert the image to black and white.
First, you need to convert the image from color to black and white.
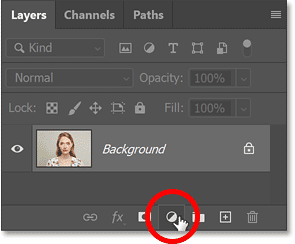
In the Layers panel , click the New Fill or Adjustment Layer icon at the bottom.
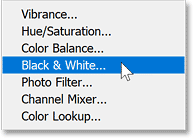
Next, select Black and White from the list.
A Black and White adjustment layer is added on top of the image on the Background layer.
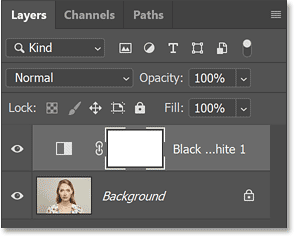
Photoshop's Layers panel displays the newly adjusted layer.
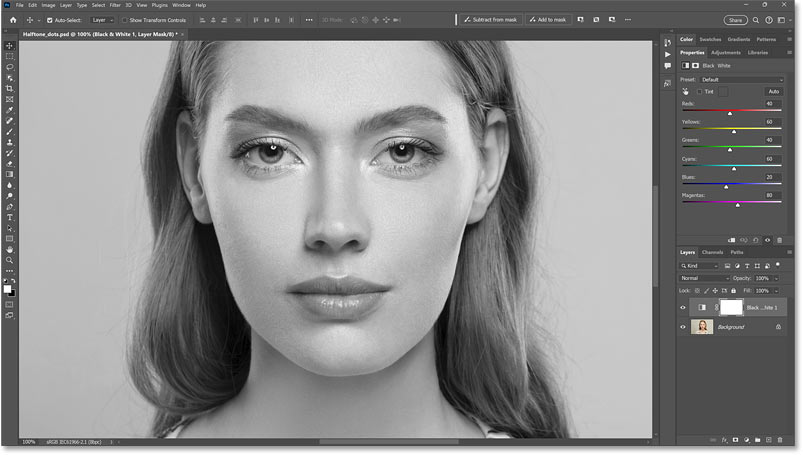
And the image was instantly converted to black and white.
Step 2: Increase the image contrast.
The halftone effect works best on high-contrast images. Therefore, we will use the Levels adjustment layer to increase the contrast of the black and white image.
Still in the Layers panel, click the New Fill or Adjustment Layer icon again .
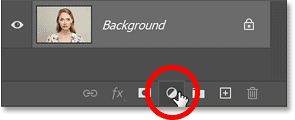
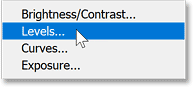
This time, select Levels from the list.
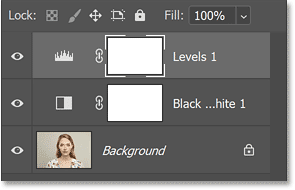
A Levels adjustment layer is added above the Black and White adjustment layer.
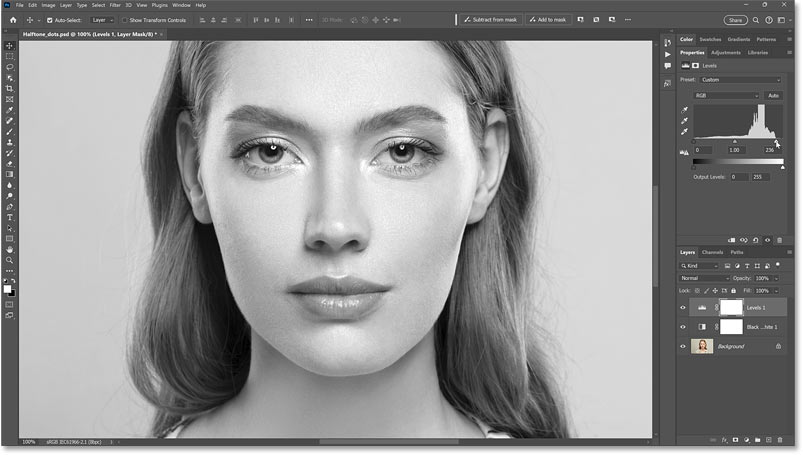
Next, in the Properties panel , use the black (left) and white (right) sliders below the histogram to increase the contrast.
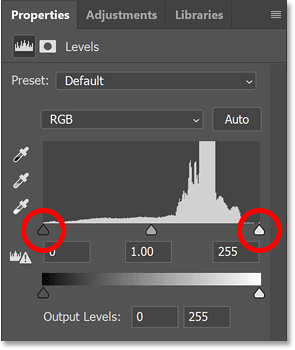
Ideally, the black point slider should be moved to the starting left side of the chart and the white point slider should be moved to the starting right side of the chart. This ensures you have true black areas in the dark areas and true white areas in the bright areas.
Not all images require moving both sliders. In the example image, the histogram has expanded completely to the left, so there's no need to adjust the black points. However, there are still some areas that can be brightened by dragging the white point slider slightly to the left.
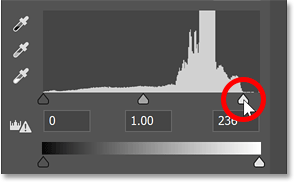
And now the contrast looks better.
Step 3: Add a new layer that is 50% gray filled.
Next, we'll add a new layer to use for the halftone effect.
Click the Add New Layer icon at the bottom of the Layers panel.
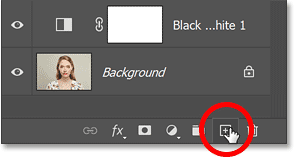
A new empty layer is added above the Levels adjustment layer.
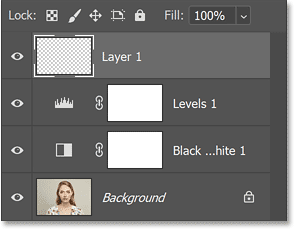
You need to fill this new layer with 50% gray.
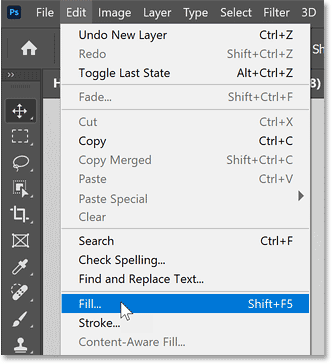
So, with the layer selected, go to the Edit menu in the Menu bar and select Fill.
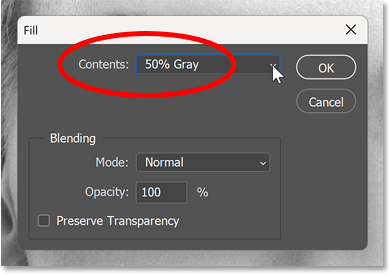
In the Fill dialog box , set Contents to 50% Gray and click OK.
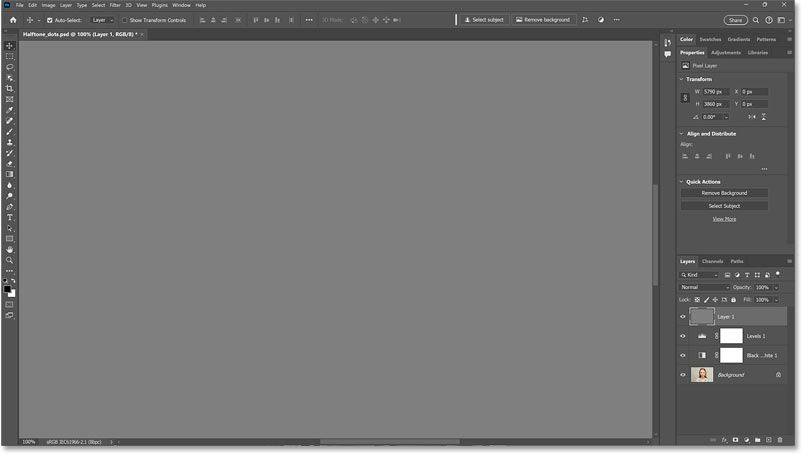
The image is temporarily hidden by a gray layer.
Step 4: Convert the layer into a smart object
The biggest challenge when creating halftone patterns is knowing how big the dots need to be. But you can create space to experiment by first converting the layer into a smart object.
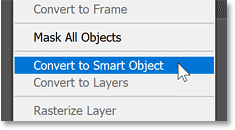
In the Layers panel, right-click on the layer.
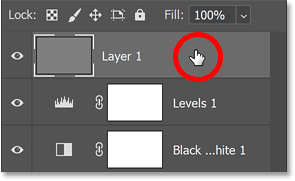
Then select Convert to Smart Object from the menu.
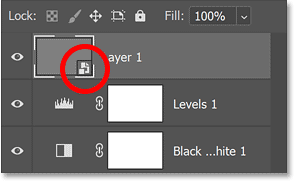
A smart object icon appears in the bottom right corner of the layer thumbnail.
Step 5: Reset the Foreground and Background colors.
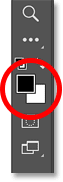
Before continuing, press the letter D on your keyboard to reset Photoshop's Foreground and Background colors to their defaults.
This action sets the Foreground color to black and the Background color to white. We will need these colors for the filters in the next step.
The current foreground and background colors are shown in the thumbnail near the bottom of the toolbar. Right-click on the layer in the Layers panel.
Step 6: Open Photoshop's Filter Gallery
To create a halftone effect, you need two filters from Photoshop's Filter Gallery.
So, go to the Filter menu and select Filter Gallery .
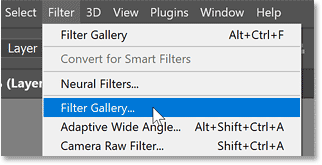
The Filter Gallery includes a large preview area on the left and two columns on the right. The first column is where we select the filter, and the second column is where we adjust the filter settings.
The filters are divided into groups, with the Artistic group open by default. Each filter in the group is displayed as a thumbnail.
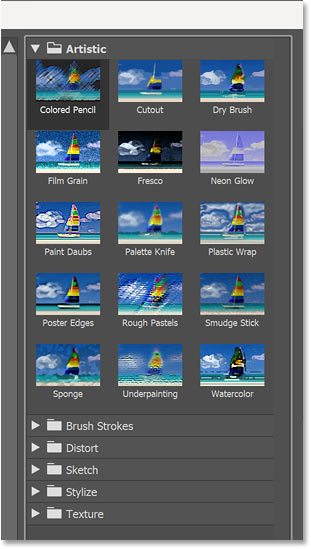
Step 7: Use the Halftone Pattern filter to add the dots.
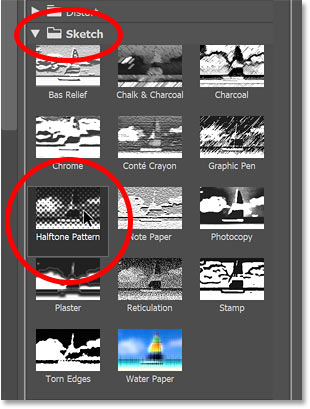
Open the Sketch group. Then, click the Halftone Pattern filter to select it.
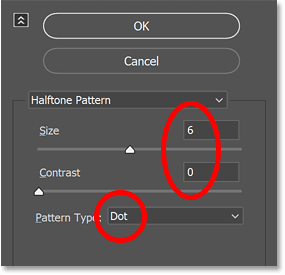
The filter options appear in the upper right corner. Make sure that Pattern Type is set to Dot and Contrast is set to 0 .
Next, use the Size slider to set the initial size for the dots. For example, we'll set our size to 6.
Since we can't see the image in the preview area, we don't know what this size will look like until we apply the filter. But that's okay because we can go back and resize it if needed.
Step 8: Use the Torn Edges filter to roughen the dots.
Note in the preview that our dots are actually just blurry squares. So, we'll use the Torn Edges filter to roughen them and make them look rounder.
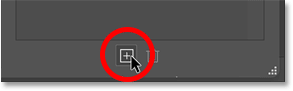
In the bottom right corner of the Filter Gallery, click the plus icon to add a new filter above the Halftone Pattern filter.
Then, still in the Sketch group, select the Torn Edges filter .
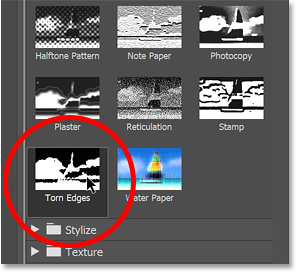
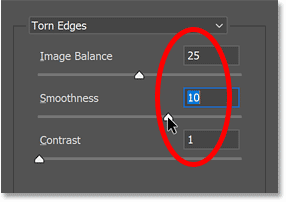
In the options, leave Image Balance at default (25) and reduce Contrast to 1.
Next, drag the Smoothness slider to the point where the blurry squares begin to look more rounded. The setting you need will depend on the dot size you selected in the Halftone Pattern filter.
Since the dot size in the example is set to 6, a Smoothness value of 10 would be appropriate. But just like with the Size value , you can always go back and change the Smoothness value if needed.
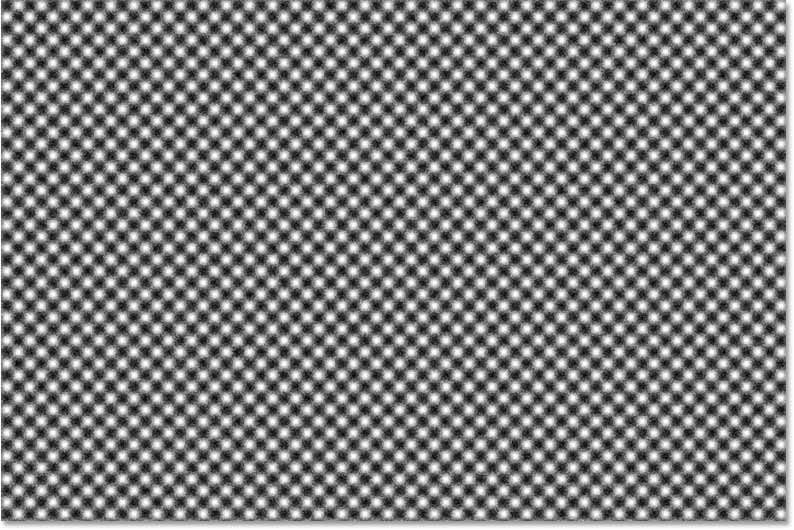
The dots will now look like this.
Step 9: Apply filters
Click OK to close the Filter Gallery and apply the two filters to the image.
The document is filled with halftone dots. We will blend the dots with the next image.
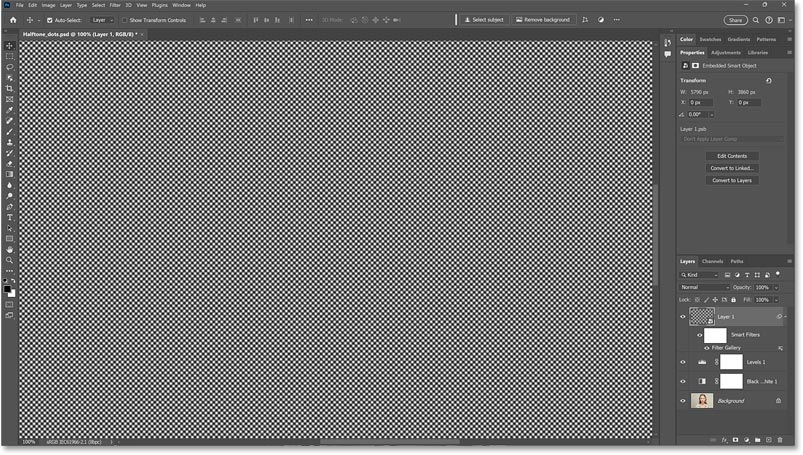
In the Layers panel , notice that Filter Gallery has been applied to the layer as a smart filter. This is because we converted the layer to a smart object before applying the filter.
The advantage of smart filters is that you can go back and adjust the settings. We'll do that right now.
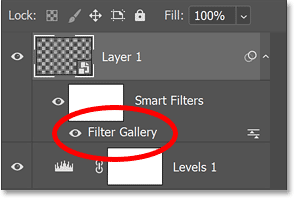
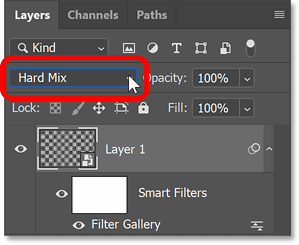
Step 10: Change the blend mode to Hard Mix
To blend the dots with the image, change the layer's blend mode from Normal to Hard Mix.
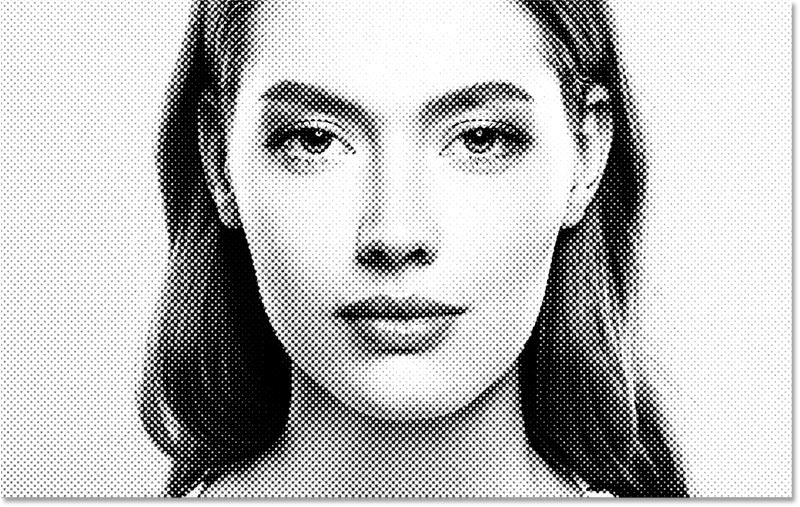
The black and white image is displayed through halftone dots, but the effect is too strong.
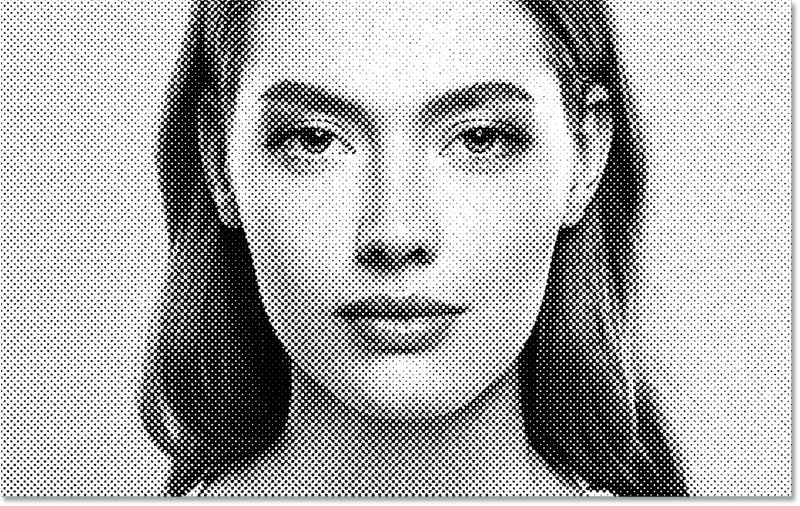
Step 11: Reduce the Fill value
To reduce the effect, decrease the Fill value of the layer.
Hard Mix is one of the eight blend modes in Photoshop that works differently when we reduce the Fill value relative to the Opacity value .
Therefore, reduce the Fill value (not Opacity) until you are satisfied with the result. For example, reduce it to 70%.
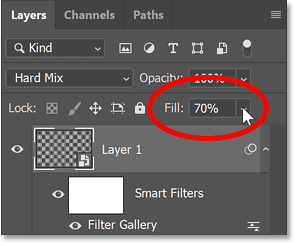
This technique blurs the dots in the bright areas and pushes the effect further into the dark areas, closely resembling a real halftone pattern.
Step 12: Adjust the dot size
If you're not satisfied with the size of the dots, you can easily change them.
In the Layers panel , double-click the word Filter Gallery to reopen it.
Right-click on the layer in the Layers panel.
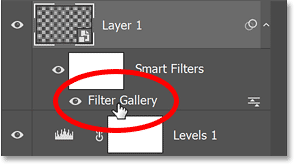
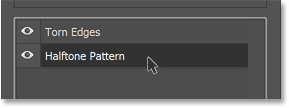
In the right-hand column of the Filter Gallery, the two filters we added are displayed stacked on top of each other, similar to how layers are arranged in the Layers panel .
Select the Halftone Pattern filter .
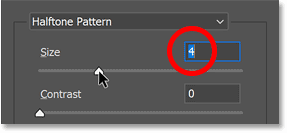
Then drag the Size slider to select a different size. For example, you can make the dots smaller by lowering the size from 6 to 4.
Again, the value you need will depend heavily on the size of your image.
After changing the dot size, you may also need to adjust the Smoothness value . So, select the Torn Edges filter again.
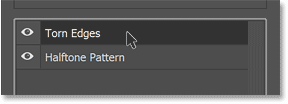
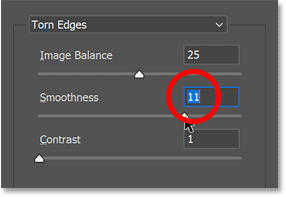
Since the dot size has been reduced, you will have to compensate by increasing Smoothness from 10 to 11.
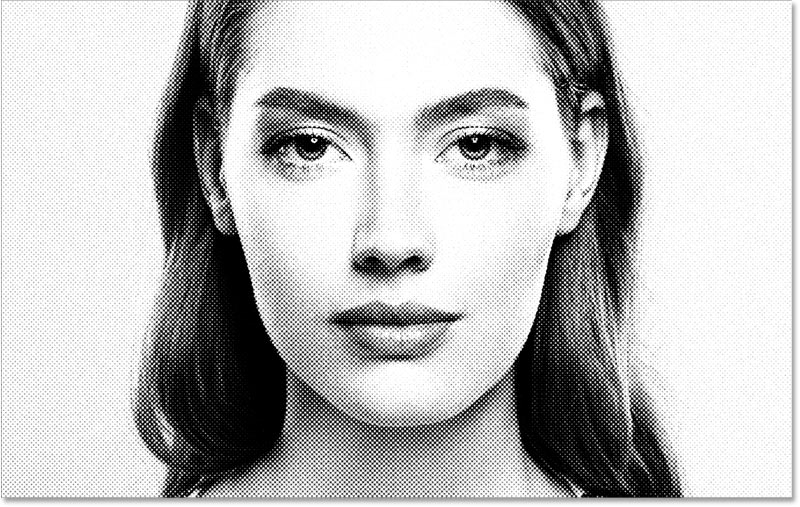
Click OK to close the Filter Gallery. The halftone texture is updated with the new settings, and the small dots look better.
At this point, we've created a black and white halftone pattern effect, and you can stop here.
But if you want to add color to the effect, follow the next steps.
Step 13: Add a Solid Color adjustment layer.
To add color to the halftone pattern, we will use the Solid Color adjustment layer.
Make sure the halftone pattern layer (the top layer) is active in the Layers panel.
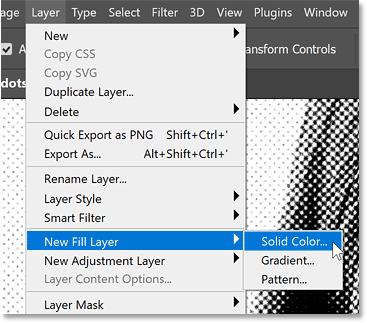
Next, go to the Layers menu in the Menu Bar, select New Fill Layer, and then Solid Color.
Step 14: Set the blend mode to Color
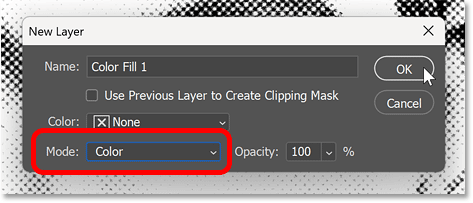
In the New Layer dialog box , change the Blend Mode from Normal to Color. Then click OK.
Step 15: Choose a color from the Color Picker
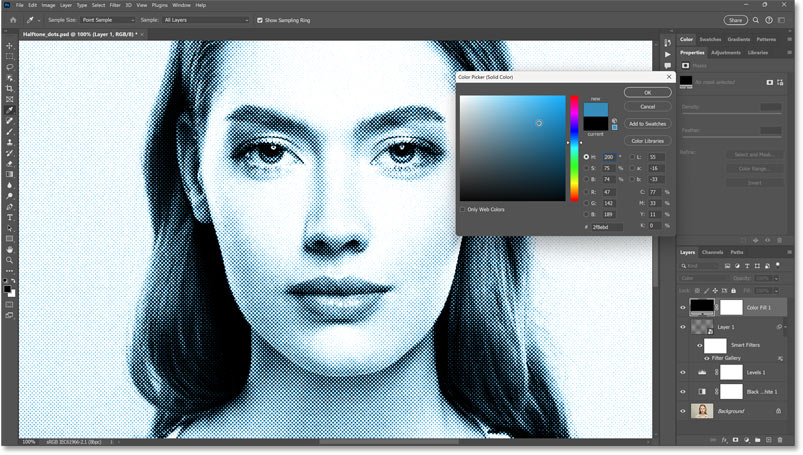
Choose a color from Photoshop's Color Picker.
Since we set the blend mode to Color in the previous step, you'll see a live preview of how the color will look with the effect.
Click OK to close the Color Picker when you're finished.
Step 16: Try blend mode Screen
To get a different look for the color effect, try changing the blend mode of the fill layer from Color to Screen.
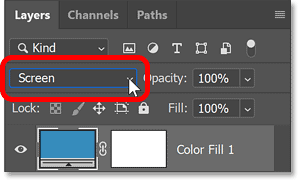
Blend mode Screen uses color to brighten images and create a lower contrast effect, especially if you select a light color in the Color Picker.
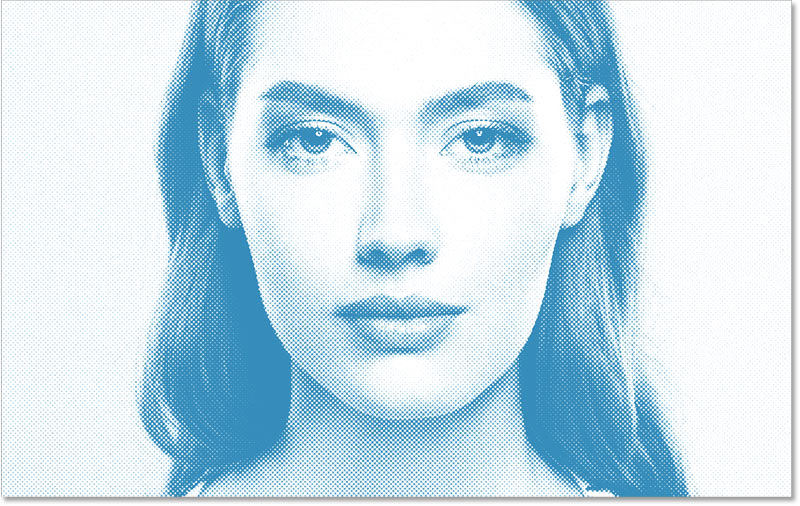
If the color is too bright and the effect looks too pale or flat, double-click the fill layer's color swatch in the Layers panel.
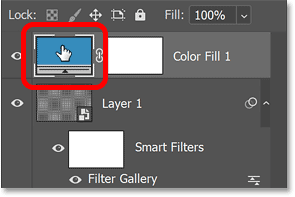
Next, select the darker version in the Color Picker.
Or choose a completely different color, as is being done here in this example.
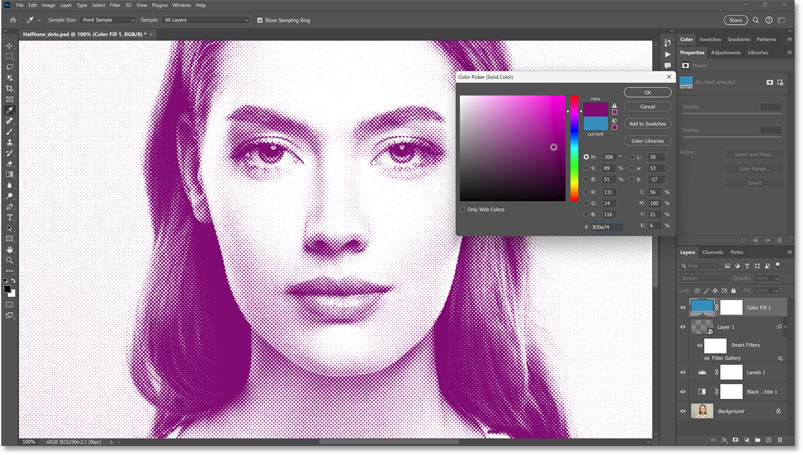
Click OK when you're finished to close the Color Picker.
And this is the final result.
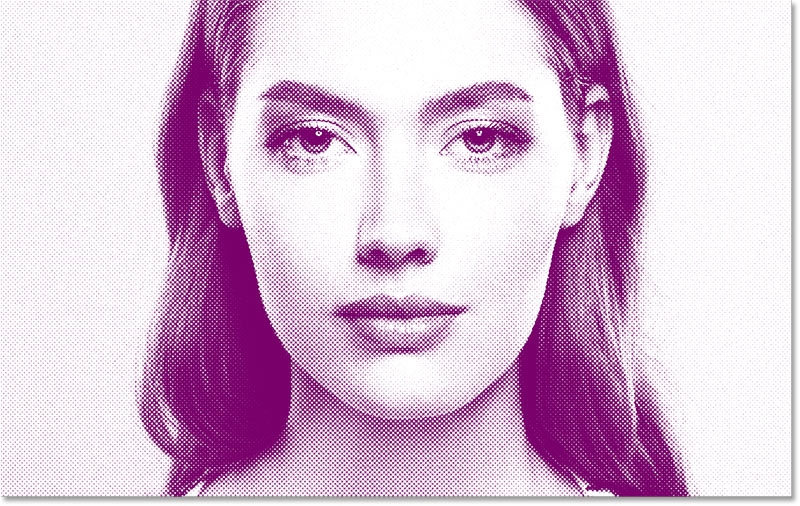
And that's it! That's an easy way to create a halftone dot pattern effect in Photoshop.






Reader Comments 0
Sign in with email or Google to join the discussion.