How to convert virtual machines from VMware to VirtualBox and vice versa
Virtual machines are useful in many ways. You can use them to try out new operating systems, test experimental software, run old applications, etc. Two of the most popular virtual machine software are VMware and VirtualBox. Each has its own pros and cons, but the best thing is that you can easily convert VMware to VirtualBox and vice versa. You will never have to recreate the same virtual machine in another software.
Migrate from VMware to VirtualBox
The author regularly uses VMware Workstation Player to create a virtual machine for his Windows 10 PC, so that's what will be used to illustrate this. Even if you are using VMware Workstation Pro, the process is the same.
Before starting the migration process, ensure that the virtual machine you want to export is completely powered off and not in a 'suspended' state. This applies to both VMware and VirtualBox. You will have to convert your VMware virtual machine file (.vmx) to a '.ovf' file. OVF is an open standard for packaging and distributing virtual machines, supported by both VirtualBox and VMware.
Export your desired VMware virtual machine file to an .ovf file by opening the VMware folder and the OVFTool folder. Press Shift + right click , then click Open PowerShell window here .

Use the command below and press Enter in the PowerShell window. Change the path of the .vmx file you want to export and the destination for the new .ovf file, based on the corresponding paths in your system.
ovftool "F:Setupskali-linux-2023.2-vmware-amd64kali-linux-2023.2-vmware-amd64.vmwarevmkali-linux-2023.2-vmware-amd64.vmx" f:ExportedKaliLinux.ovfAs soon as you execute the command, the system will start writing OVF packets to the marked destination. Depending on the size of the VM, it may take several minutes to complete.

Note : If you are using the paid version (i.e. VMware Workstation Pro), you can also export the VM as an OVF file by navigating to File and selecting Export to OVF . Just enter the name and path for the OVF file and you're done.
Now that you have successfully exported the OVF package to the desired location, launch VirtualBox and click Import or File -> Import Appliance .
In the Import Virtual Appliance window , click the browse button, select the exported OVF file and click Next .
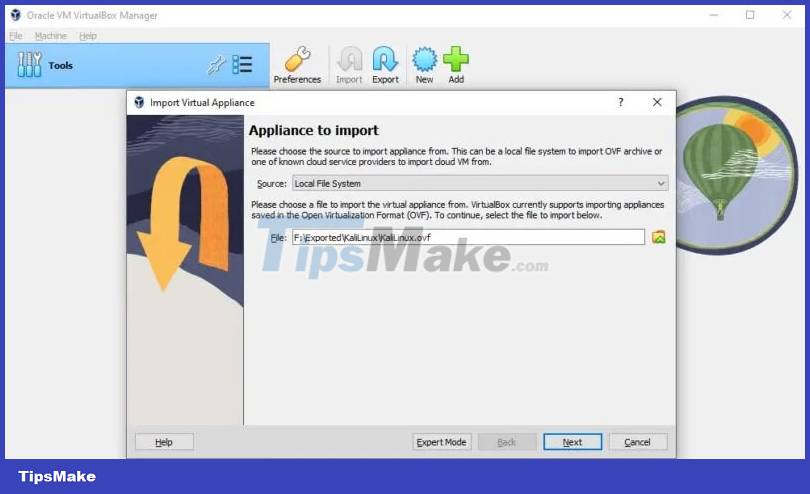
The next screen displays Appliance settings . VirtualBox will show you all the VM settings. Leave it as it is; you can always change them later. Click Finish to continue.
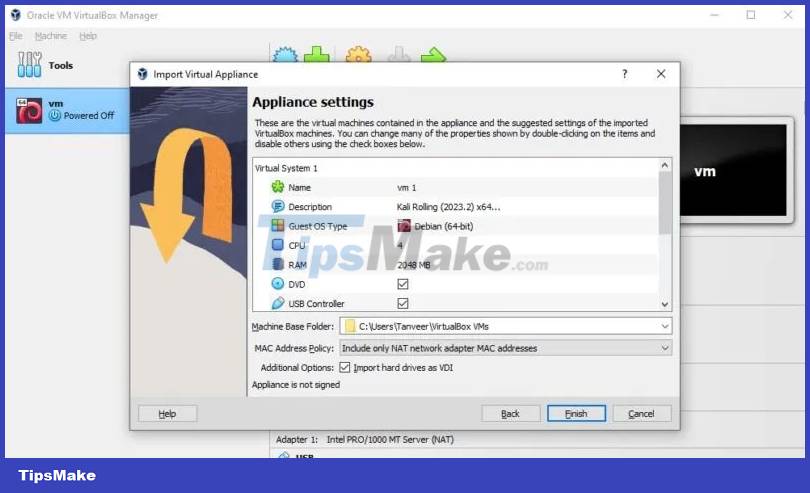
The import process will take some time to complete. Once the import is complete, your imported virtual machine will be in VM VirtualBox Manager. Select the VM and click Start to power on the VM.
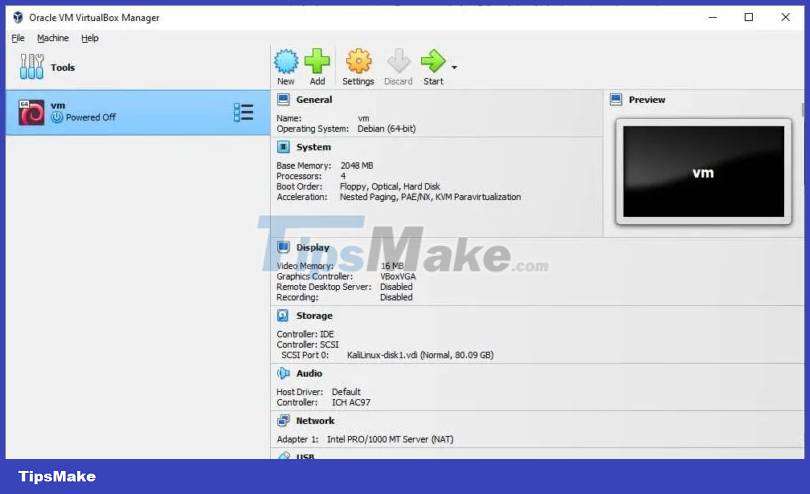
You have successfully converted your VM from VMware to VirtualBox.
Fix import errors in VirtualBox
If you get an error while importing, follow the steps below.
1. Open the exported OVF file in Notepad, find all instances of 'ElementName' and replace it with 'Cap t ion'.
2. Find the version 'vmware.sata.ahci' and replace it with 'AHCI'.
3. Find the SHA1 hash value of the exported OVF file using this online tool and replace the old hash value with the new hash value found in the exported file. You can open it with any text editor.
Once you've made your changes, try importing again. This will resolve the import errors. If not, you should probably restart the VMware to VirtualBox conversion process above.
Migrate from VirtualBox to VMware
Whether you want to install macOS in VirtualBox or run Windows in VirtualBox on your Linux machine, this easy-to-use software will make everything extremely seamless. Additionally, migrating from VirtualBox to VMware is easier than converting VMware to VirtualBox. You don't need a PowerShell window. Launch VirtualBox and click File -> Export Appliance .
In the Export Virtual Appliance wizard , select the VM you want to export and click Next to continue.

Select the destination path for the exported VM, leaving everything else unchanged. Click Next to continue.
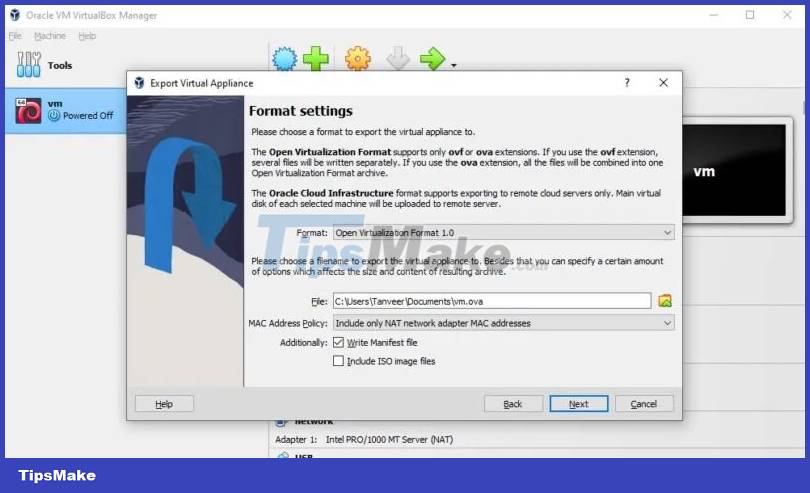
Check all the settings on the next screen and click Next to start the export process.
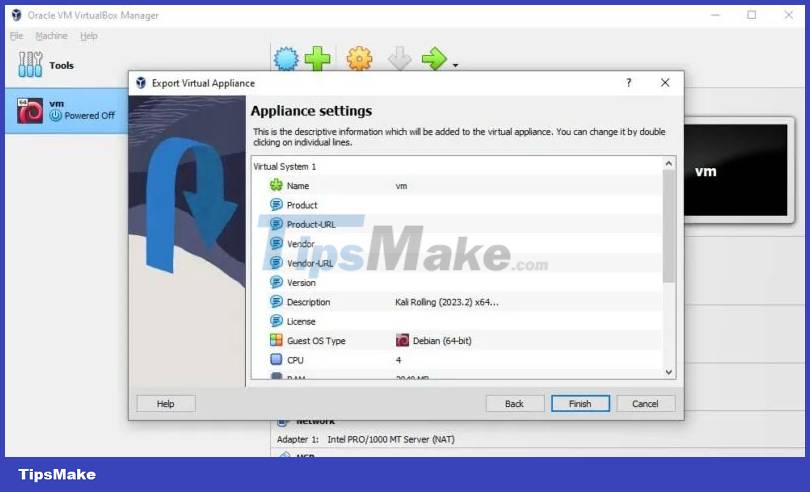
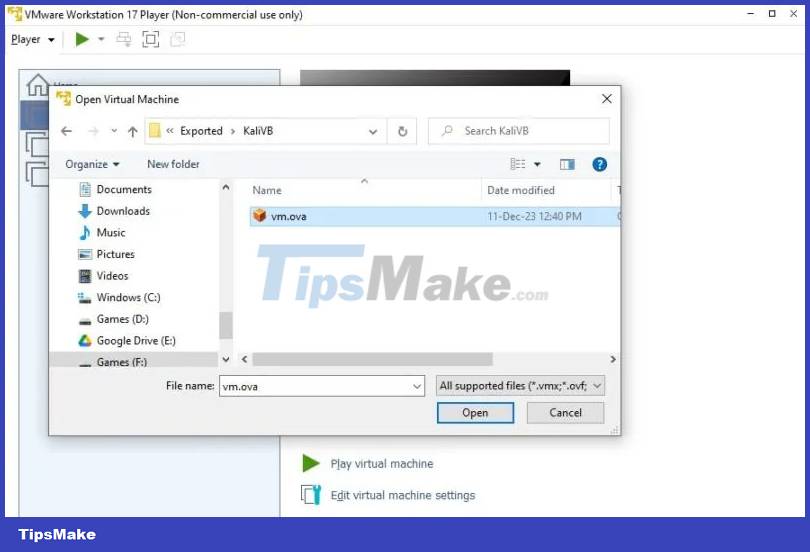
Depending on the size of the VM, the export may take some time. Once you have finished exporting the VM, you can import it into VMware. To do that, open VMware Workstation Player and click File -> Open . Select the OVA file you exported from VirtualBox.
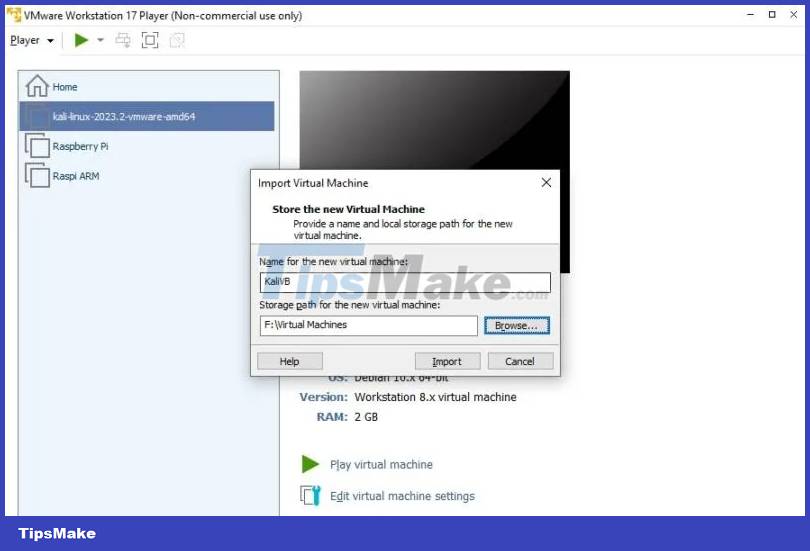
Give the VM a name and path and click Import to start the process. This process may also take some time, depending on the size of the VM.
If you receive an error indicating the import failed due to hardware compliance issues, click Retry to start the import.
Note : If the above does not resolve the issue, you must create a new virtual machine from scratch.
Once the import is complete, turn on the VM by clicking Play virtual machine .
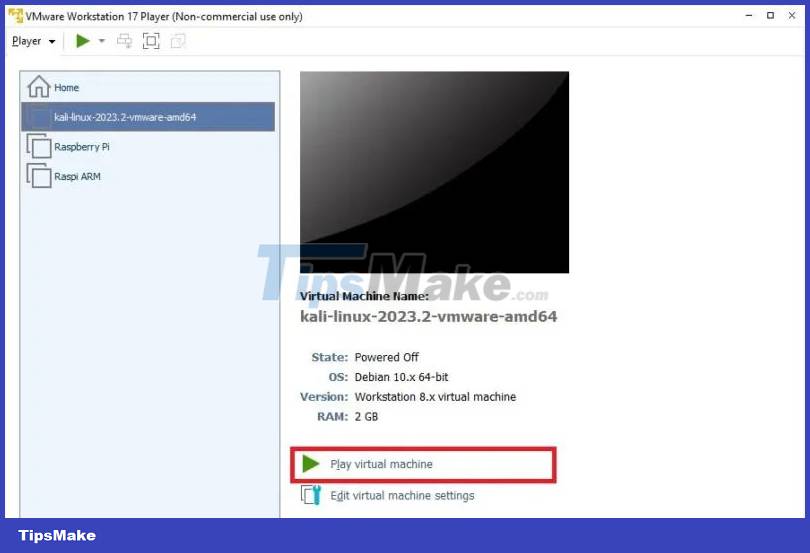
You have successfully imported or migrated your virtual machine from VirtualBox to VMware.
Both VMware and VirtualBox are great virtualization tools for Windows users. Depending on your preferences, you can use either to try out different operating systems or run dangerous software. You can easily export your favorite virtual machines – convert VMware to VirtualBox or vice versa. Instead, if you favor Linux, you can import and export OVA files in VirtualBox on your Linux PC.