How to convert black and white images into color images in Photoshop
One of the favorite photography or photo effects is to turn color images into black and white. However, for those who regularly do photo restoration work, it is certainly impossible to ignore the turning black and white photos into color images, restoring the skin color, hair color, .
There are also some websites that turn color images into black and white like AI Colorize Photos, but most will choose photo editing software like Photoshop to restore old photos. The following article will guide you how to restore old photos, convert black and white to color images in Photoshop.
- Create light effects and shadows in Photoshop
- 3 tips to improve low-resolution image quality
- 10 Photoshop beginner skills need to know
Instructions for restoring old photos on Photoshop
- 1. Restore the skin color of the image
- 2. Restore the subject's lip color
- 3. Restoring eye color for subjects in Photoshop
- 4. Restoring eyebrows to the subject
- 4. Restoring the color of clothes in photos
- 6. Restoring the hair color for the subject
1. Restore the skin color of the image
Step 1:
Open images to convert from black and white to color images in Photoshop. Next, click on the original image layer and then click on the Pen tool in the toolbar to the left of the interface.
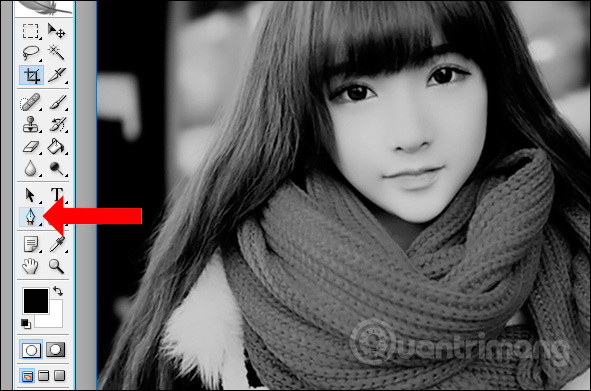
Next we will use the pen to enclose the skin of the subject in the picture.
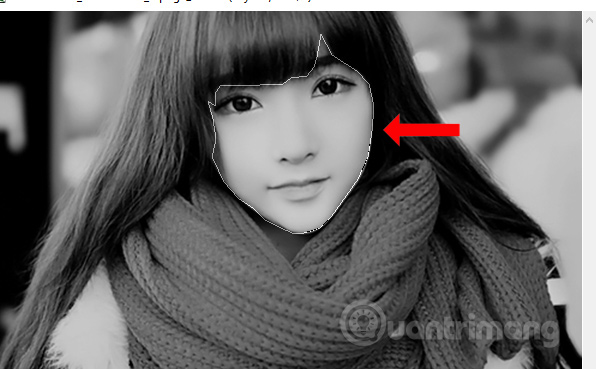
Step 2:
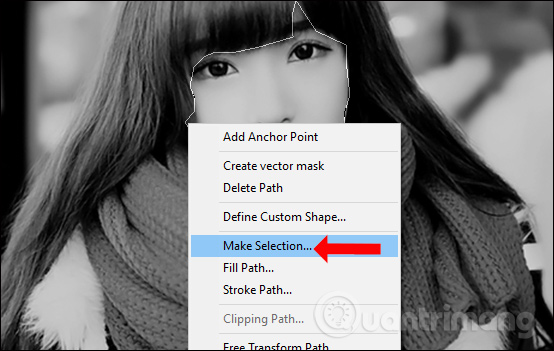
Right-click on the boundary and choose Make Selection .
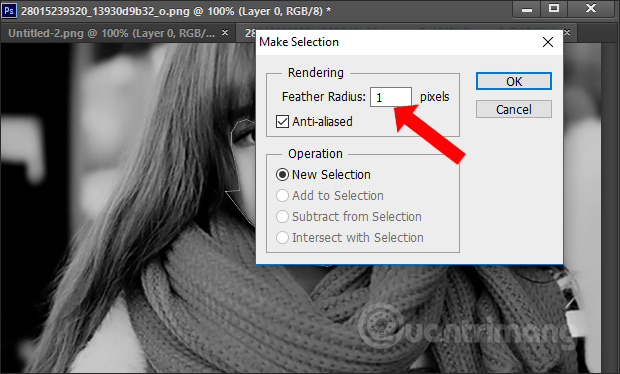
Display the new interface panel, press 1 in pixels and click OK to select a skinned area.
Step 3:
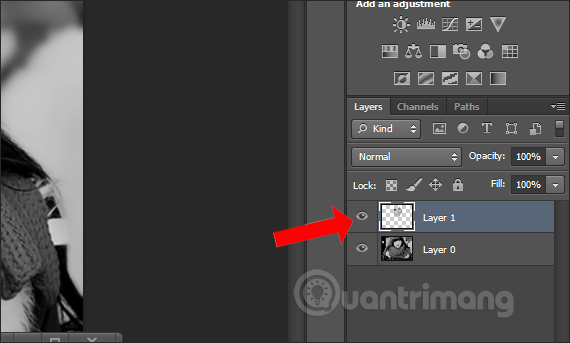
Press Ctrl + C again and press Ctrl + V to add new layer to the skin layer.
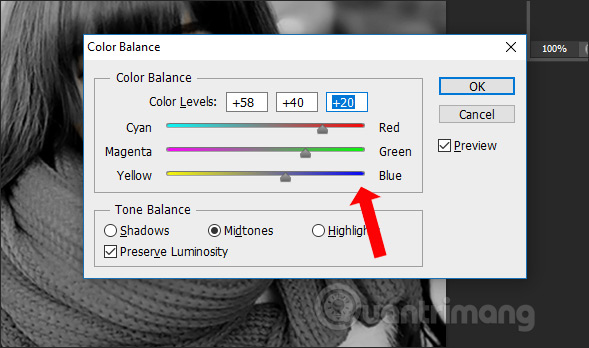
Press Ctrl + B again to display the color panel. Here the user will adjust the color at the 3 bars in the interface to choose the most suitable color for the skin color of the subject. When finished click OK to save the new skin color.
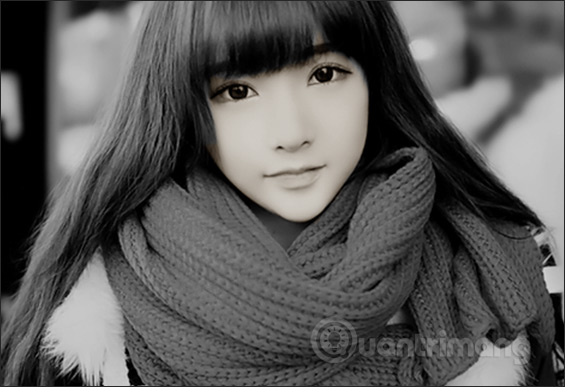
The result we will be skin color after recovery as shown below.
2. Restore the subject's lip color
Step 1:
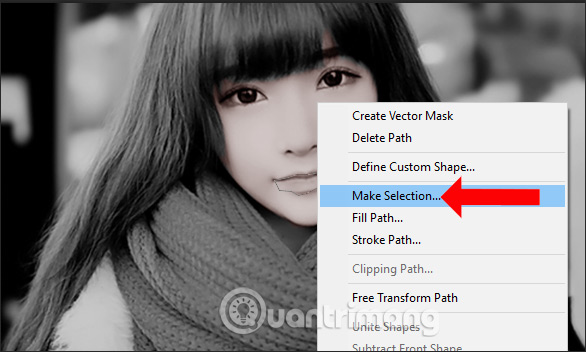
At the layer for the skin color, click on the Pen tool to create an area for the lips. Because the lip area is in the face area, you'll still select the skin color layer.
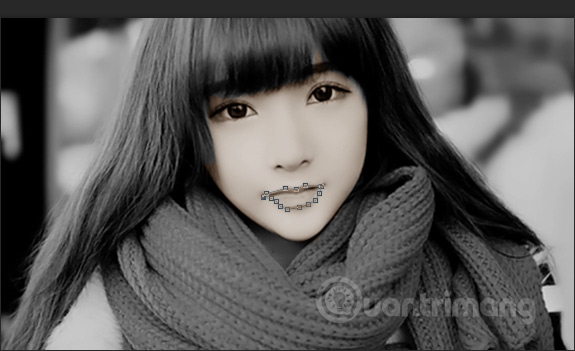
Right-click on the lip area and then select Make Selection to select the current area.
Step 2:
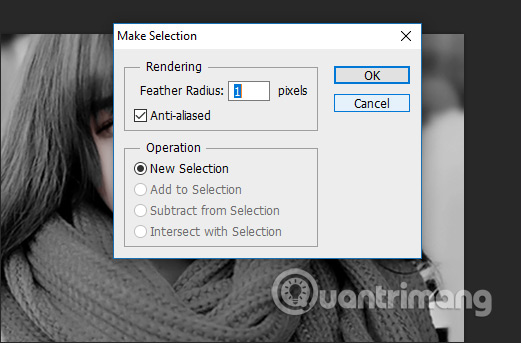
Display the new dialog box, press 1 to select a zoned area.
Step 3:
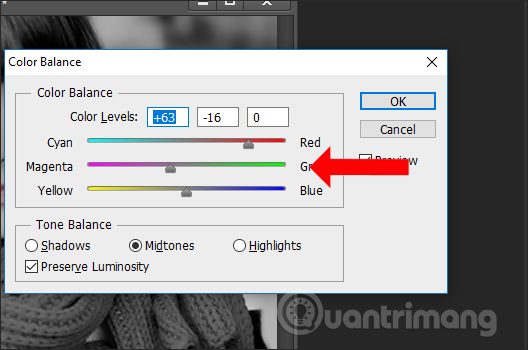
Press Ctrl + C key then Ctrl + V to add layer to lip layer. Next press Ctrl + B to adjust the lip color in 3 sliders in the Color Balance window. You should adjust the lip color to match the restored skin color.
The lip area has been restored to color as shown below.
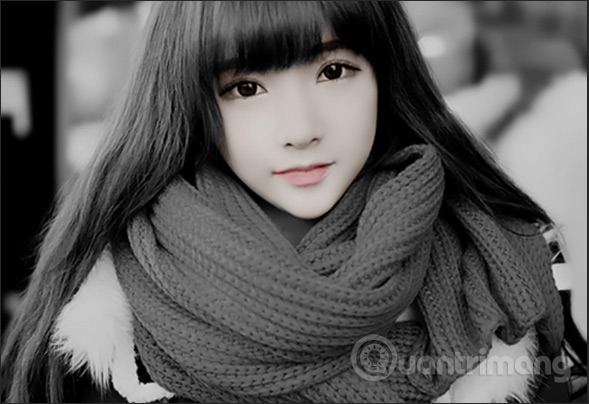
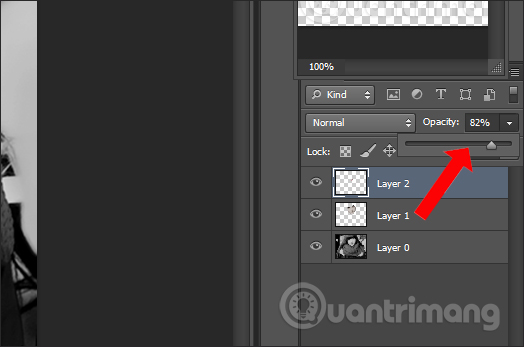
In case you find the lip color is not natural, you can click on the lip layer and reduce the Opacity to the appropriate level.
3. Restoring eye color for subjects in Photoshop
Step 1:
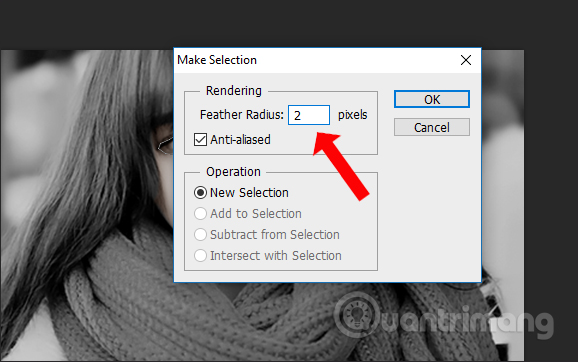
Click again on the first original subject layer and then click on the Pen tool to surround the two eye areas of the character in the image. Then right-click on the highlighted area and select Make Selection. Display dialog box interface, press 2 to select 2 eye areas.
Step 2:
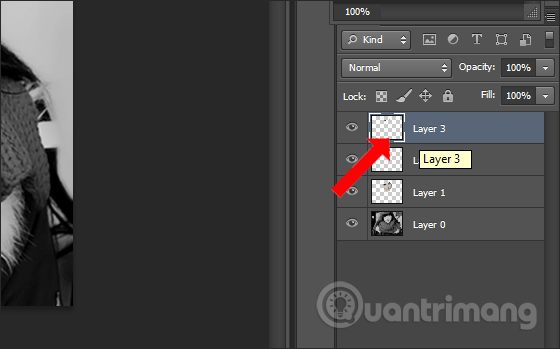
Press Ctrl + C and Ctrl + V to add layers to the eye area. Continue dragging the new eye area layer on top of the layers.
Step 3:
Users will press Ctrl + Shift + L to adjust the eye color for the character. You can combine the opacity adjustment for the eye area. As a result we will get eye color after recovery as below.

4. Restoring eyebrows to the subject
Step 1:
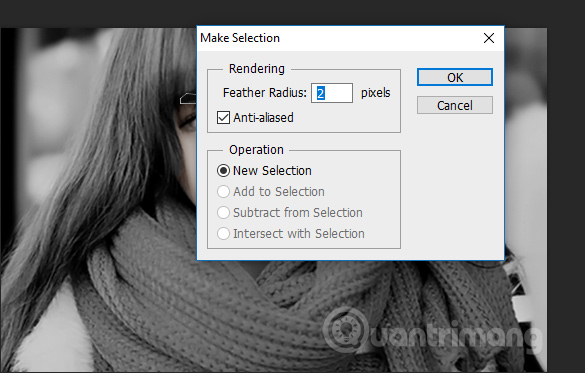
Click again on the original layer and then click on the Pen tool to draw around the two eyebrows of the subject. Right-click and select Make Selection . In the Make Selection window, click 2 and click OK to select the area.
Step 2:
Press Ctrl + C then Ctrl + V to duplicate the eyebrow area layer. Then drag this new layer to the top of the existing layers . Then press Ctrl + B to adjust the color for the eyebrow area.
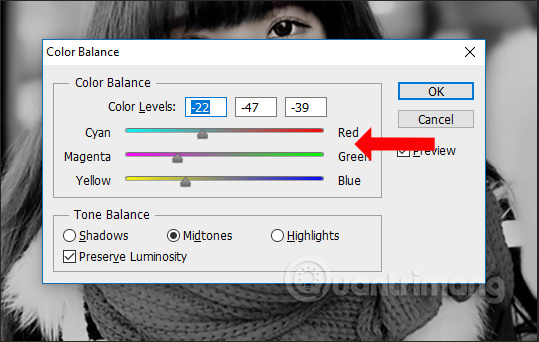
We can also use Opacity to adjust the color for the eyebrow area.
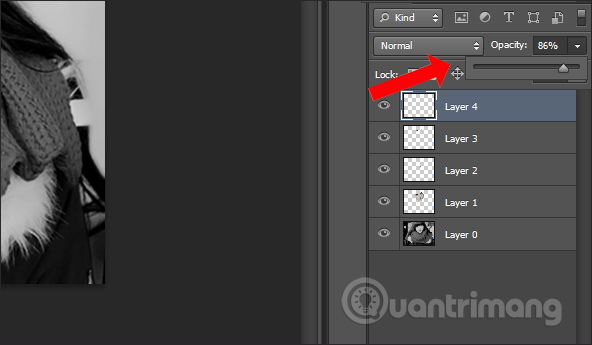
4. Restoring the color of clothes in photos
Step 1:
Click again on the original subject layer and click on the Pen tool to surround the clothing area. Right-click and select Make Selection and press 1 to select the highlighted area. With the clothes area if there are many different, separate areas, you need to proceed to delineate each part, adjust colors in turn.
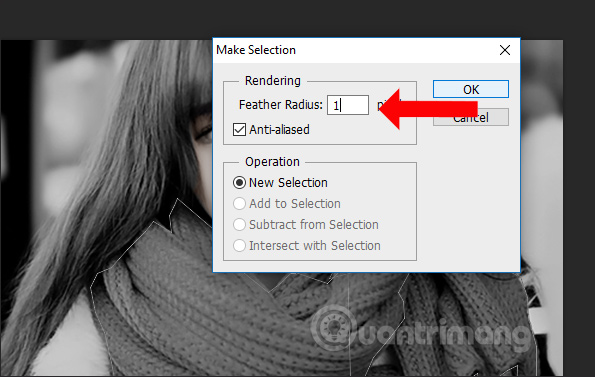
Step 2:
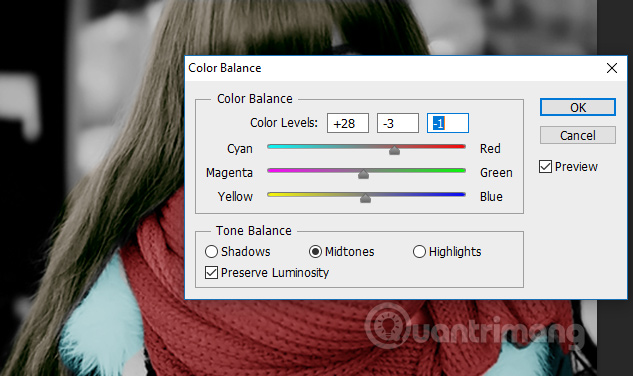
Users press Ctrl + C key and Ctrl + V to add layer to the clothes area. Continue pressing Ctrl + B and drag 3 sliders in the Color Balance box to select the color you like and click OK.
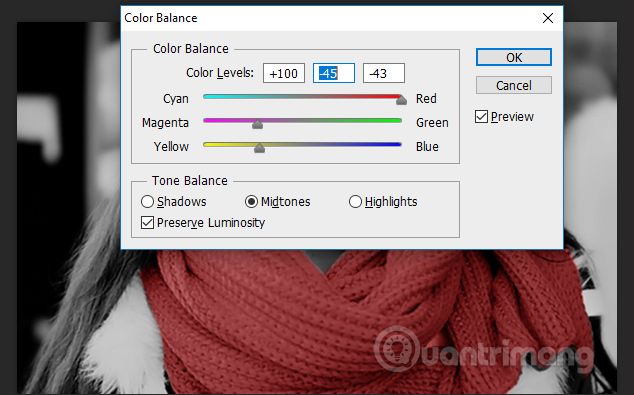
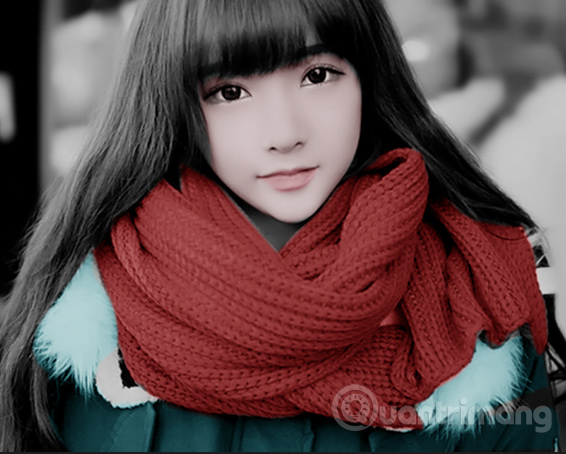
Continue to circle the rest of the clothes and also proceed to adjust the colors as above. The result we will get is the color of a clothing area as below.
6. Restoring the hair color for the subject
Step 1:
Click again on the original subject image layer and press the Pen Tool and draw around the character's hair. Right-click and select Make Selection. In the new table part parameters pixels we can leave 1 or 2. Click OK to continue.
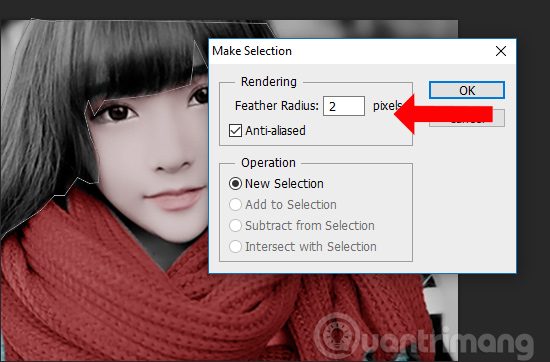
Step 2:
Press Ctrl + C and Ctrl + V to create new hair layer. Then press Ctrl + B to open the color correction dialog box. Adjust the hair color to match the overall picture.
The final image after being restored in full color will look like the following. If you are skilled, the image will look much more beautiful and natural.
In the process of selecting the area with the Pen tool you need to pre-calculate the zoning direction to be able to surround the entire selection without missing any area. If you want to get used to it, you should choose a photo that doesn't have much detail on your hair or clothes to master it with every step of the way.

Restoring old photos, changing images from black and white to colors takes many steps because we will restore each part of the image. Each selected area should create a new layer to change the color, without damaging the color of the previously changed image area.
See more:
- The best free Photoshop replacement software
- 30 tools to support online photo editing without using Photoshop
- 15 best photo editing apps for Android
I wish you all success!
You should read it
- ★ How to convert a color image to black and white using Photoshop
- ★ How to convert black and white photos to color images with ColouriseSG
- ★ How to use Photoshop CS5 - Part 11: Change colors from black and white photos
- ★ How to convert color photos to black and white online
- ★ Make artistic black and white photos with PhotoScape