How to build beautiful Next.js forms using React Hooks and Material UI
You want to build a beautiful Next.JS form . Then let's try doing it with React Hook Form and Material UI.
Material UI (MUI) is a popular component library that implements Google's Material Design system. It provides a series of pre-built UI elements that you can use to design beautiful, versatile, and intuitive interfaces.

Although designed for React, you can extend its functionality to other frameworks in the React ecosystem, such as Next.js.
Instructions for using React Hook Form and Material UI
React Hook Form is a popular library that provides a simple declarative way to create, manage, and validate forms.
By integrating Material UI elements and styles, you can create beautiful, easy-to-use forms and apply consistent design to your Next.js apps.
To get started, create a local Next.js project. In this example, install the latest version of Next.js:
npx create-next-app@latest next-project --appNext, install these packages in the project:
npm install react-hook-form @mui/material @mui/system @emotion/react @emotion/styledThe following results:

Create and style forms
React Hook Form provides a series of utility functions, including the useForm hook.
This hook neatly streamlines state handling, input validation, and data submission, simplifying basic aspects of form management.
To create a form using this hook, add the following code to the new file: src/components/form.js .
First, add the necessary imports for the MUI and Reack Hook Form packages:
"use client" import React, {useState} from 'react'; import { useForm } from 'react-hook-form'; import { TextField, Button as MuiButton, Alert } from '@mui/material'; import { styled } from '@mui/system';MUI provides a collection of ready-to-use UI elements that you can further customize by passing styling properties.
However, if you want more flexibility and control over the user interface design, you can choose to use a styled approach to design each UI element using CSS properties. In this case, you can style the main elements of the form: the main container, the form itself, and the input text fields.
Right below the imports, add the following code:
const FormContainer = styled('div')({ display: 'flex', flexDirection: 'column', alignItems: 'center', justifyContent: 'center', height: '100vh', }); const StyledForm = styled('form')({ width: '80%', maxWidth: '400px', padding: '20px', borderRadius: '10px', border: '2px solid #1E3A8A', boxShadow: '0px 0px 10px rgba(0, 0, 0, 0.2)', backgroundColor: '#ffffff', textAlign: 'center', }); const StyledTextField = styled(TextField)({ marginBottom: '16px', width: '100%', });Maintain important modular codebase in programming. For this reason, instead of bundling all your code into a single file, you should define and style custom components in each separate file.
This way, you can easily import and use those components across different parts of the application, which makes code organization and maintenance easier.
Now, define the functional component:
export default function Form() { const { register, handleSubmit, formState: { errors } } = useForm(); return ( <> Submit ); }Finally, import this component into the app/page.js file . Delete all prepared Next.js code and update it as follows:
import Form from 'src/components/Form' export default function Home() { return ( ) }Start the programming server and you will see a basic form with two input fields and a submit button in the browser.
Handles form authentication
The form looks nice but it still doesn't do anything. For it to run, you need to add some authentication code. The useForm hook utility functions are useful when managing and validating user inputs.
First, define a state variable to manage the current form state, which depends on whether the user provided the correct credentials or not. Add this code inside the function component:
const [formStatus, setFormStatus] = useState({ success: false, error: '' });Next, create a handler function to authenticate the login information. This function will simulate HTTP API queries that typically occur when app clients interact with the backend authentication API.
const onSubmit = (data) => { if (data.username === 'testuser' && data.password === 'password123') { setFormStatus({ success: true, error: '' }); } else { setFormStatus({ success: false, error: 'Invalid username or password' }); } };Add an onClick event handler to the button element - passing it as a property - to trigger the onSubmit function when the user clicks the submit button.
onClick={handleSubmit(onSubmit)}The value of the formStatus state variable is important because it will determine how you provide feedback to the user. If the user enters the correct authentication information, you can display a success message. If there are other pages in your Next.js application, you can redirect them to another page.
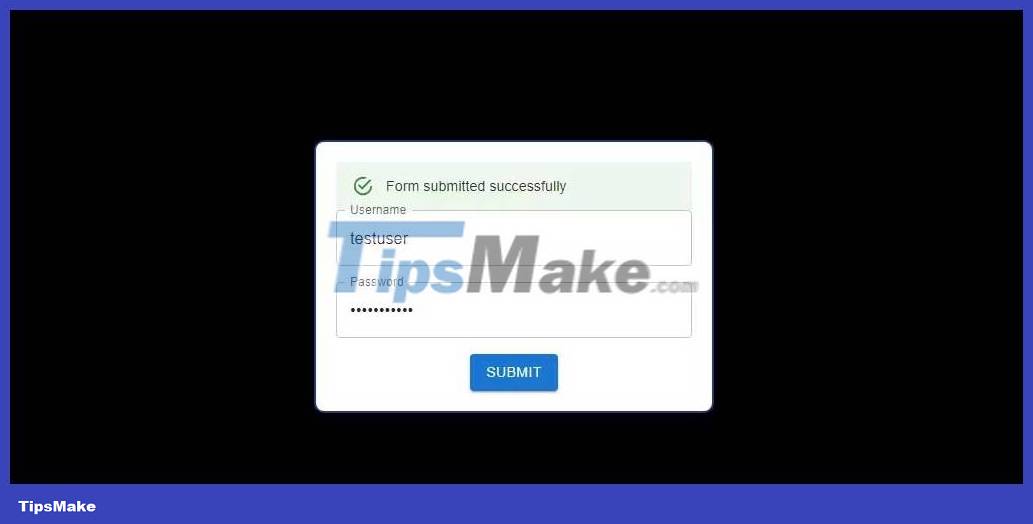
You should also provide appropriate feedback if the credentials are incorrect. Material UI provides a great responsive component that you can use with React's conditional rendering technique to notify the user, based on the value of formStatus .
To do this, add the following code just below the StyleForm opening tag .
{formStatus.success ? ( Form submitted successfully ) : formStatus.error ? ( {formStatus.error} ) : null}Now, to capture and validate user input, you can use the register function to register a form's input field, track its values, and specify validation rules.
This function takes several arguments, including the name of the input field and a validation parameters object. This object specifies validation rules for input fields such as type and minimum length.
Go ahead and include the following code as an attribute in the username, StyledTextField element .
{.register('username', { required: 'Username required', pattern: { value: /^[a-zA-Z0-9_.-]*$/, message: 'Invalid characters used' }, minLength: { value: 6, message: 'Username must be at least 6 characters' }, })}Now, add the following object as a property in the password StyledTextField element .
{.register('password', { required: 'Password required', minLength: { value: 8, message: 'Password must be at least 8 characters' }, })}Add the following code below the username input field to provide visual feedback on the input request.
This code will trigger a warning with an error message to inform the user of the requirements, ensuring they correct any errors before submitting the form.
{errors.username && {errors.username.message}}Finally, include the same code right below the password entry field:
{errors.password && {errors.password.message}}It's done! Good luck!