Table of Contents
This guide provides a clearer, better-organized overview of How and When to Use the Lens Correction Feature in Adobe. It focuses on the essential facts, practical steps, and common questions readers are most likely to have.
But not every image needs lens retouching, so how do you know whether to apply it or not?
This article will tell you what Lens Correction is in Adobe Lightroom, how and when to use this tool.
What Is Lens Correction in Adobe Lightroom?
Different lens types, camera models, and camera settings all contribute to the outcome of a photo. While you should make sure you're shooting with the correct lens, sometimes errors do occur, or you only notice the issue once the image has been uploaded to your PC; That's when Adobe Lightroom comes into the picture.
Lightroom can help correct the most common photography mistakes. When Lens Correction is enabled, Lightroom will detect the camera manufacturer and model used for the photo being edited, and based on what it knows about the lens and camera, it will automatically adjust. But if for some reason it enters the wrong information, you can always change it manually.
How to Change Lens Profiles in Lightroom
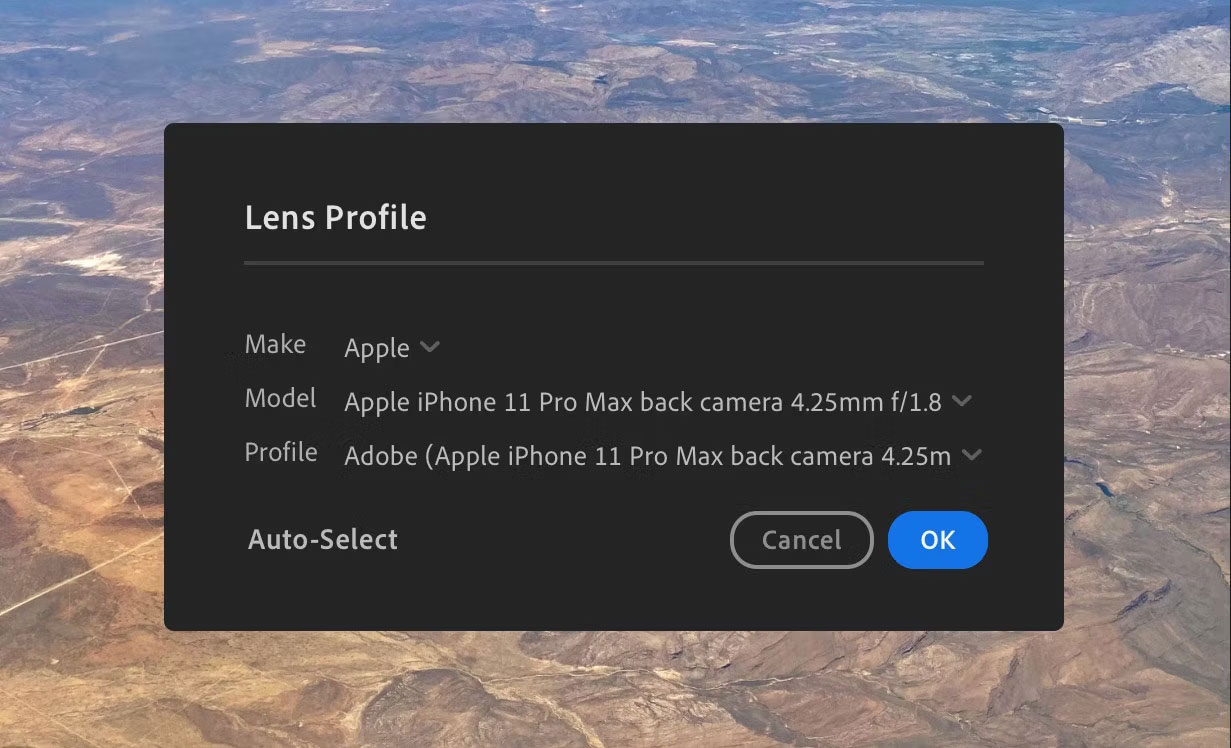
If you need to change the lens configuration, all you have to do is:
- Select Edit In the right sidebar.
- Scroll down to Optics And select the down arrow icon.
- Select the box next to Enable Lens Corrections And additional settings appears directly below.
- Select the camera icon in the upper right corner and the Lens Profile Menu appears in the middle of the screen.
- Select the arrows next to Make , Model And/or Profile , then choose the appropriate items.
How and When to Use the Lens Correction Feature in Lightroom
Adobe Lightroom's Lens Correction tool primarily targets blur and distortion, but it also works with the Remove Chromatic Aberration Tool. You can apply Lens Correction in just a few clicks, but there are additional actions you can take in Lightroom to correct your photography mistakes.
Blurred Edges
Vignetting is a common phenomenon in photography. It occurs when light or saturation is depleted along the edges, overtaking the center. Mild vignetting often goes unnoticed, but sometimes it can be severe enough to require repair. If this issue affects your image (affects tone, quality), you will want to remove it.
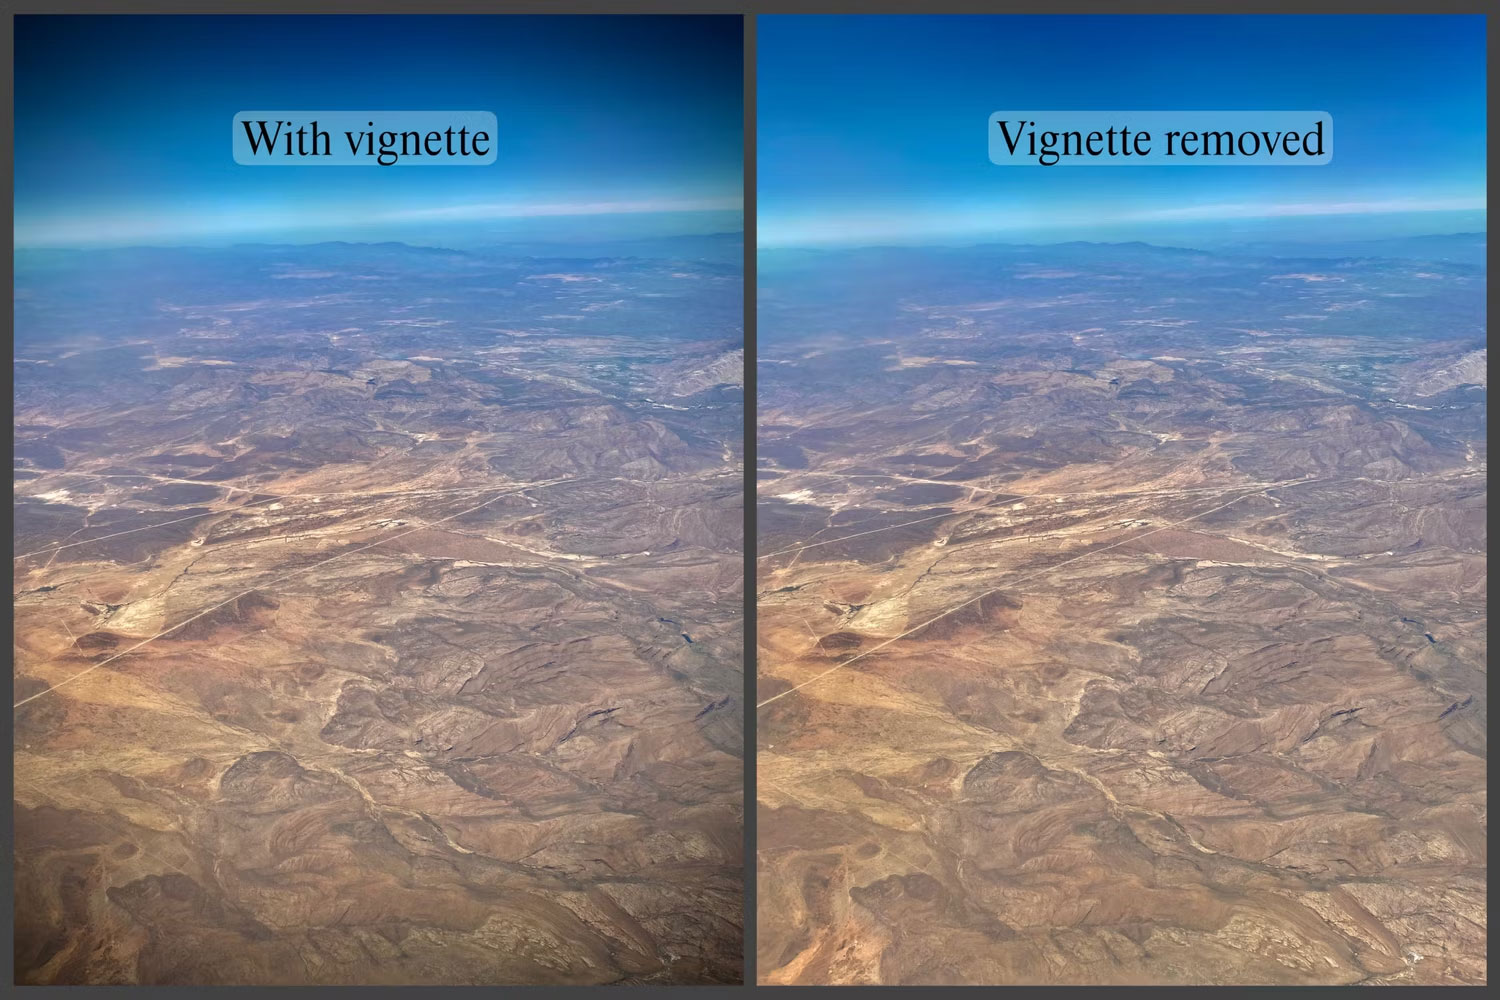
Eliminating vignetting is easy with these simple steps:
- Once the image is open in Adobe Lightroom, select the Edit Icon (looks like three sliders) in the top right corner.
- Scroll down To Optics .
- Once clicked, two boxes appears. select the box labeled Enable Lens Corrections .
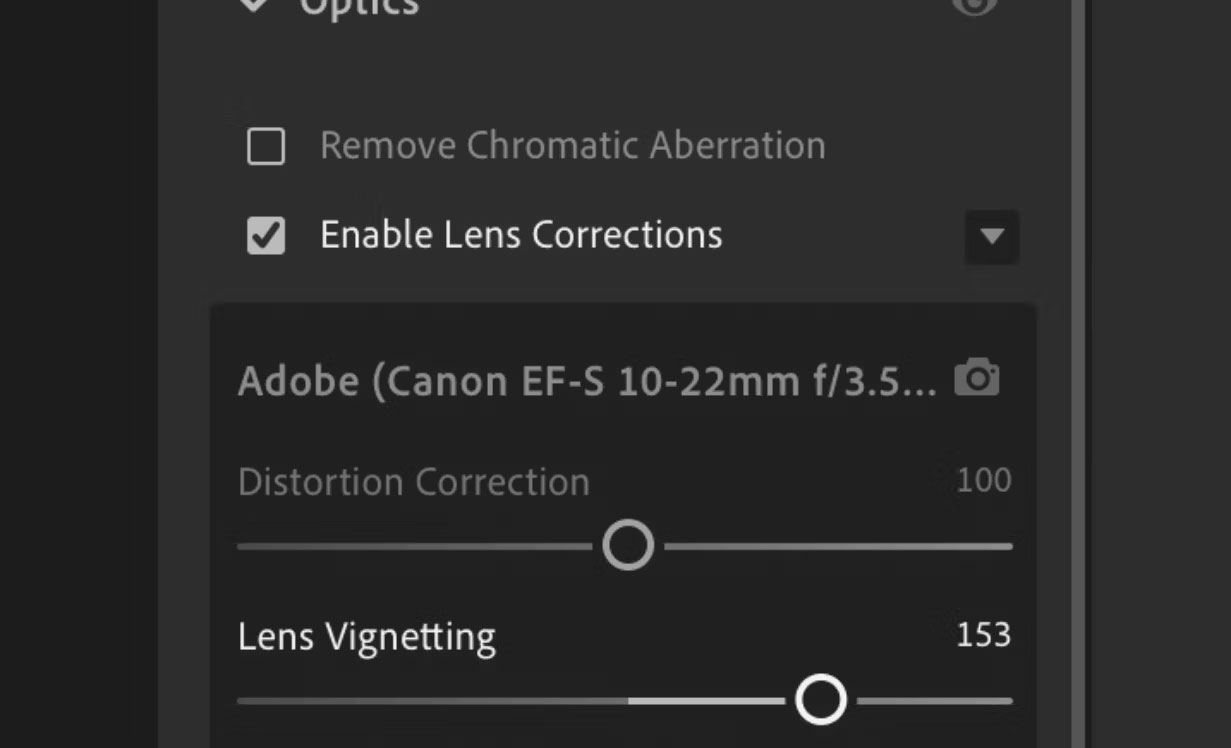
Adobe Lightroom will take care of any vignetting issues. Once done, the software will automatically adjust in the Lens Vignetting Section. However, the intensity can be further changed or reduced using the slider.
Additionally, you can also fine-tune by scrolling up to Effects And manually moving the Vignette Slider left and right to increase or decrease the effect.
While you're at it, try comparing your edited image with the original to see how small changes can make a difference.
Deformation
In photography, distortion is a type of optical aberration that occurs when a linear projection is enlarged or stretched, resulting in an image with distorted perspective. It is most common in photos using wide-angle lenses. You will notice that the image is distorted if straight objects, such as buildings or flat surfaces on the ground, appear curved.
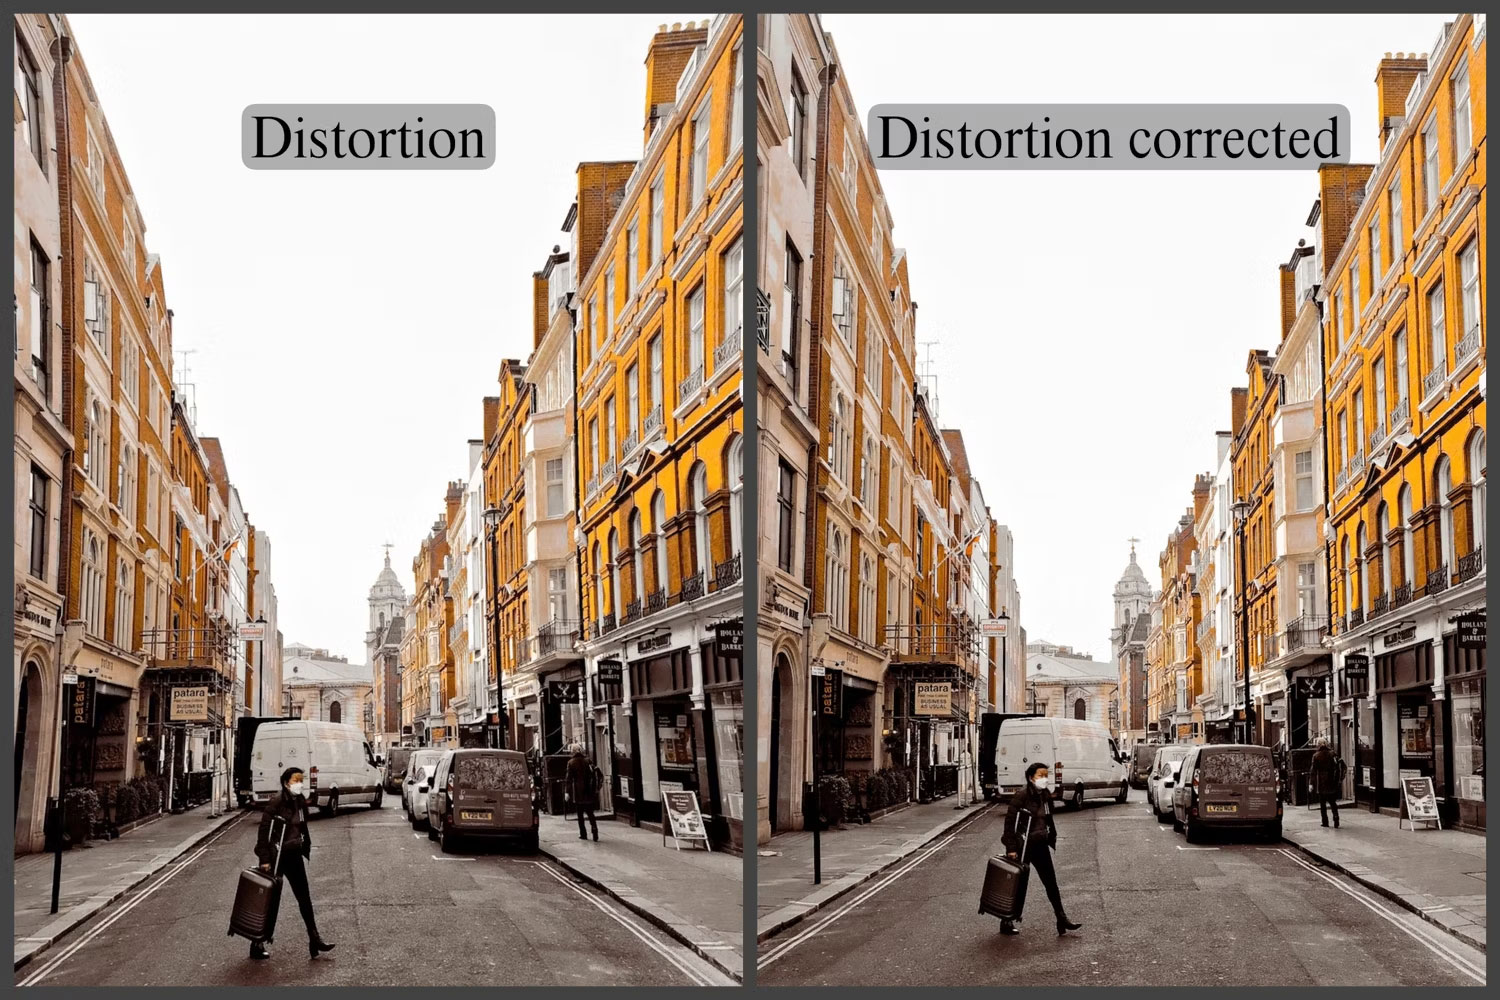
Distorted images won't look good unless they serve an artistic purpose, such as a fisheye lens. So unless your intention is to represent something abstract and creative, it's better to fix the distortion for a more realistic perspective. You can do this by following these steps:
- Open the image you want to edit in Adobe Lightroom and on the right menu bar, select the Edit Icon below the cloud icon.
- Scroll down to Optics And select the arrow.
- Next, check the Enable Lens Corrections Box.
- Another menu will pop up and Adobe will automatically adjust the slider labeled Distortion Correction , but you can also modify it if you're not satisfied with the adjustments.
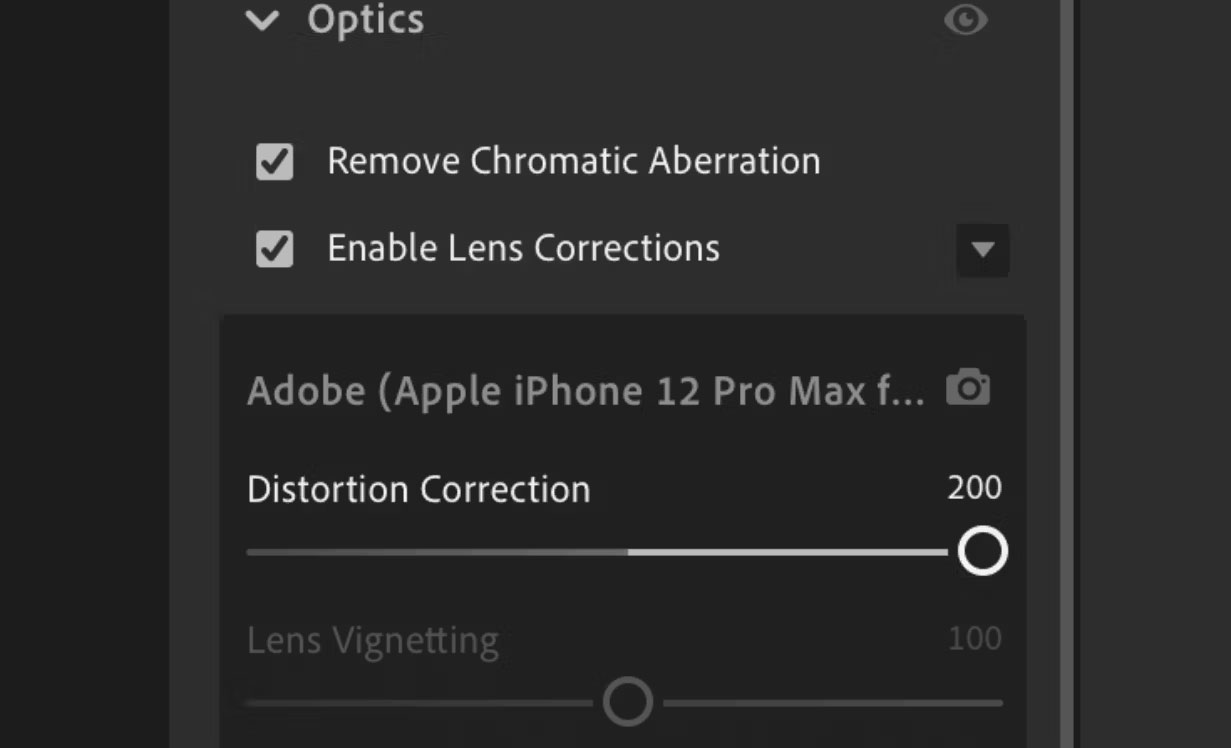
Like vignetting, you can also fine-tune distortion manually in the Geometry Heading, which contains a multitude of settings that adjust the image's perspective, including:
- Distortion
- Vertical
- Horizontal
- Rotate
- Aspect
- Scale
- X Offset
- Y Offset
When you're happy with your perspective changes, you can select the Constrain Crop Box and the edges will be cropped.
Chromatic Aberration
Chromatic aberration is another feature in Optics That goes hand in hand with Lens Correction; it is the color fringing that outlines and distorts the objects in the image.

Turning on Lens Correction Can help with chromatic aberrations with some minor adjustments to image color and brightness, but if color fringing is severe, it's better to take that extra step to eliminate it..
Removing chromatic aberrations can be done with a select or two, but sometimes Lightroom needs a little extra help to fine-tune an image.
FAQ
What is the main point of How and When to Use the Lens Correction Feature in Adobe?
But not every image needs lens retouching, so how do you know whether to apply it or not?
Why might the details change over time?
Software versions, prices, policies, services, and product availability can change. Check the official source before making a purchase or changing important settings.
How can I use this information safely?
Follow official instructions, verify downloads and claims, back up important data, and avoid sharing passwords or sensitive account information.
Related Articles
 Lightroom - Lightroom Download and Installation Guide5 minutes read
 Summary of Shortcut Adobe Photoshop Lightroom4 minutes read
 Lightroom Keyboard Shortcuts - All Adobe Lightroom Keyboard Shortcuts to3 minutes read
 How to Post Photos to Instagram Directly from Adobe Lightroom4 minutes read
 Instructions on How to Improve and Speed up Lightroom8 minutes read
 How to Use the Color Grading Feature in Adobe Lightroom7 minutes read
Reader Comments 0
Sign in with email or Google to join the discussion.