Guide to configuring Windows 11 search indexing
Windows Search often takes a long time to find specific files. Therefore, the search indexing function solves this problem by creating an index of files on your computer.
Table of Contents
Windows Search often takes a long time to find specific files. Therefore, the search indexing function solves this problem by creating an index of files on your computer. This makes it easy to retrieve indexed information instead of searching from scratch. Below are instructions for configuring Windows 11 search indexing.
How to configure Windows 11 search indexing
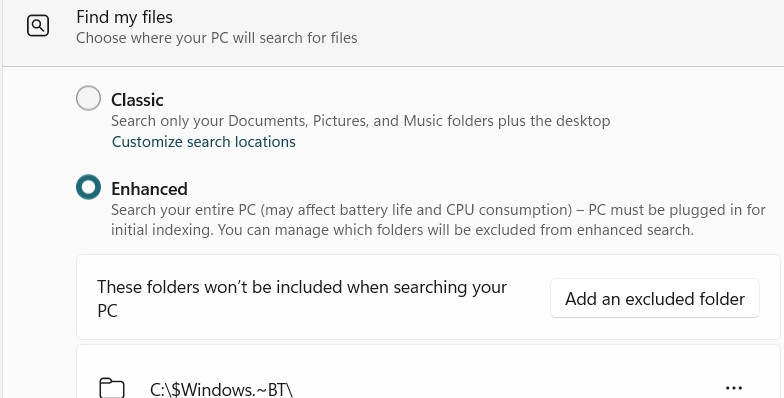
Go to Settings > Privacy & security > Search . Then, in the Find my files section , select Classic and then tap Customize search locations to adjust the search location.
Alternatively, you can click Add an excluded folder to restrict the use of Enhanced mode.
How to disable indexing via Windows Services
Enabling advanced indexing consumes a significant amount of system resources. If you don't need it, you can disable it.
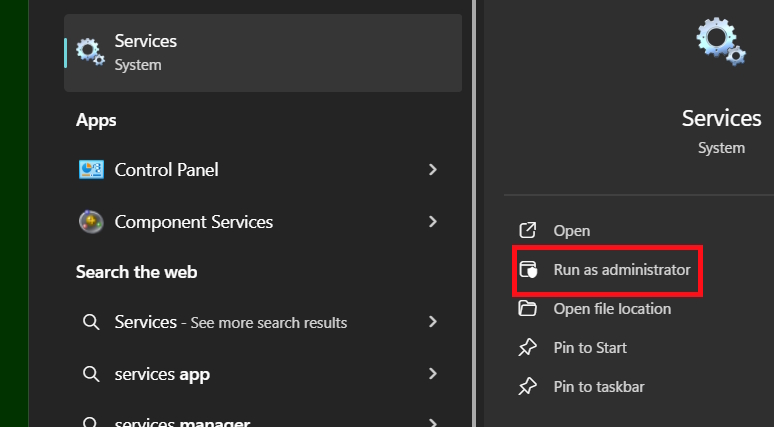
Step 1:
Type "Services" into the search bar and select "Run as administrator" to open it with administrator privileges.
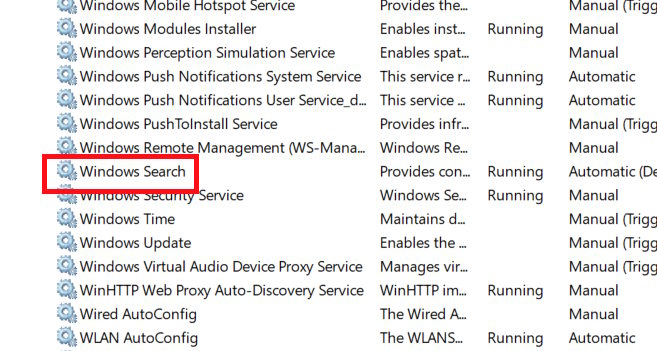
Step 2:
In the interface, find the Windows Search service and double-click to adjust its settings.
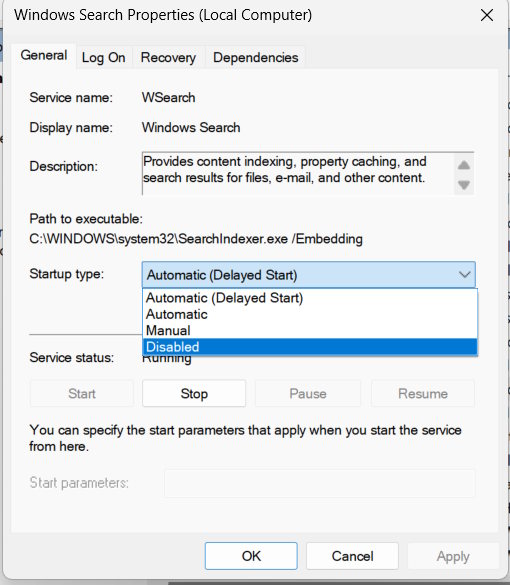
Here, click on Disabled in Startup type , then select Apply. Finally, click Stop to apply. If you want to restart, click Automatic (Delayed Start).
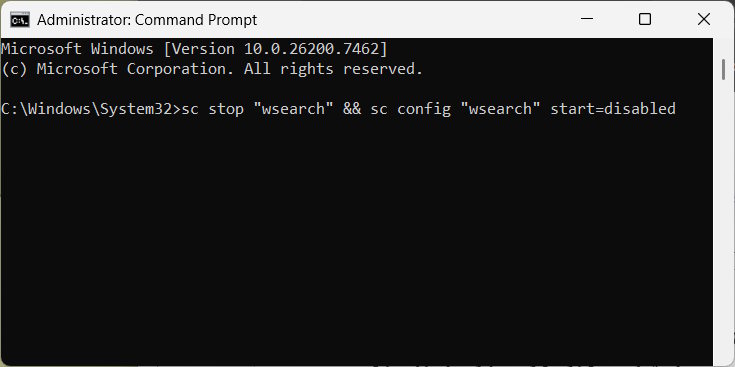
How to disable search indexing via Command Prompt
You also need to open cmd with administrator privileges , then enter the command below to proceed with disabling it.
sc stop "wsearch" && sc config "wsearch" start=disabled
To enable this feature, use the following command:
`sc config "wsearch" start=delayed-auto && sc start "wsearch"`
Was this article helpful?
Your feedback helps us improve.
Related Articles
 Small tips to improve Windows Search Indexing3 minutes read
 How to enable PDF content indexing in Windows Search2 minutes read
 Steps to fix Indexing is Paused error in Windows 117 minutes read
 Turn off Indexing Service to let the computer run faster4 minutes read
 How to Change Indexing Options in Windows 86 minutes read
 How to create a codebase index in Cursor12 minutes read
Reader Comments 0
Sign in with email or Google to join the discussion.