Find and remove Malware with Sysinternals Tools - Part 1
In part one of this two-part series, I will show you how to use Sysinternals Tools to detect and destroy malware in Windows systems.
There are many applications that can detect and kill malware, such as Microsoft's own Malicious Software Removal Tool (MSRT), a free tool that can be downloaded here.
Identify and destroy Malware yourself
Here are some important steps in identifying and destroying malware:
- Disconnect the computer from the network.
- Identify malicious processes and drivers.
- Pause and close identified processes.
- Identify and delete any malware that starts automatically.
- Delete malware files
- Restart and repeat the above process.
The first step in this process is a precautionary step. Disconnecting your computer from the network will prevent your computer from infecting malware for other computers on the network or vice versa. However, its disadvantage is to make you not be able to fully observe the actions of malware and not fully understand how they work.
So how do we identify suspicious processes? The way to identify is to look at processes without symbols, without descriptions and without company names. In addition, we also need to focus on processes that reside in the Windows directory, Especially containing strange URLs in their string, processes that open TCP / IP endpoint or suspicious hosting services and DLLs (hidden as DLLs).
So where do we need to go first to check these processes? Many IT professionals often start by looking at the Processes tab of Task Manager . The Description column, which provides a lot of information about the application in use, is the column that we need to pay special attention to.
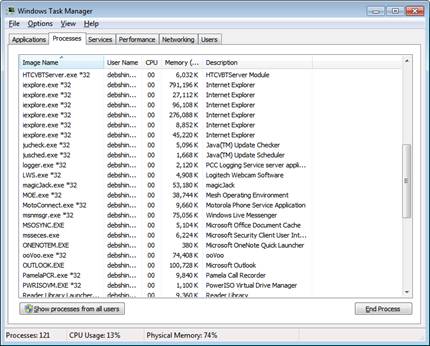
You can get a lot of information in Task Manager by going to the View menu and clicking Select Columns , then tick the desired checkboxes.
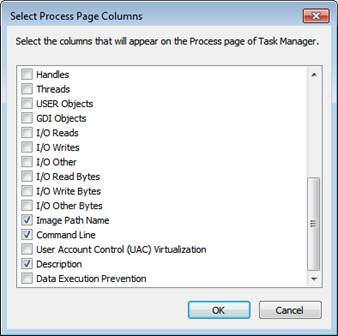
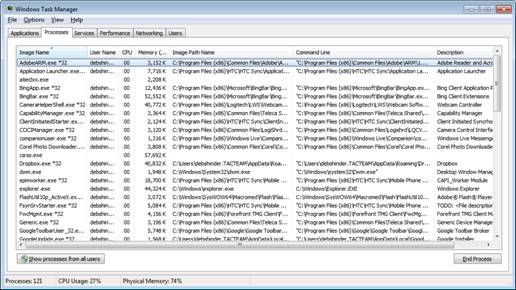
For example, it is possible to display the path of a file that is connected to the process or it can be included in the Command Line check box to display the command, with which parameters or commands were used to launch the process.
Another way to get more information about the process in Task Manager is to right-click it and select Properties . Here you will see information related to file type, location and size, digital signature, copyright information, version (most malware is not available), permission, . Even so all. Only the initial steps, the Task Manager still provides quite a bit of detailed information about a process compared to what you get with the tool like Sysinternals Process Explorer.
Use Process Explorer to identify malware
Process Explorer is provided for free with a capacity of 1.47 MB. It can run on Windows XP and newer versions. The current version of this tool is 14.1 and you can download it here, or you can also run from this link.
As you can see in Figure 4, this tool will provide more detailed information about processes than what is received from Task Manager.
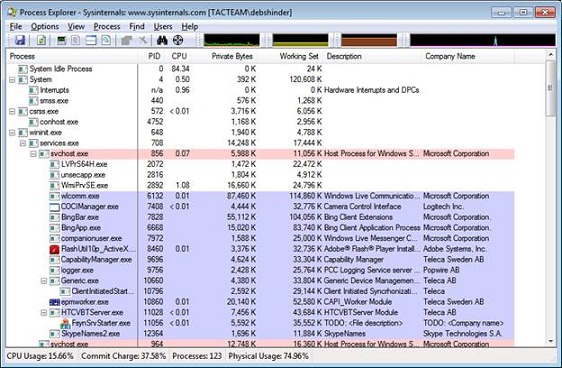
You will see in Process Explorer, the progress tree in the left column shows the parent-child relationship. If a process is suspected, related processes are also suspicious. Another interesting feature is the ability to right click on a process and select 'Search online' to find more information about the process.
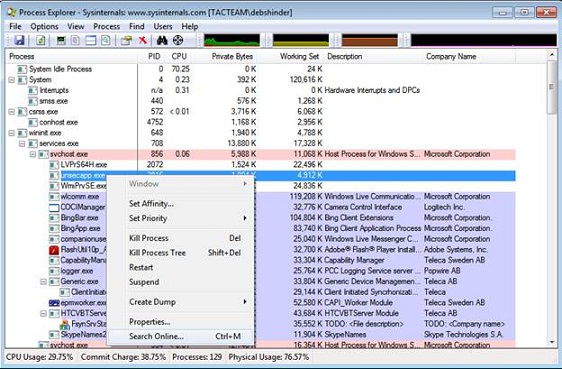
However, one thing to keep in mind is that some malware can use randomly generated process names for the purpose of distracting you in identity.
As mentioned above, malware that is often packaged and purple in Process Explorer is a sign that files are packaged; Process Explorer looks for signatures of packages and uses a number of techniques to mark these processes.
Some familiar processes make us mistakenly think of them as malware, such as svchost.exe, rundll32, taskhost.exe, etc. However, some people who create malware know this and often hide malware under processes and run as the system process.
Process Explorer's bottom panel is opened from the View menu. When you open this panel you can specify whether to display DLL files. In the DLL view, we can see what is inside the process, can view data or images. This view displays the loaded drivers and can check the string as well as the digital signature.
If it detects that some process claims to be Microsoft but not digitally signed, this is a suspect process. We can selectively check digital signatures with the Verify button on the Image tab in Properties (accessed by double-clicking the process name). You can see the Properties dialog box with the Verify button as shown in Figure 6.
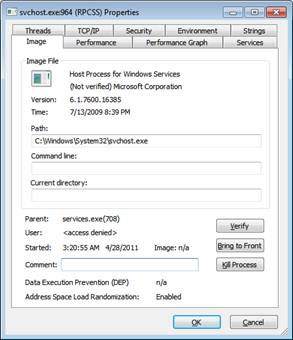
When verifying a process, the tool will connect to the Internet to check the Certificate Revocation List (CRL). You can add ' Verified Signers ' column to Process Explorer' s display by selecting View | Select Columns and check ' Verified Signer '.
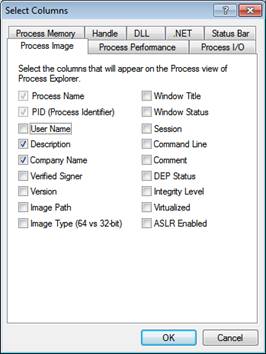
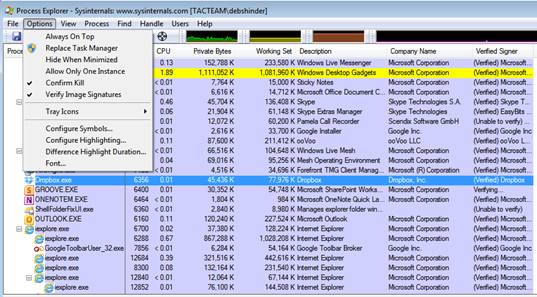
In the following, you can see the newly added columns and digital signatures that have been verified.
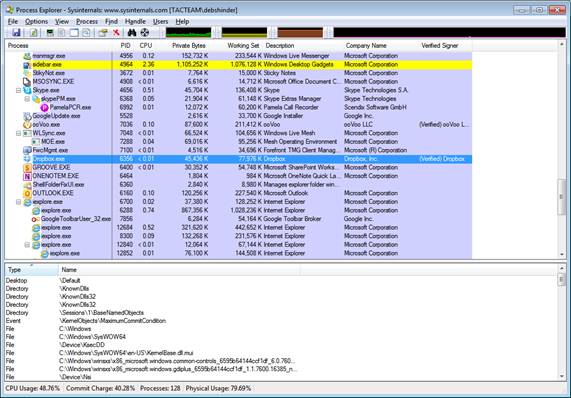
If you want to verify all digital signatures, click the Options menu and select ' Verify image signatures '.
Another Sysinternals tool you can use for digital signature verification is Sigcheck, a tool that runs on Windows XP and recent versions. Its current version is 1.71 and can be downloaded here.
Sigcheck is a command line tool that can be used to scan the system. It includes many parameters. By using the -u switch, you will get a list of unsigned files. In addition, you can find hash values (used to check malicious files), and check if the file name in the list is valid for the internal file name.
However, it should be noted that malware creators can also create digital certificates for their software, so the existence of a valid certificate does not guarantee that the process is not malicious.
Conclude
In Part 1 of this series, I showed you how to use Process Explorer to find suspicious processes that are malware. In Part 2 of this series, I will show you how to use Autoruns to find the malware that boots at startup, as well as how to use Process Monitor to track malware actions and how to remove malware from the system. .