Detailed and easy-to-understand guide to installing Photoshine on Windows.
Photoshine photo editing software has many different versions, which can be confusing to install. Free Download guides you on how to download and install it quickly and without errors.
Table of Contents
Installing Photoshine isn't difficult, but choosing the wrong version or performing the steps incorrectly can lead to errors. Below, Free Download will provide detailed step-by-step installation instructions.
Steps to follow
System requirements:
To install this program, your computer must be running Windows version 95 or later.
Step 1: Download the software installation file.
=> Download link for Photoshine
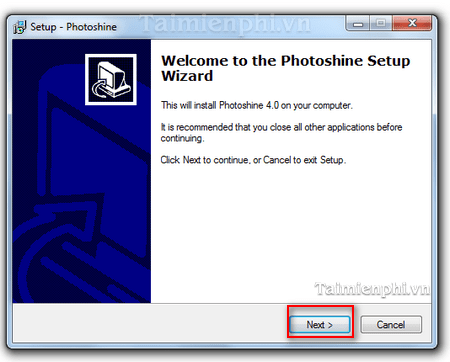
After downloading the software, activate the setup file and the installation window will appear. It will inform you that you are installing the software on your computer.
Please click Next to proceed to the next installation step.
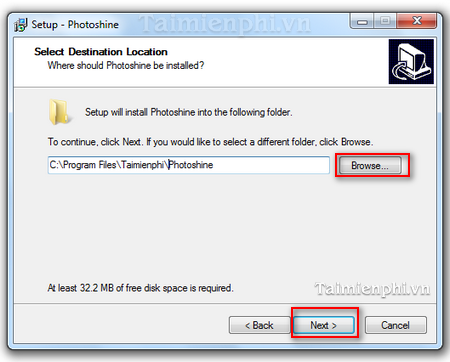
Step 2: After clicking Next , a new window will appear. This window will also show you the folder path where the photo editing software will be stored. You can customize the software storage folder by clicking on Browse.
To proceed to the next installation step, click Next.
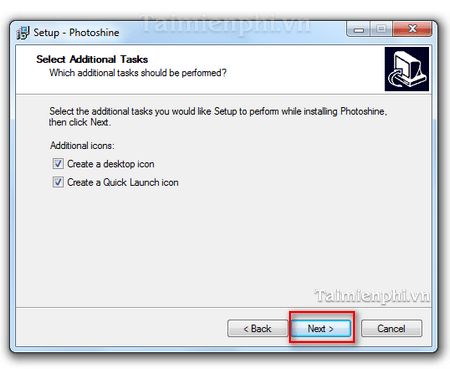
Step 3: After clicking Next , the system will switch to the Select Additional Tasks window . This window will ask the user if they want to allow the software to create shortcuts on the desktop or create Quick Launch icons .
After making your selection, click Next to automatically proceed to the next step.
Step 4: In this window, the system will confirm again whether you want to install the software. Additionally, this window will briefly inform the user about the settings you have made in the previous steps.
If you feel everything is set up correctly, click Install to allow the program to install itself.
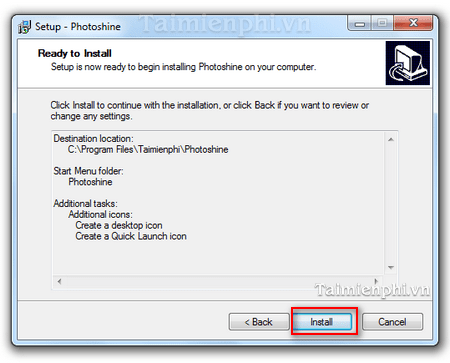
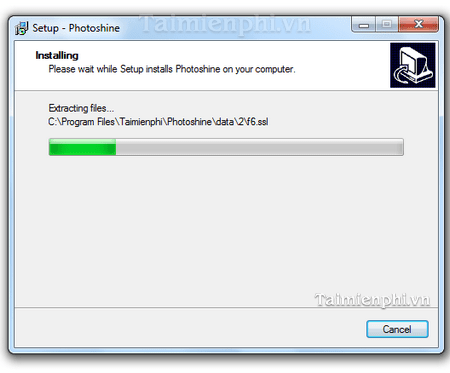
After clicking Install, the system will automatically install the software on your computer.
Step 5: After the setup process is complete, the system will automatically switch to a new window informing the user that the setup is finished. Click Finish to complete the process.
PhotoShine helps users edit images and decorate backgrounds with beautiful and vibrant images. The software provides a rich library of over 900 template images, allowing you to unleash your creativity and freely edit your photos.
Was this article helpful?
Your feedback helps us improve.
Related Articles
 Collage photos into frames with PhotoShine2 minutes read
 How to change the default browser on Windows 112 minutes read
 Detailed instructions on how to install Windows 7 for beginners3 minutes read
 A simple, detailed, and safe guide to installing Windows on a laptop, perfect for beginners.15 minutes read
 Mechanical keyboard construction: Understanding the detailed components in an easy-to-understand way.14 minutes read
 How to install Windows 10 using a bootable USB drive - a detailed guide from A to Z.10 minutes read
Reader Comments 0
Sign in with email or Google to join the discussion.