Table of Contents
Understanding create upload file with vb. net is easier when the main points are organized clearly. This guide brings together the essential details and practical considerations.
Uploading files is a common feature used by users to upload documents to server-based applications. This is an essential part of many applications from basic to more complex. The steps below explain how to add Upload File to ASP. NET applications and create it in VB. NET. Through the VB. NET code example of this document, you can create a function similar to C # (if that's the language you normally use) by changing a bit in the code. Depending on the different applications, users will have many different options on the website. Some systems such as document management system, content management system, request management system. will allow users to upload different documents. In the example of this article, you will have to create a simple ASP. NET web application to allow uploading a file to the server. Open Visual Studio. Net and create a new Project with the following settings:
- Project Type : Visual C # Projects
- Templates : ASP. NET Web Application
- Location : http:/// localhost / FileUpload
How Create Upload File with VB. NET Works
On the web form:
1. Click Toolbox, select the HTML section, navigate to the File Field control and drag and drop it onto the form. 2. Right-click the control and set " Run as Server Control ". 3. Change the control's Name attribute to ' File1 '. 4. Go to Toolbox again, select Web Forms section, find a Button, and drag it onto the form. 5. Set Text property to ' Upload ' and ID to " CmdUpload ". The screen will display as follows:
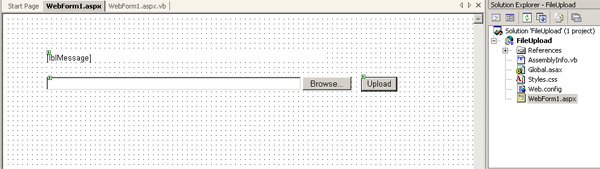
Add the following code to the form definition of the. aspx file:
encType = "multipart / form-data"
As a result, the entire form tag will look like this:
 method = "post"
 encType = "multipart / form-data"
 runat = "server">
Add the following code to the description of the. vb file:
 Dim sFileDir As String = "C:"
 Dim lMaxFileSize Long = 4096
Remember that the value above will be editable depending on the app you use. You can also make them dynamic and the app will read these values from a database or from an XML file. Add the following code to the top of the page. vb:
Imports System.IO
Add the following. vb code page:
Private Sub DeleteFile (ByVal strFileName As String) If strFileName.Trim (). Length> 0 Then Dim fi As New FileInfo (strFileName) If (fi.Exists) Then 'if file exists, delete it fi.Delete () End If End If End Sub
Add the following code to the. vb file:
 Private Sub cmdUpload_Click (ByVal sender As System.Object, _ ByVal e As System.EventArgs)
 CmdUpload.Click 'handle that file đã được chọn và nó là tập tin hợp lệ
 If (Not File1.PostedFile Is Nothing) _ And (File1.PostedFile.ContentLength> 0)
 Then 'determine file name Dim sFileName As String = _ System.IO.Path.GetFileName (File1.PostedFile.FileName)
 Try If File1.PostedFile.ContentLength <= lMaxFileSize Then 'save file on disk File1.PostedFile.SaveAs (sFileDir + sFileName)
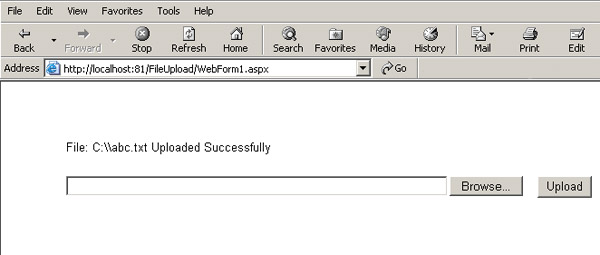
 lblMessage.Visible = True lblMessage.Text = "File:" + sFileDir + sFileName + _ "Uploaded Successfully"
 Else 'reject file lblMessage.Visible = True lblMessage.Text = "File Size if Over the Limit of" + _ lMaxFileSize
 End If Catch exc As Exception 'in case của lỗi lblMessage.Visible = True lblMessage.Text = "An Error Occured. Please Try Again!" DeleteFile (sFileDir + sFileName)
 End Try Else lblMessage.Visible = True lblMessage.Text = "Nothing to upload. Please Try Again!" End If End Sub
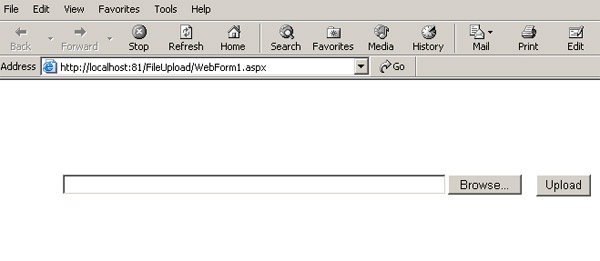
Press F5 to compile and run the project. The interface screen will look like this:
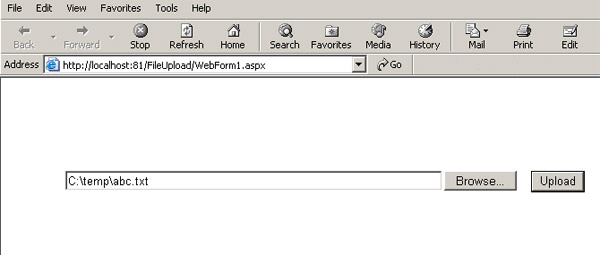
Click Browse and select a file to upload. The interface screen is as follows:
Click Upload. You will receive a message displayed above:
You should check to see if the file has been copied to the directory defined in the code.
Working
The value of sFileDir and lMaxFileSize is written in the fixed code above instead of being called from the database or XML configuration file. sFileDir specifies the location on the server so that the upload file can be saved. lMaxFileSize specifies the maximum file size for uploading.
The DeleteFile procedure is used to delete files that have been copied to the server. As part of the normal cleanup process, after the upload file has determined the location, the file will be put into the database or somewhere on the server depending on the needs of the app. In this example, the file should not be copied to another location because you cannot call this procedure unless an error occurs and need to transfer the file. DeleteFile can be called after the file has been moved to the database or to another location to intentionally remove redundant files. It accepts a full name (directory name and file name) as an argument and needs to be verified that the file is actually existent and the length of the argument is greater than 0. Then it will try to delete file using FileInfo object.
When users clicks on cmdUpload, you must first check if the file already exists. If the file already exists, you decide the file name without the directory (File1. PostedFile. FileName attribute stores the location and name of the file on the client) by using System. IO. Path. GetFileName. You will then have to verify that the file size is not larger than the maximum allowed capacity. Then, save the file to the location specified on the server using File1. PostedFile. SaveAs method and randomly put the directory and file name on it. When the file is saved, please give users a confirmation message that the file has been uploaded successfully. If an error occurs, you must delete the file and display an error message in the lblMessage label.
Note: When files are uploading, remember that ASP. NET limits the file size for uploading to 4MB (4096 KB). If you try to upload a larger file, you may encounter an error message. You can change this setting by resetting maxRequestLength in the httpRuntime element of the Machine. config file.
FAQ
What is the main benefit of create upload file with vb. net?
The main benefit is a clearer understanding of the topic and a practical way to apply the information covered in this guide.
What should I check before using create upload file with vb. net?
Confirm compatibility, review the required settings, protect important data, and use the latest supported version whenever possible.
What should I do if the result is different?
Repeat the steps carefully, verify permissions and version differences, and consult the product's official support documentation for changes not shown in the article.
Related Articles
 How to Create System Information File in Windows 104 minutes read
 Create EXE File: How to Create an EXE Installation File17 minutes read
 Instructions to Upload Audio Files and Images to YouTube6 minutes read
 Instructions for Creating and Using BAT File on Windows9 minutes read
 Upload Files as Knowledge in Microsoft Copilot Studio12 minutes read
 How to Upload Multiple Files to Dropbox from iPhone at the Same Time3 minutes read
Reader Comments 0
Sign in with email or Google to join the discussion.