Table of Contents
On a current Windows PC, use the Apple Devices app to sync photos and coordinate music or video from Apple's companion apps. On a Mac, use Finder. iTools can still provide a third-party transfer interface, but its compatibility may lag behind current iOS releases, so use it only after checking the exact device and version.

Before you connect the iPhone
- Back up important iPhone data before changing a sync configuration.
- Use a reliable USB or USB-C cable, unlock the iPhone, and tap Trust when prompted.
- Decide whether iCloud Photos or manual photo syncing will manage the library. Mixing methods can make albums appear differently or disable a manual sync option.
- Confirm that the media is in a format supported by the destination app.
Recommended method on Windows: Apple Devices
Install Apple's current Apple Devices app. Apple Music is required for music syncing, and Apple TV is required for movies and TV shows.
- Connect the iPhone to the PC and open Apple Devices.
- Select the iPhone in the sidebar.
- Select Photos, Music, Movies, or another content category.
- Enable syncing for that category, choose all items or selected albums and files, then click Apply.
To transfer a file to a specific iPhone app instead of the Music, TV, or Photos library, select Files in Apple Devices and drag it to an app that supports file sharing. The file will appear inside that app, not automatically in Photos.
Apple's current instructions are available in the Apple Devices syncing guide.
Recommended method on Mac: Finder
- Connect the iPhone and open a Finder window.
- Select the device under Locations in the sidebar.
- Choose Music, Movies, TV Shows, Photos, or Files.
- Select the content to sync, then click Apply or Sync.
When iCloud Photos is enabled, use the Photos app and iCloud rather than trying to maintain a second manually synced photo library. The differences between common cloud libraries are covered in Google Photos versus Apple Photos.
Using iTools: legacy interface guide
iTools is not an Apple product. Download it only from the developer's official iTools page, scan the installer, and check its support notes for the current iOS version. The developer's published compatibility information has not always kept pace with the newest iOS release, and individual import or export functions may be unavailable.
After installation, connect and unlock the iPhone. Accept the Trust prompt only when the computer is yours and the iTools installation is trusted. A recognized device appears in the interface.
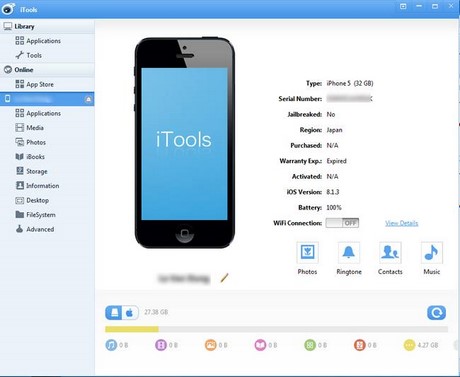
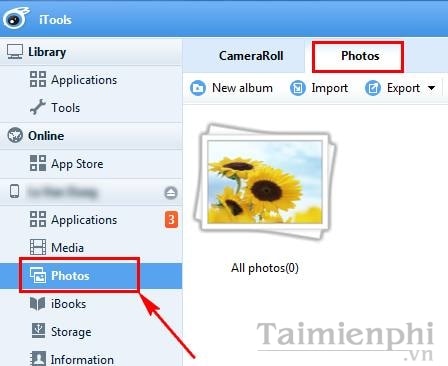
Copy photos with iTools
Open Photos > Photos. Create a new album if needed, then use the import control or drag supported image files into the selected album. Wait for the transfer to complete before disconnecting.
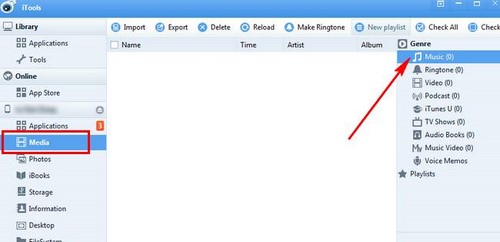
Copy music with iTools
Open Media > Music, choose the import option, and select the audio files. Confirm that tracks appear on the iPhone and play correctly. DRM-protected media cannot be made transferable simply by dragging the file.
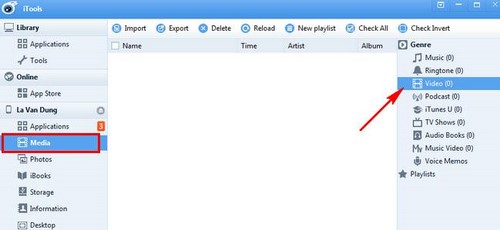
Copy videos with iTools
Open Media > Video and import the files. If iTools reports an unsupported format, convert a copy to a format accepted by the target iPhone app or use Apple Devices file sharing with a compatible video player.
Avoid sync surprises
- Read the summary before clicking Apply; a new library selection can replace previously synced content in that category.
- Do not unplug the cable while a transfer or backup is running.
- Test a few files before transferring a large library.
- Keep the source files and a separate backup; an iPhone should not be the only copy.
- Eject the device in the app before disconnecting it.
Older computers may still rely on iTunes. If that applies to your system, start with this iTunes beginner guide, but prefer Apple Devices on a supported current Windows installation.
Related Articles
 How to Copy Photos from iPhone to Computer Using ITools3 minutes read
 Copy the Image to Your iPhone Using Send Anywhere4 minutes read
 How to Fix the iTools Error Where It Doesn't Recognize iTunes4 minutes read
 Copy Photos from iPhone, iPad to Computer Without iTunes or iTools4 minutes read
 Copy Music to Your iPhone Using CopyTrans Manager Without iTunes5 minutes read
 How to Copy Videos, Movies, and Music to iPhone and iPad Using iTunes on a PC11 minutes read
Reader Comments 0
Sign in with email or Google to join the discussion.